1Password SaaS Management supports running workflows based on triggers in other applications. We suggest starting off by looking at a simple use case about running SaaS Manager workflows from Jira automations.
This article covers additional features including:
- Handling more complex array field types in Jira.
- Creating and provisioning a new person (identity) in the SaaS Management workflow.
- Conditionally provisioning applications based on what was selected in Jira.
Create a multi-select custom field in Jira
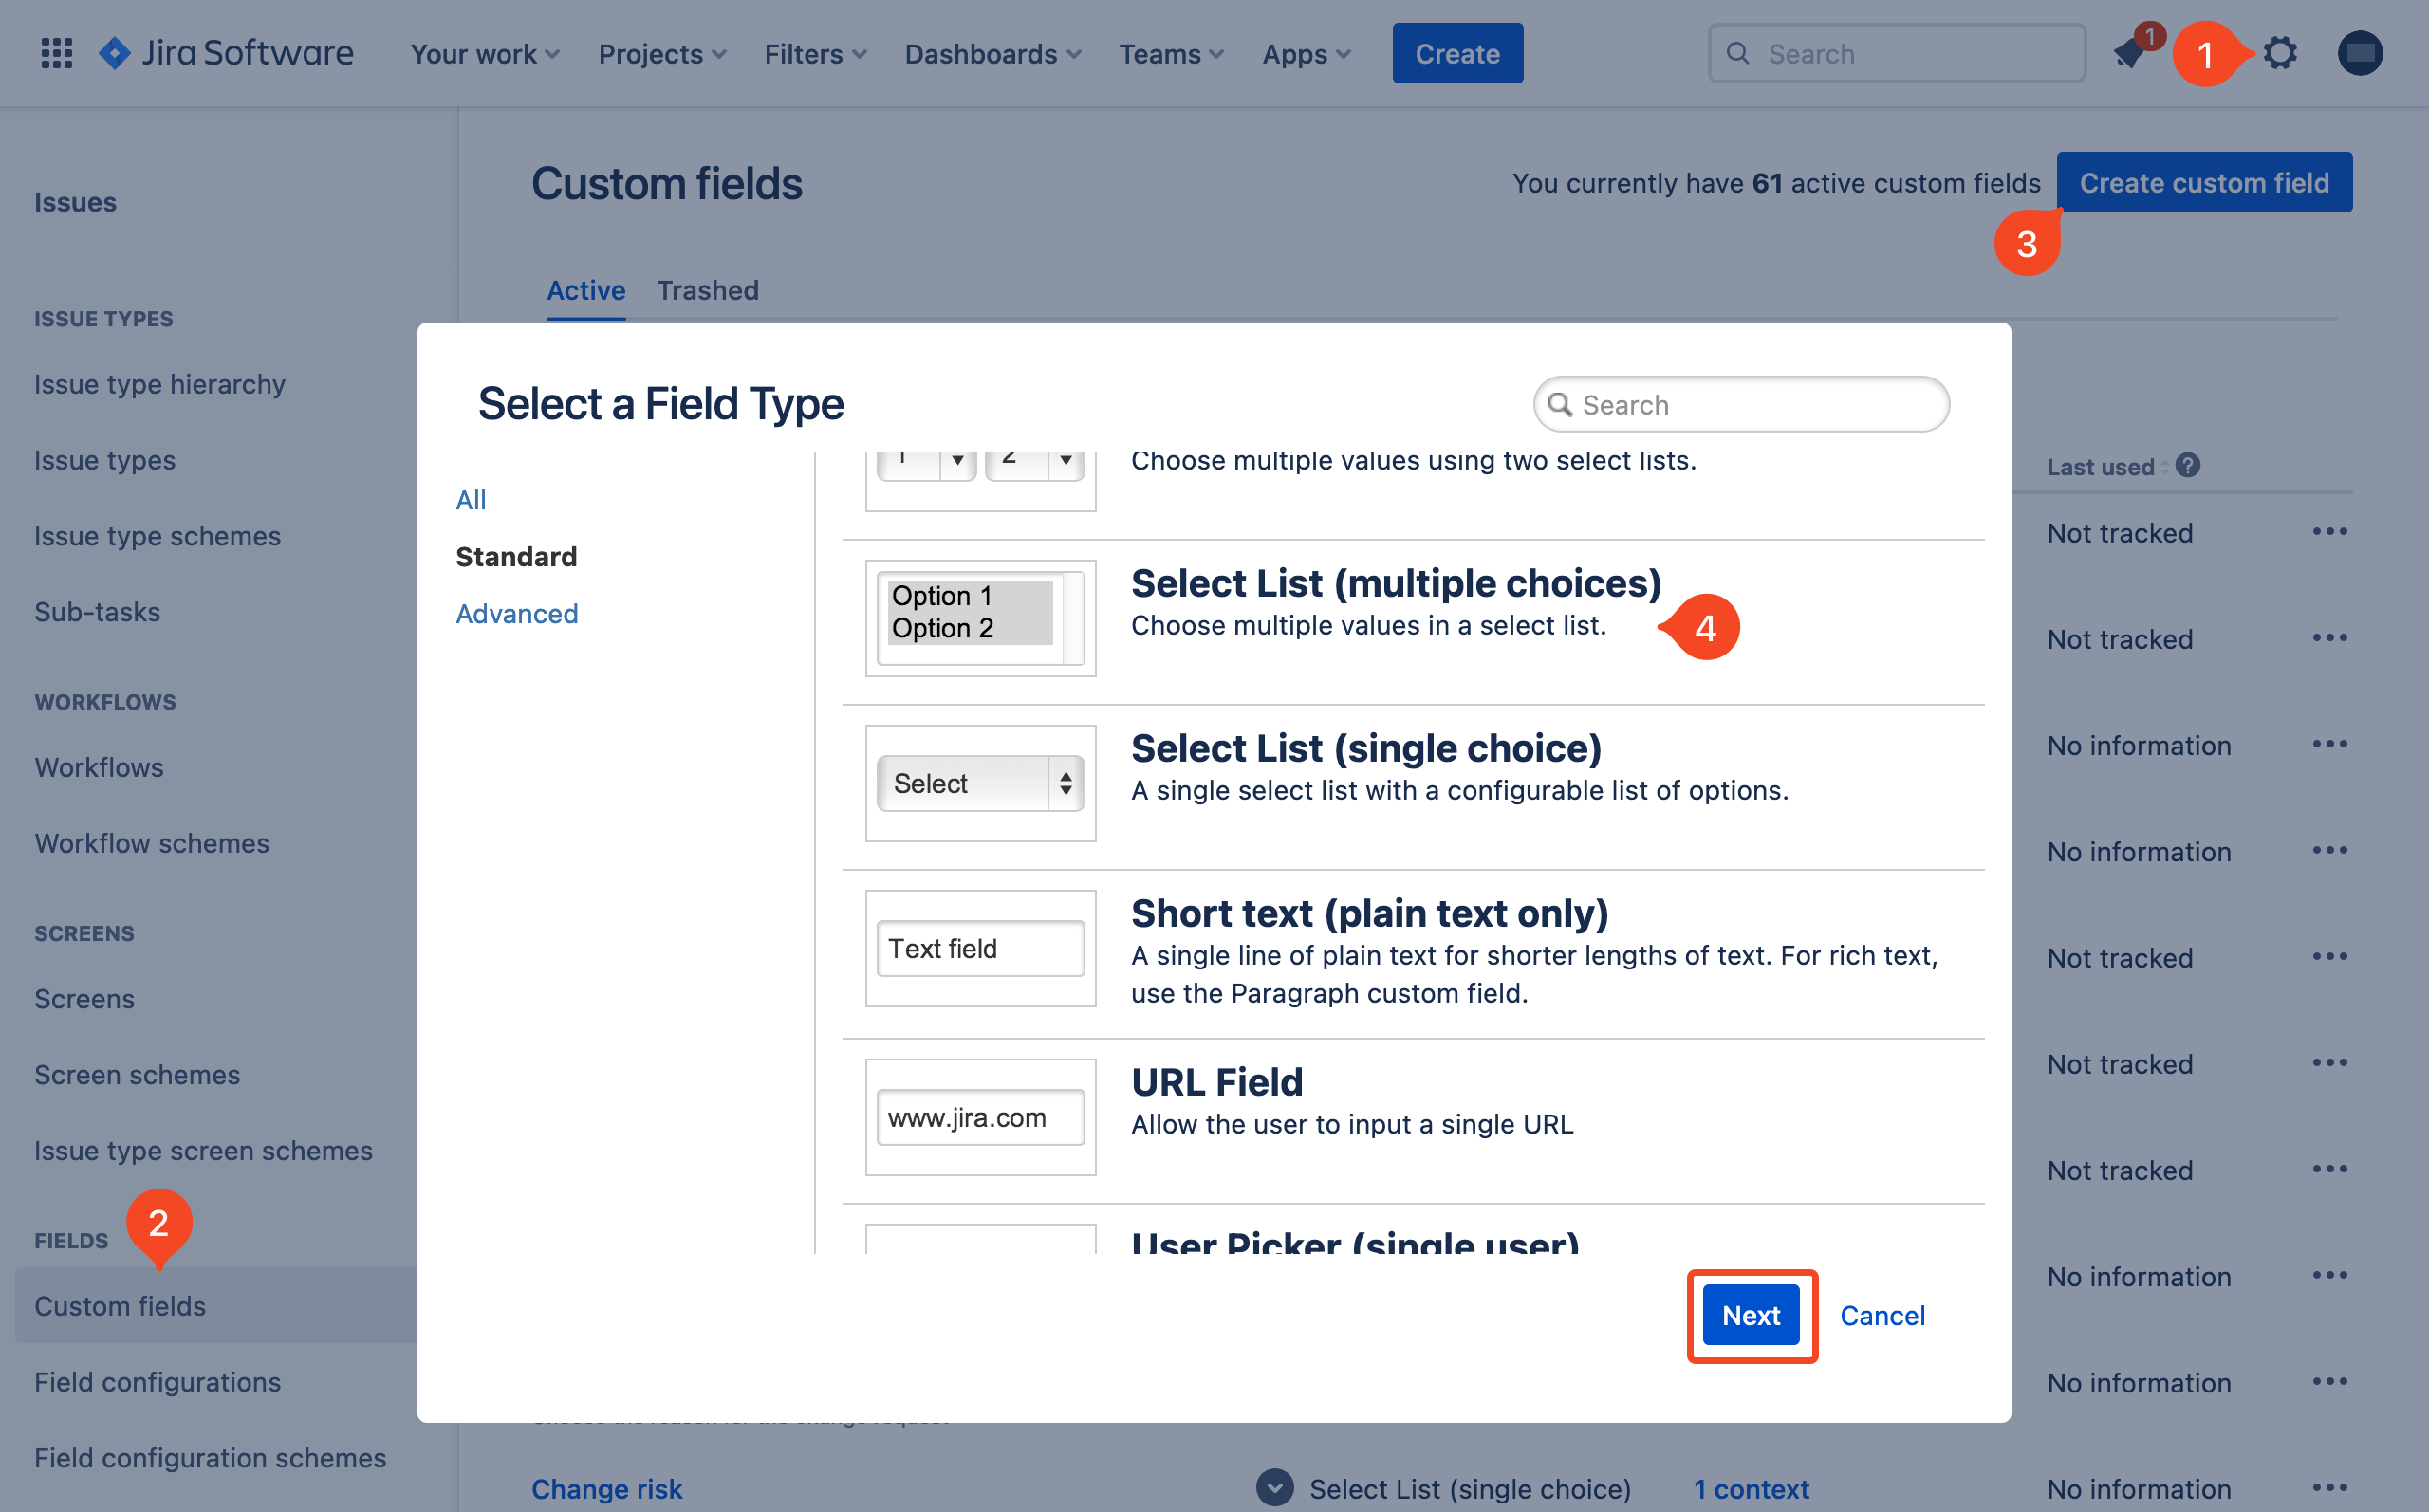
Go to Settings (cog icon) > Issues > Custom fields.
Click Create custom field.
Choose Select List (multiple choices) and click Next:
Add a Name for the field, optionally a description and then Add a number of application names that you might want to provision for a user.
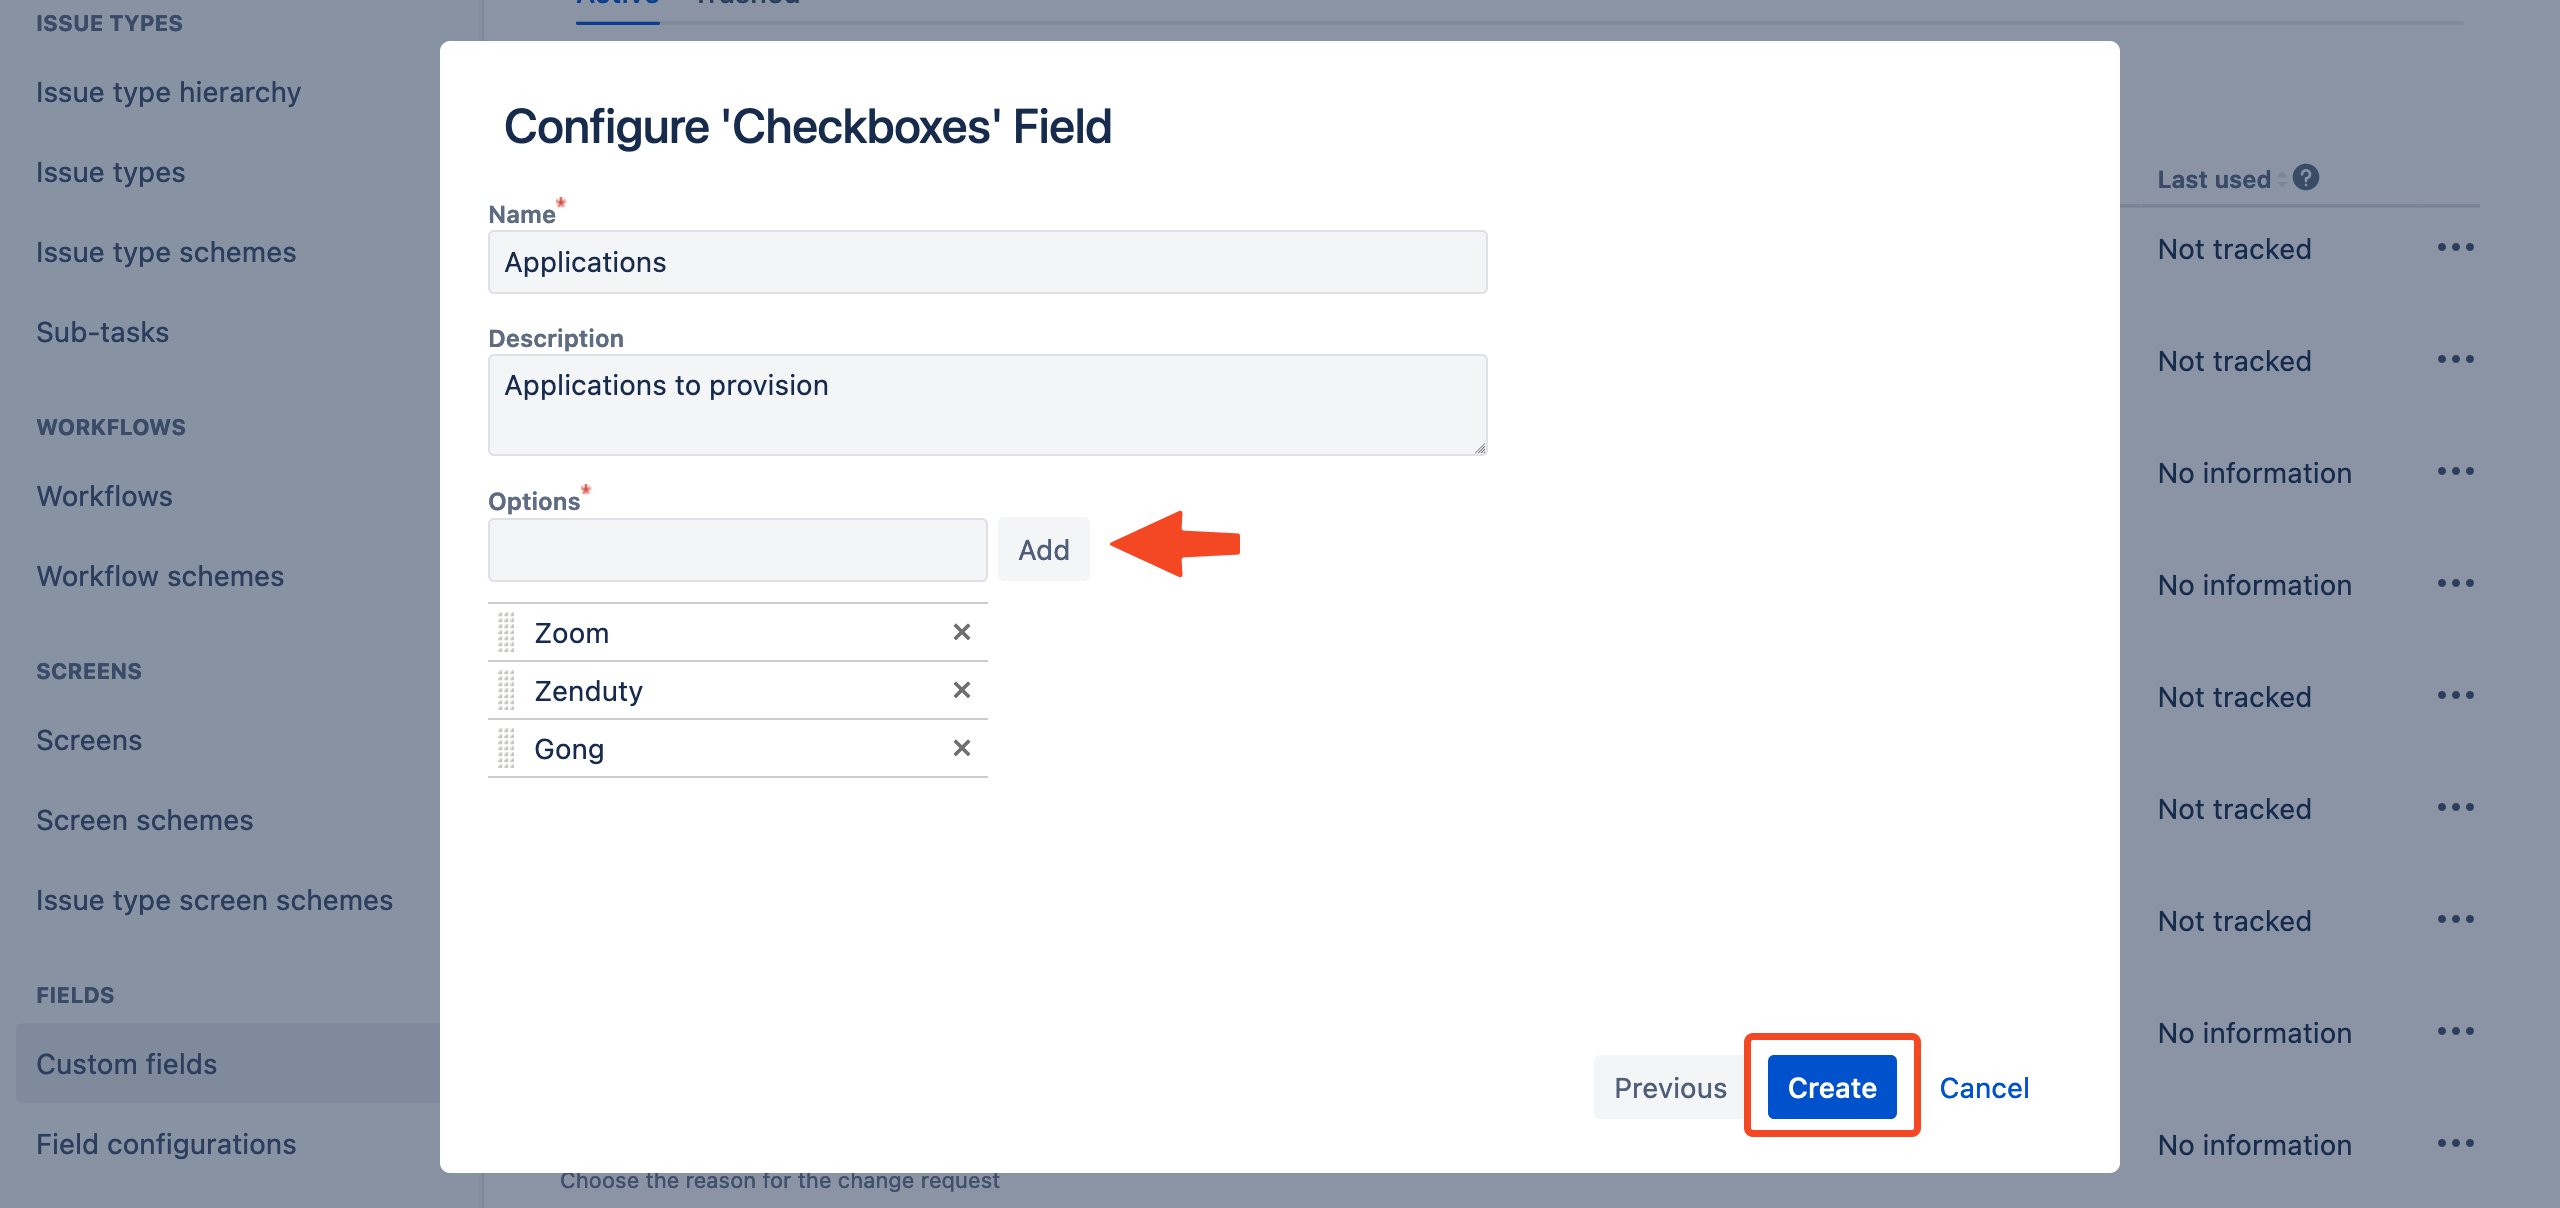
When you’re done click Create.
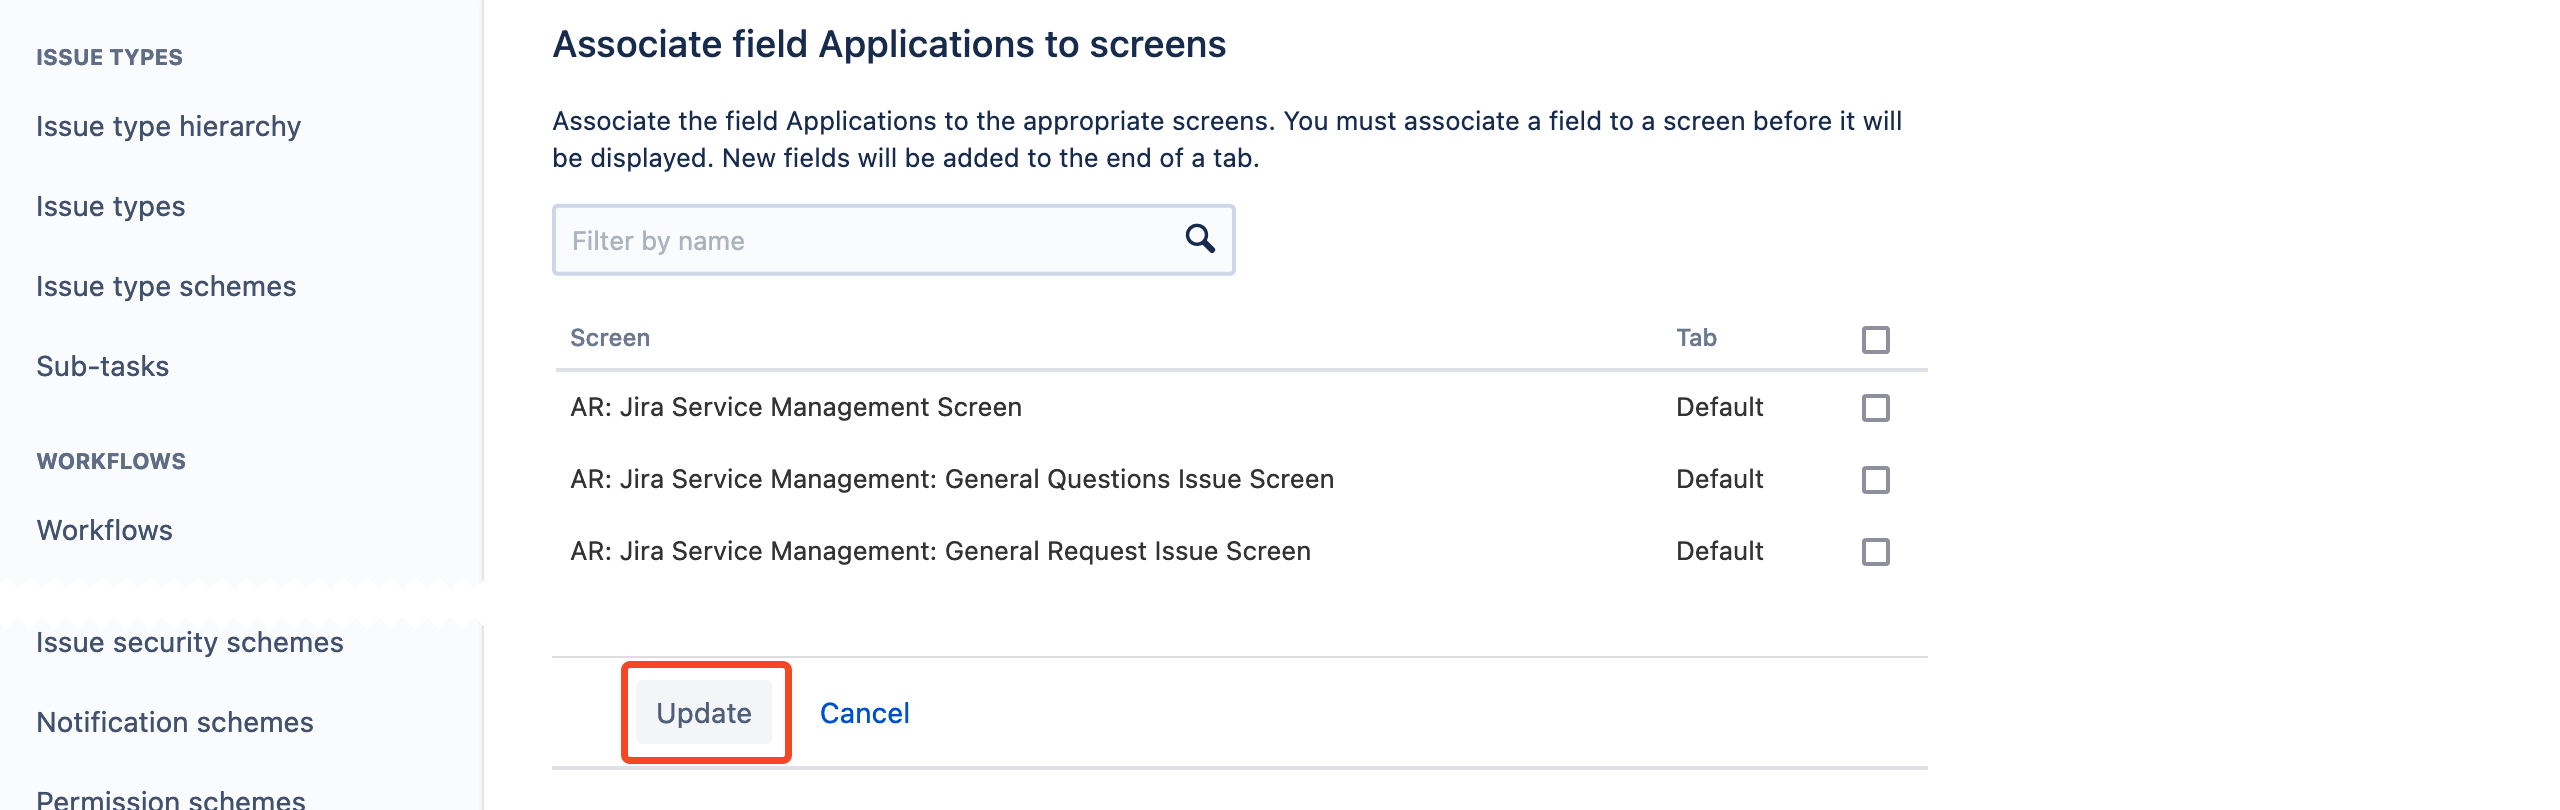
You can ignore the Associate field Applications to screens step for now and just click Update
Go to Project Settings > Issue types and search for the new custom Applications field
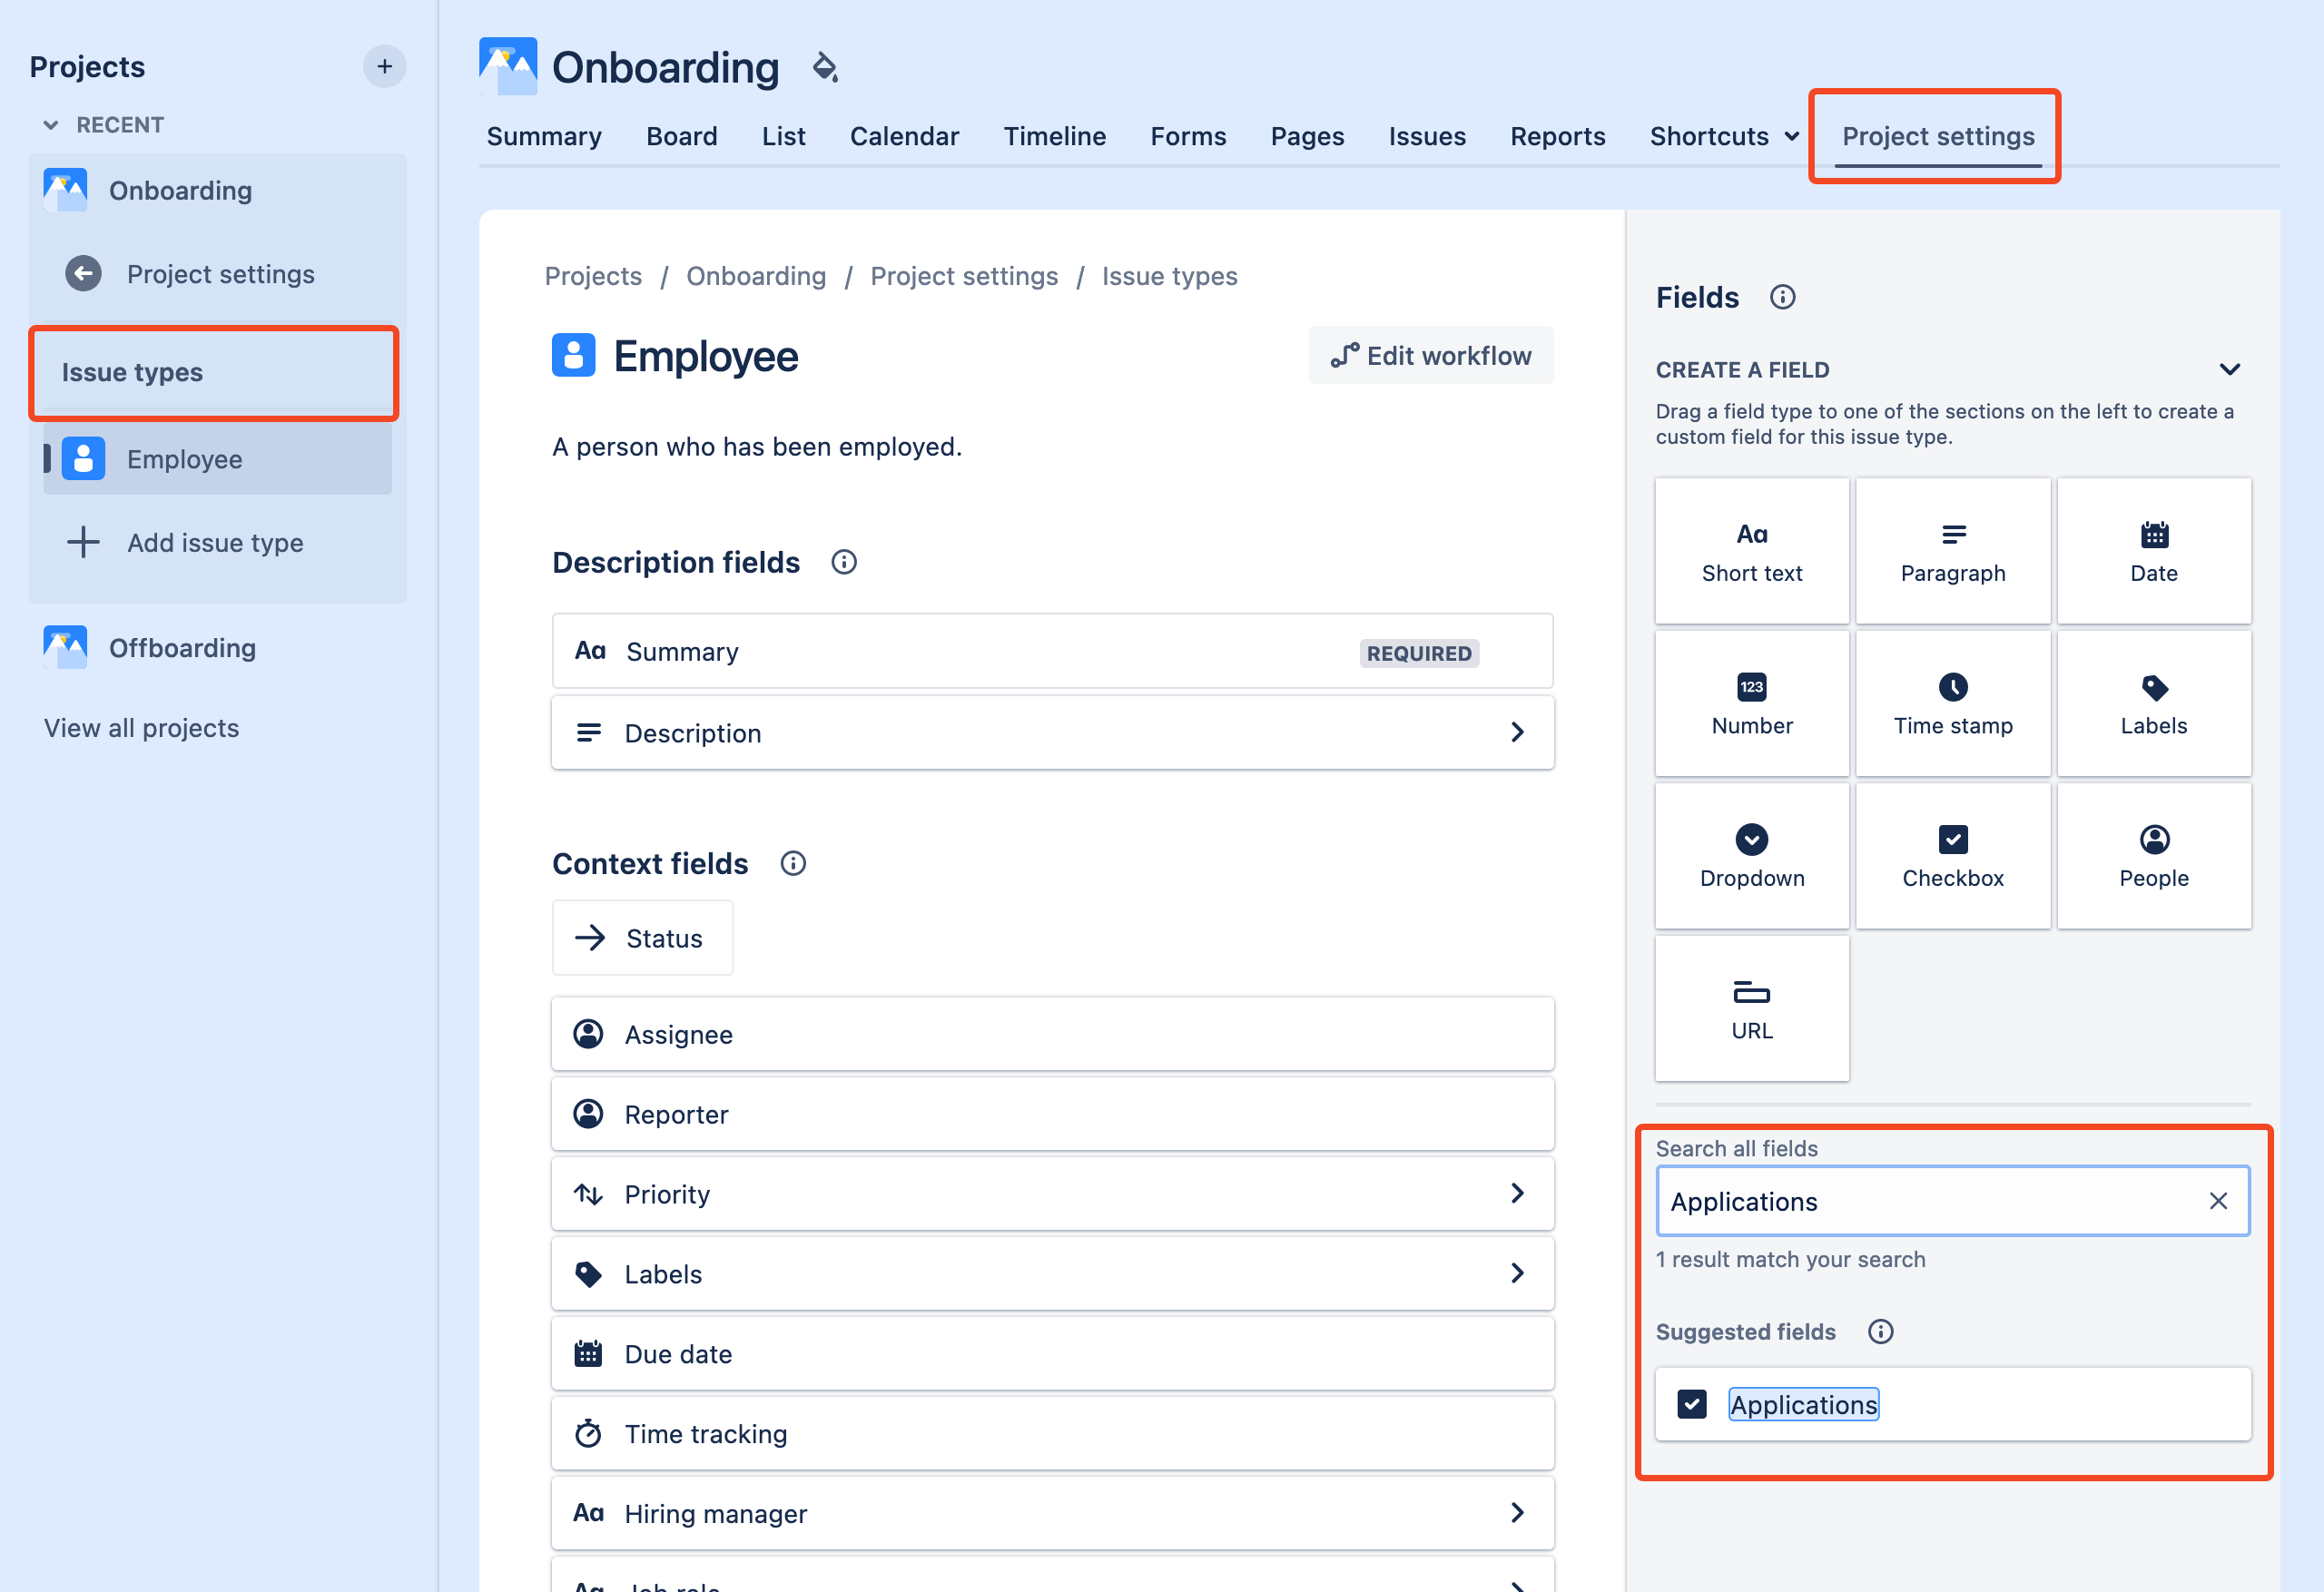
Also add a Short text field called Work email.
Create a test Issue in your Jira project
You can create a new Issue in various ways in Jira, but one approach is to create a form and add the new fields to this:
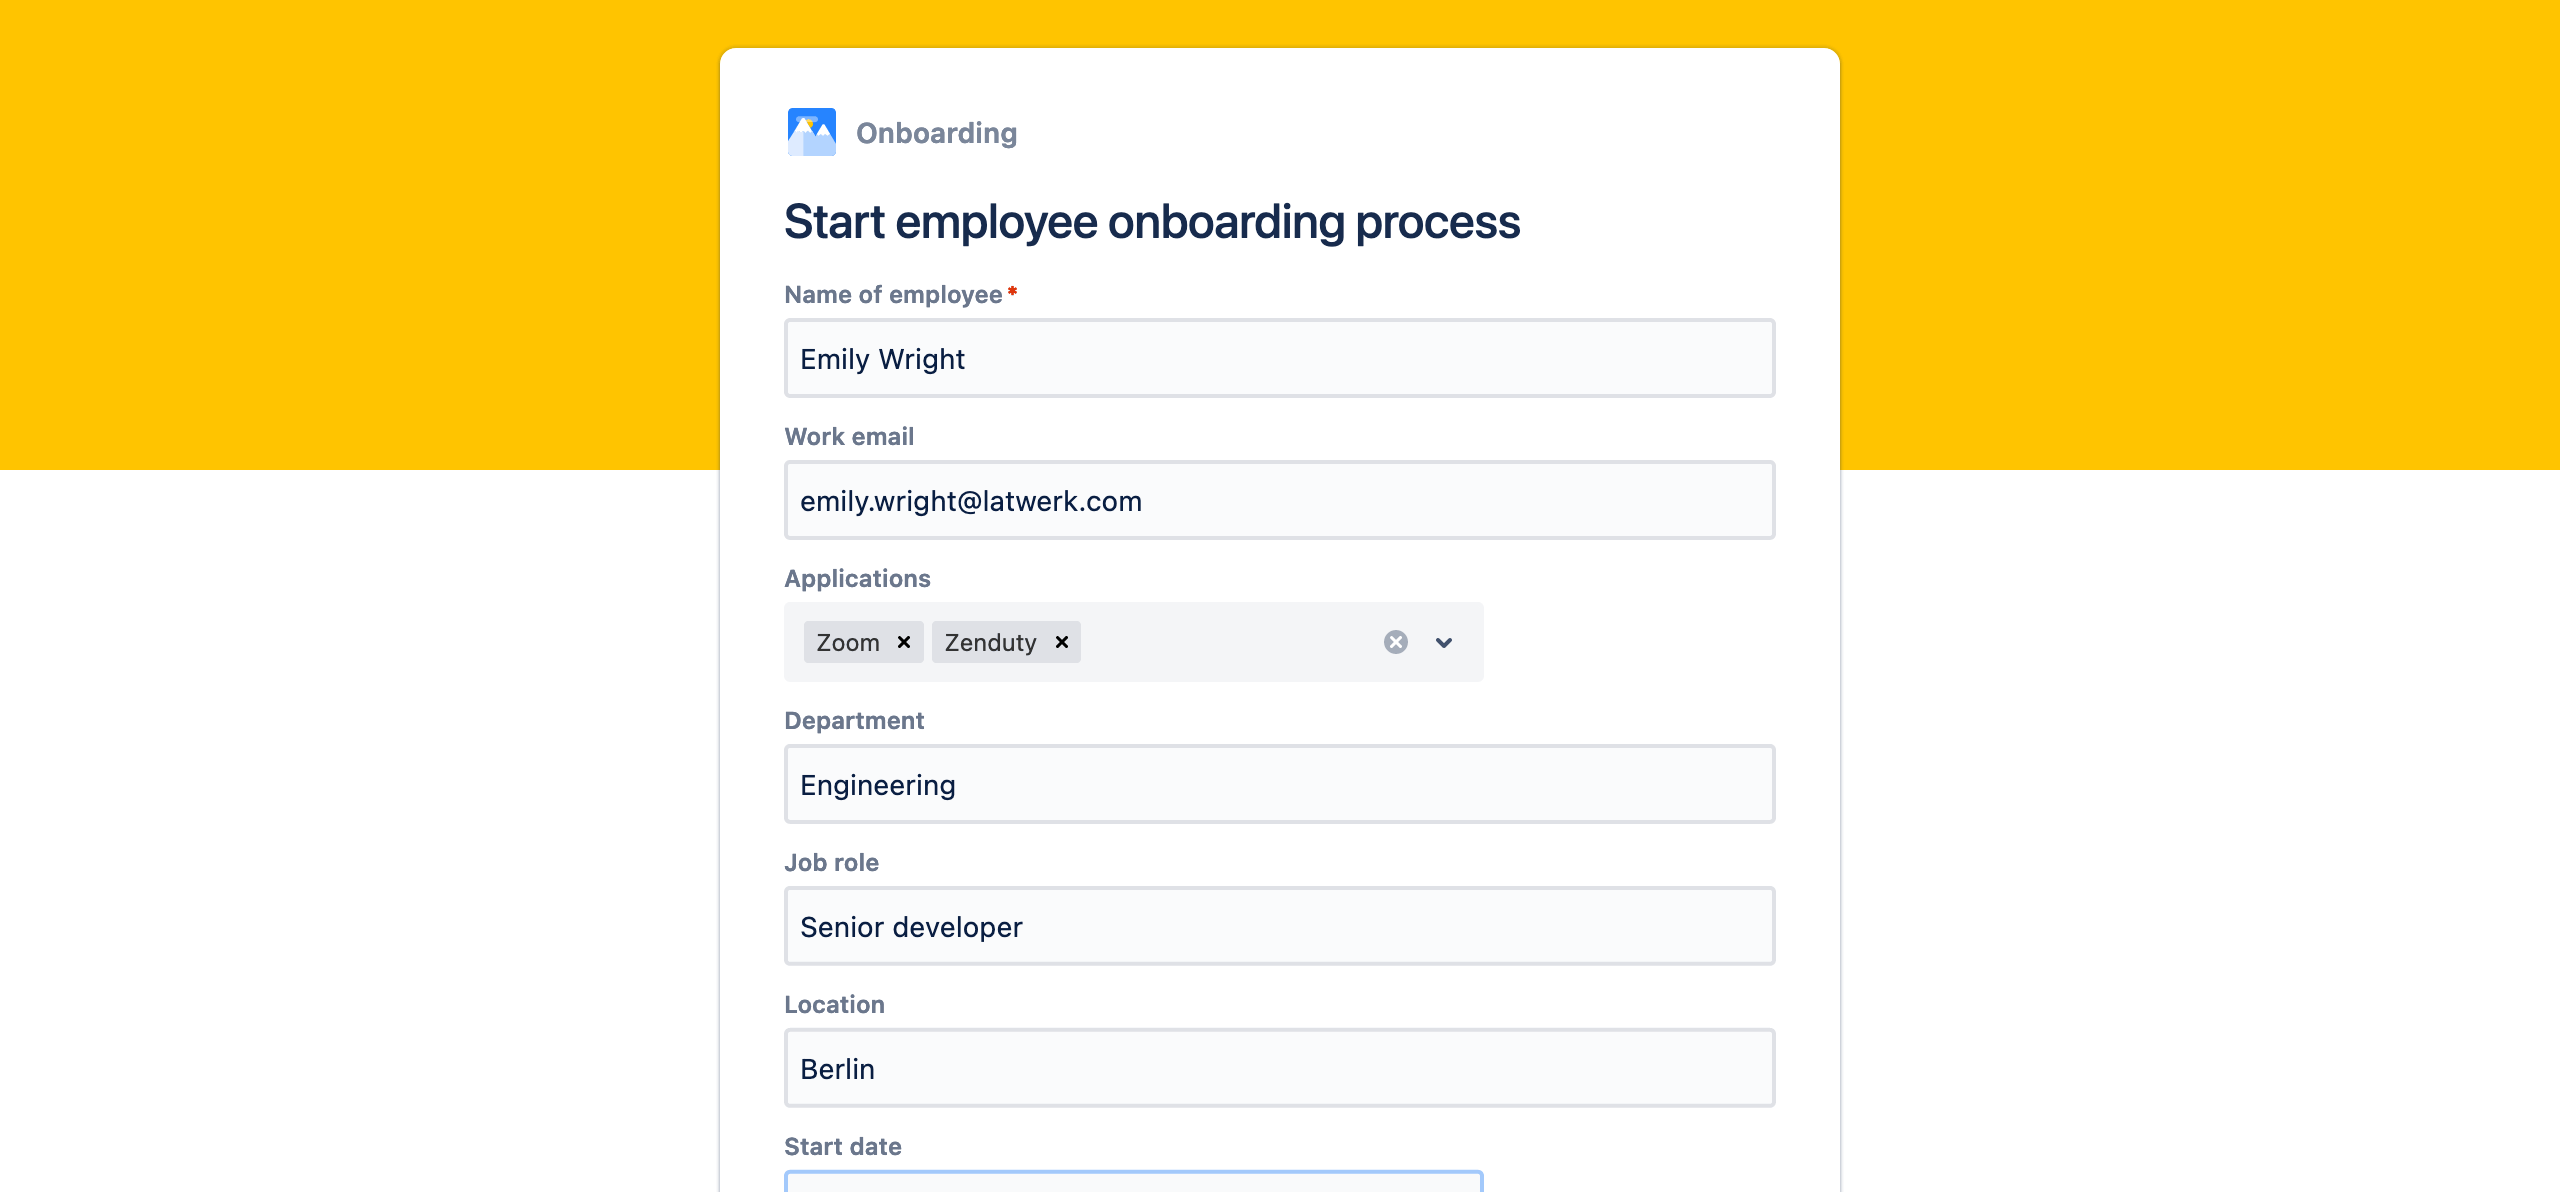
Open up the new issue. You will see the Work email and Applications fields.
On the right-hand panel click Actions and then choose Create automation.
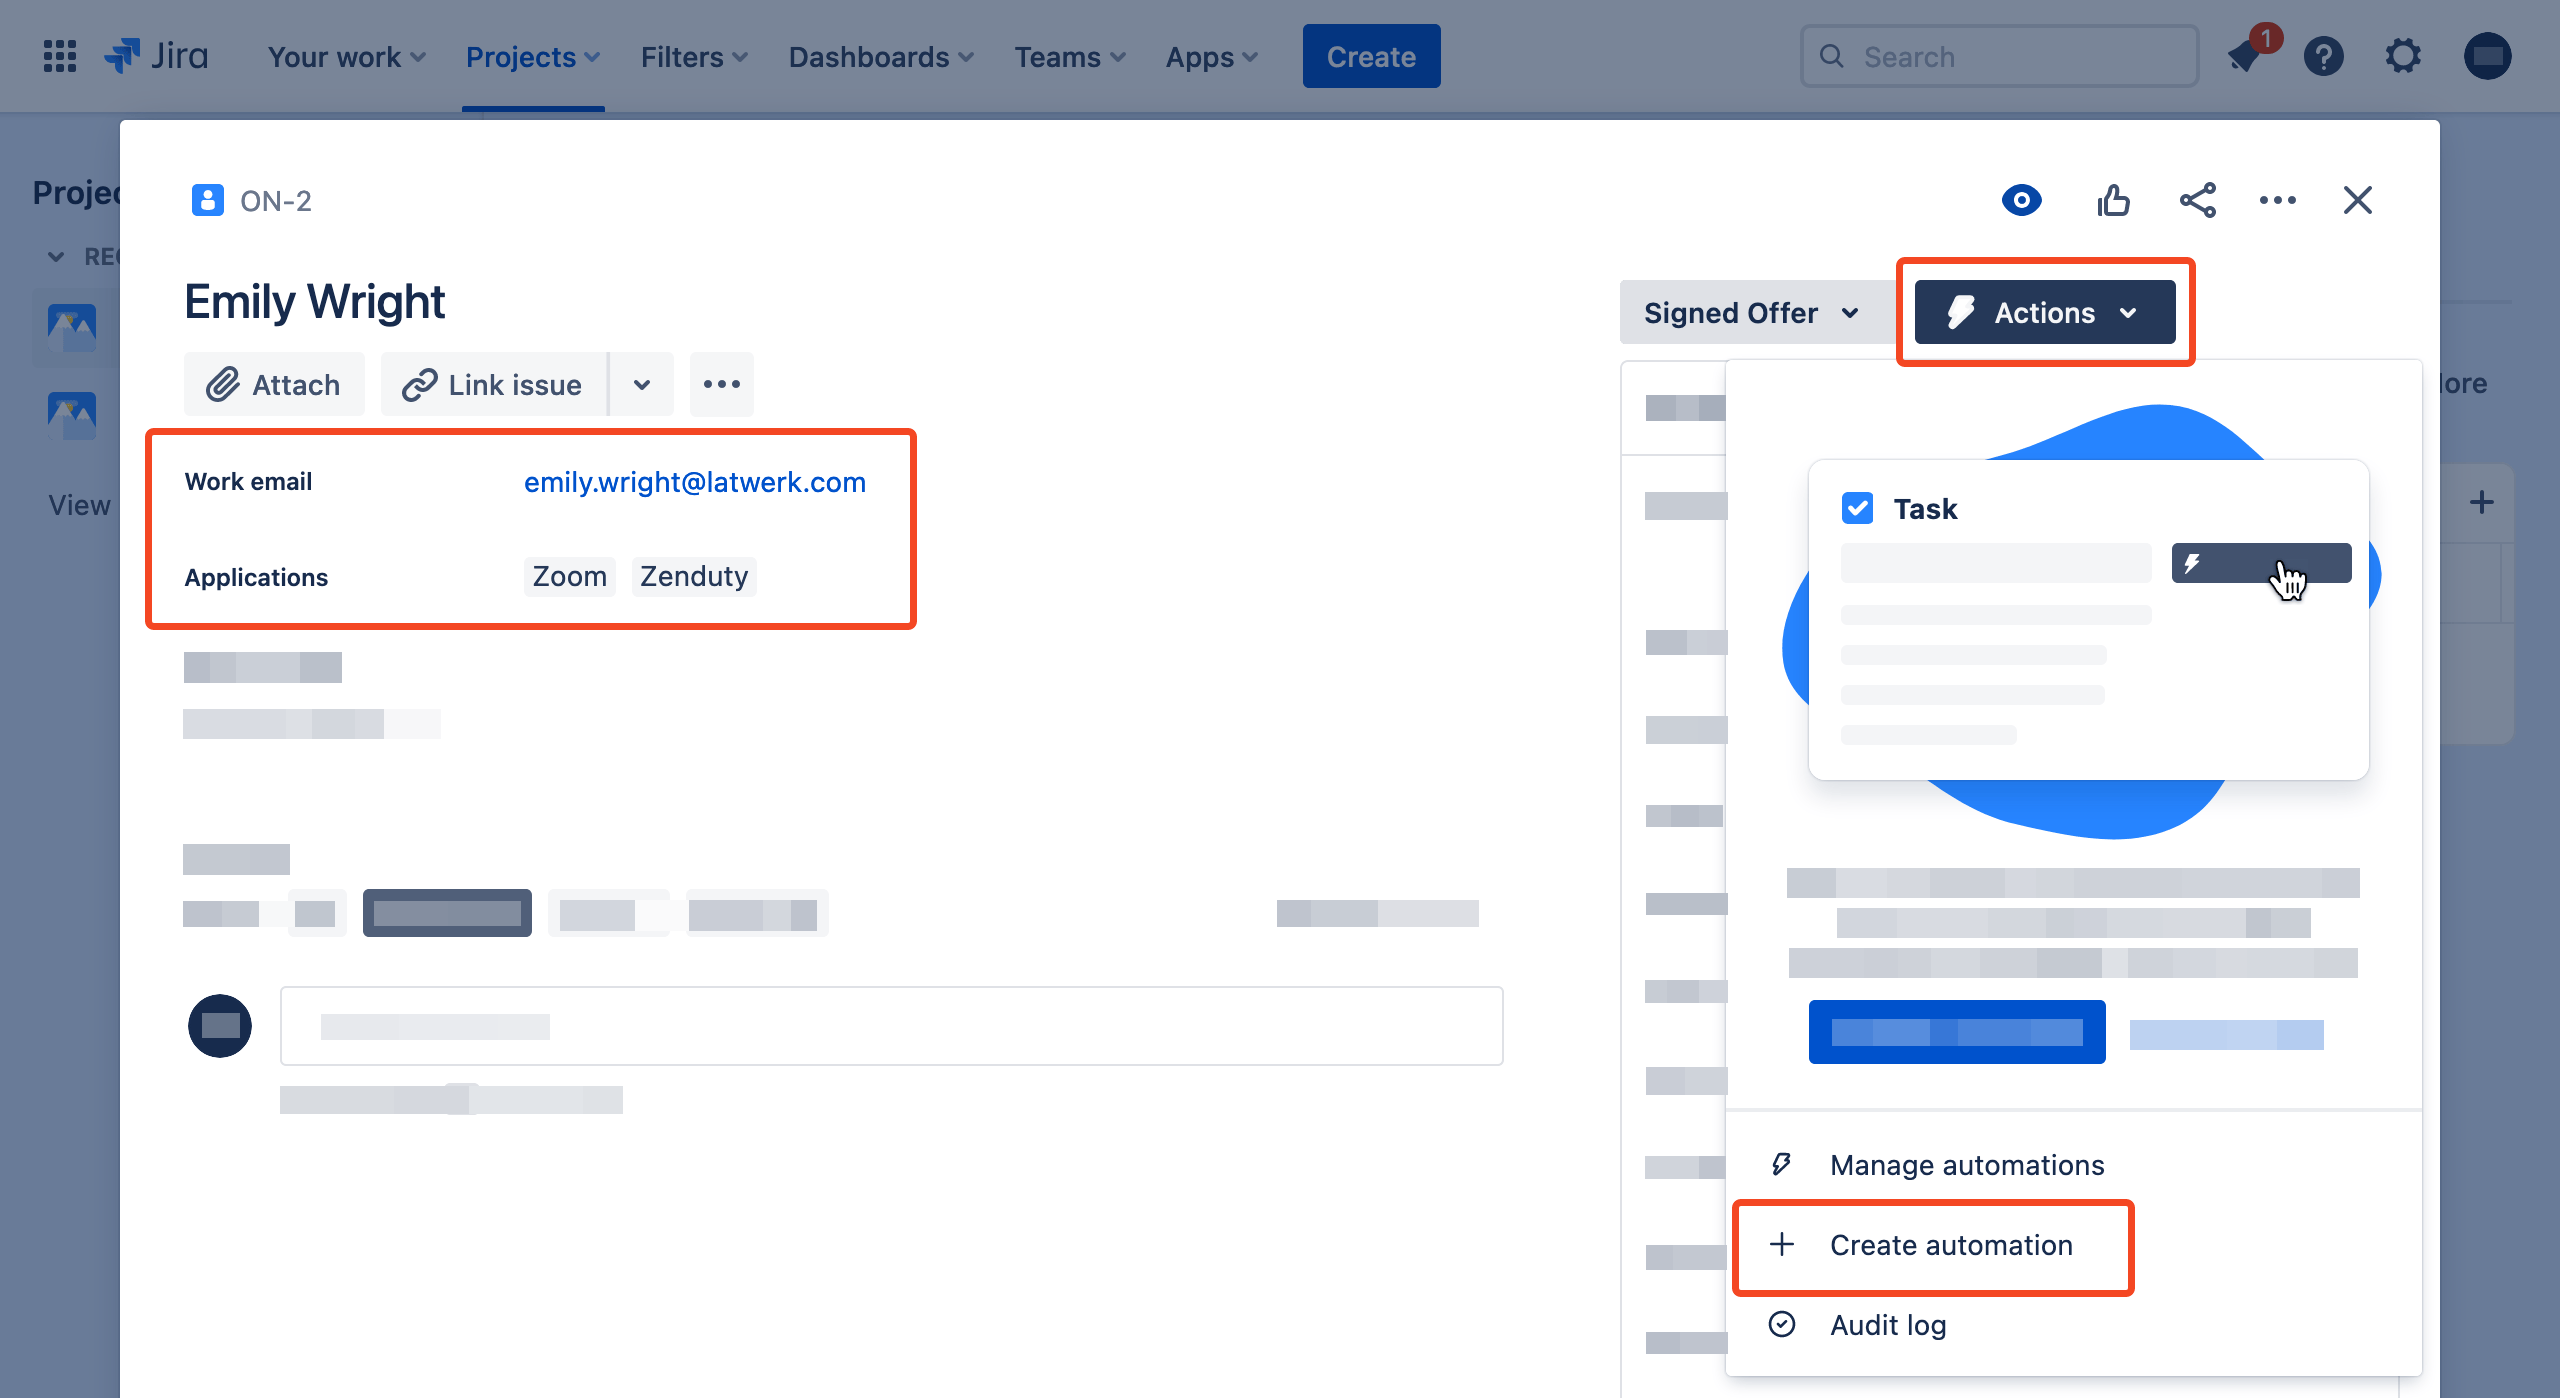
Create the automation in Jira
The process for creating the automation is very similar to that outlined in the first article about running SaaS Manager workflows from Jira automations.
Use the following Custom data for the Jira Web request body
{
  "issueKey": {{issue.key.asJsonString}},
  "issueStatusName": {{issue.status.name.asJsonString}},
  "issueSummary": {{issue.summary.asJsonString}},
  "issueTypeName": {{issue.issueType.name.asJsonString}},
  "reporterEmail": "{{reporter.emailAddress.asString}}",
  "work_email": {{issue.Work email.asJsonString}},
  "joiner_first_name": {{issue.summary.split(" ").first.asJsonString}},
  "joiner_last_name": {{issue.summary.split(" ").last.asJsonString}},
  "applications": {{issue.Applications.value.asJsonStringArray}}
}
Notice the special syntax for returning the multi-select
applicationsfield (.value.asJsonStringArray).Also, the syntax for
reporterEmailis slightly different. This is a work-around because if you use the Validate your web request option in Jira then it posts an empty value. This does however work correctly if you trigger an automation from an issue directly.Create an
Applicationsfield in SaaS Management. The options should match the options you entered into Jira. Make sure Allow multiple value selection is checked.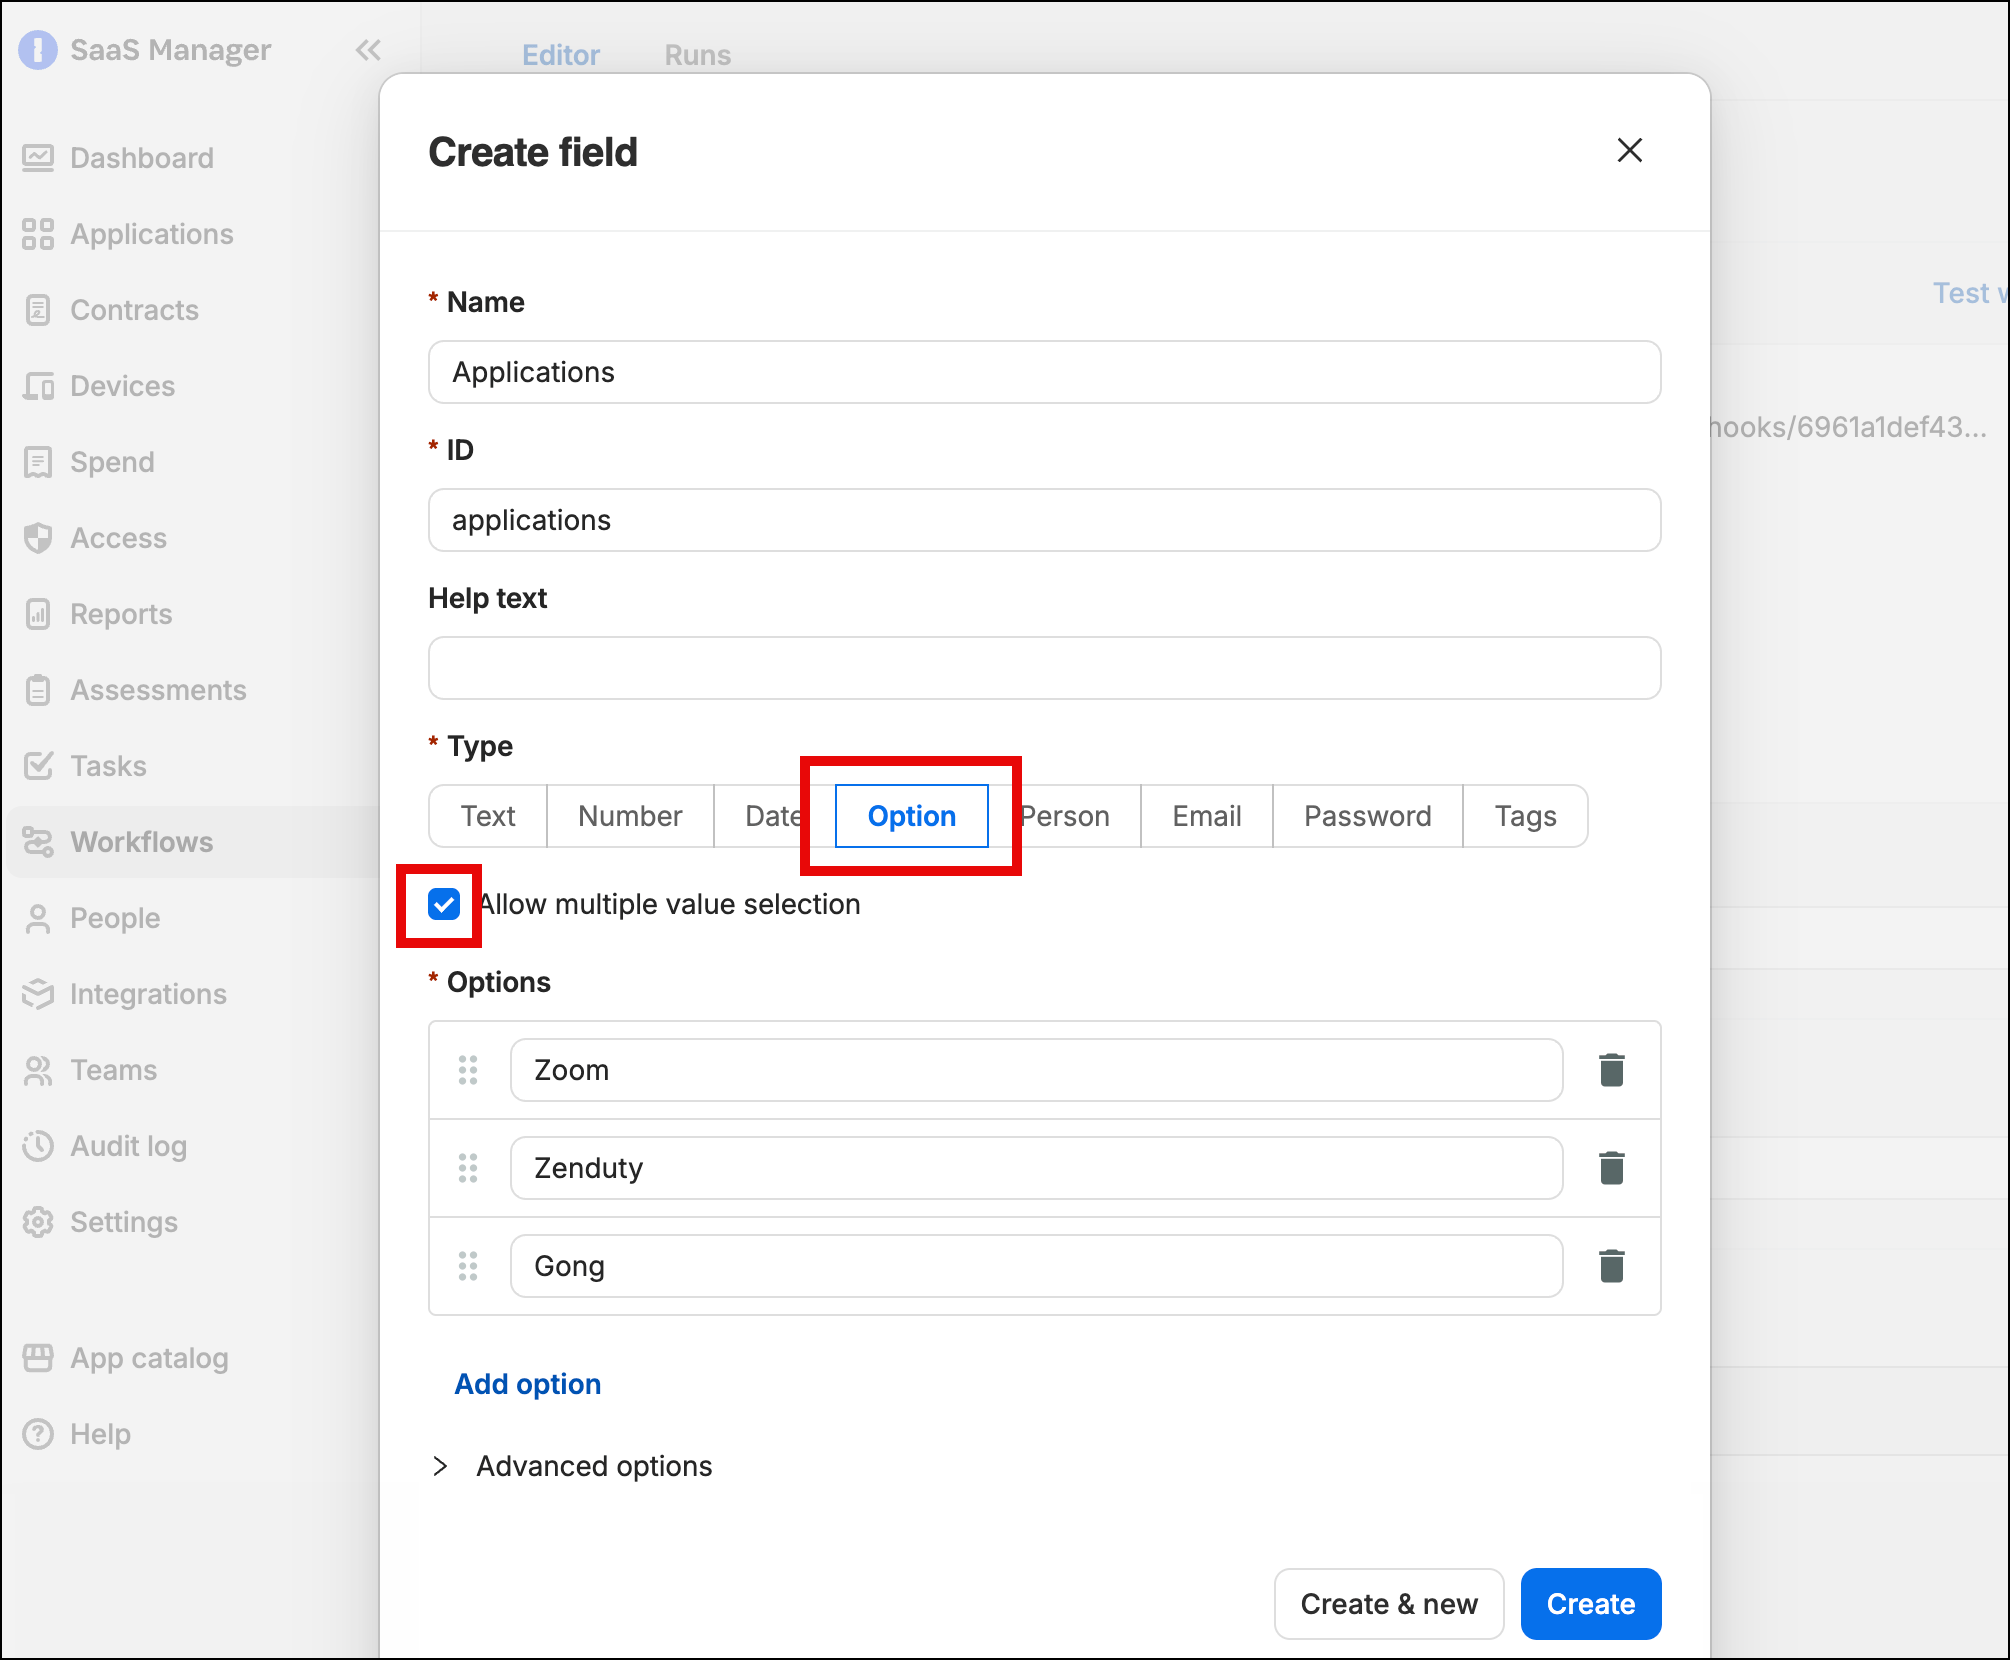
Create some more matching text fields over in your SaaS Management workflow:
Joiner first nameJoiner last nameWork email
Now try testing the webhook from SaaS Management by using the Validate your web request configuration in Jira.
If everything is looking good then swap the URL in Jira for the non-test URL in SaaS Management:
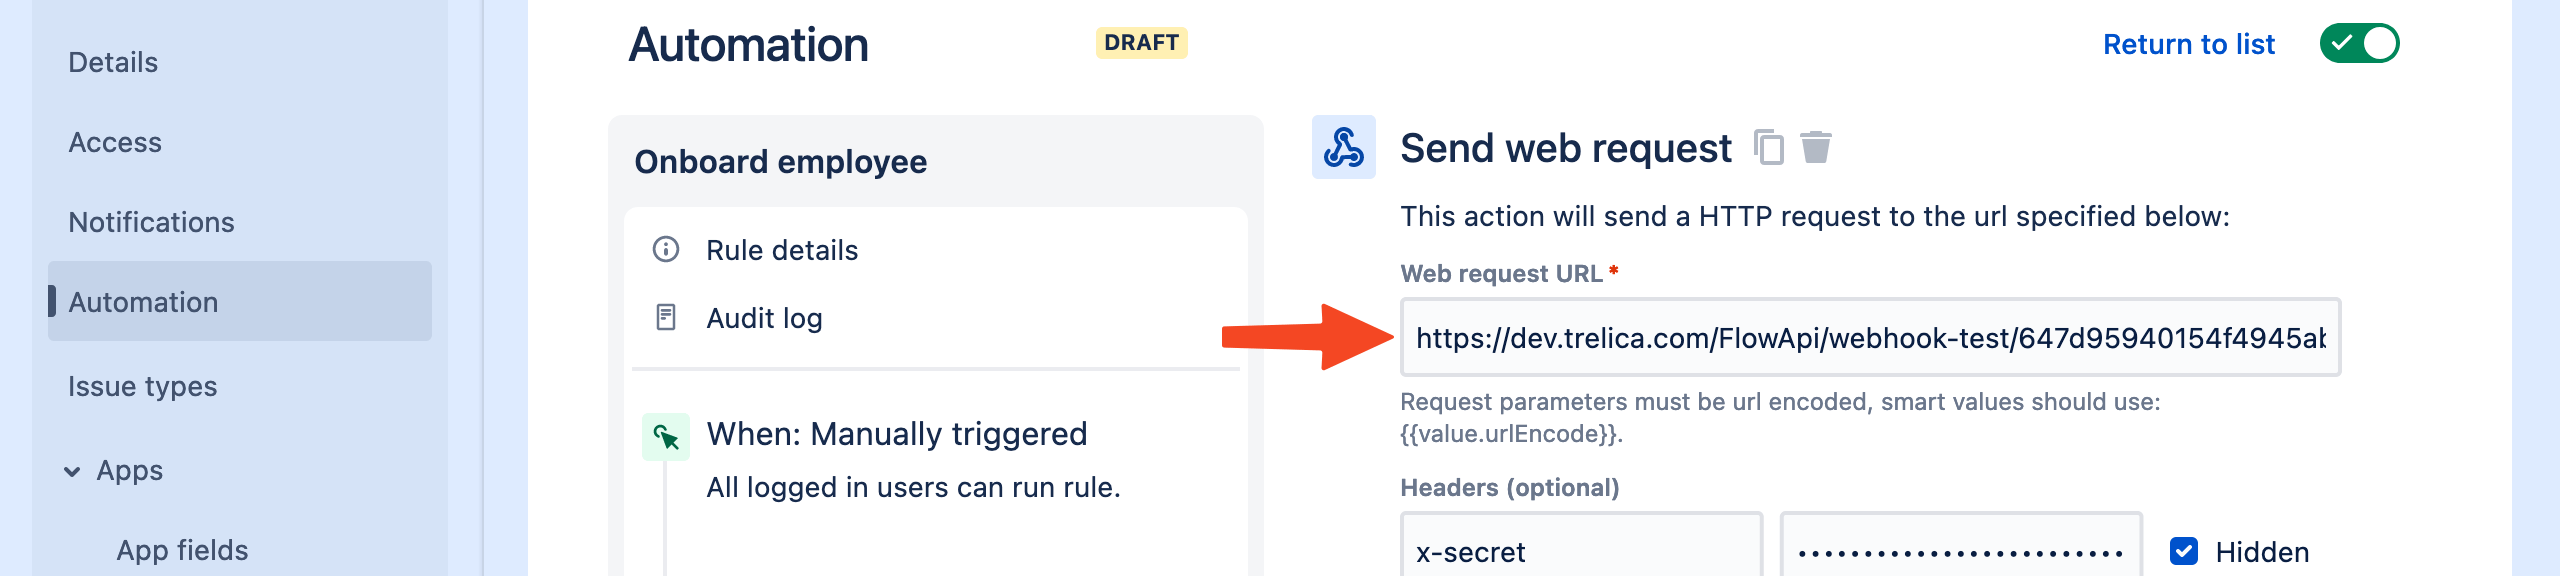
Save and Publish your Jira automation.
Build your SaaS Management workflow
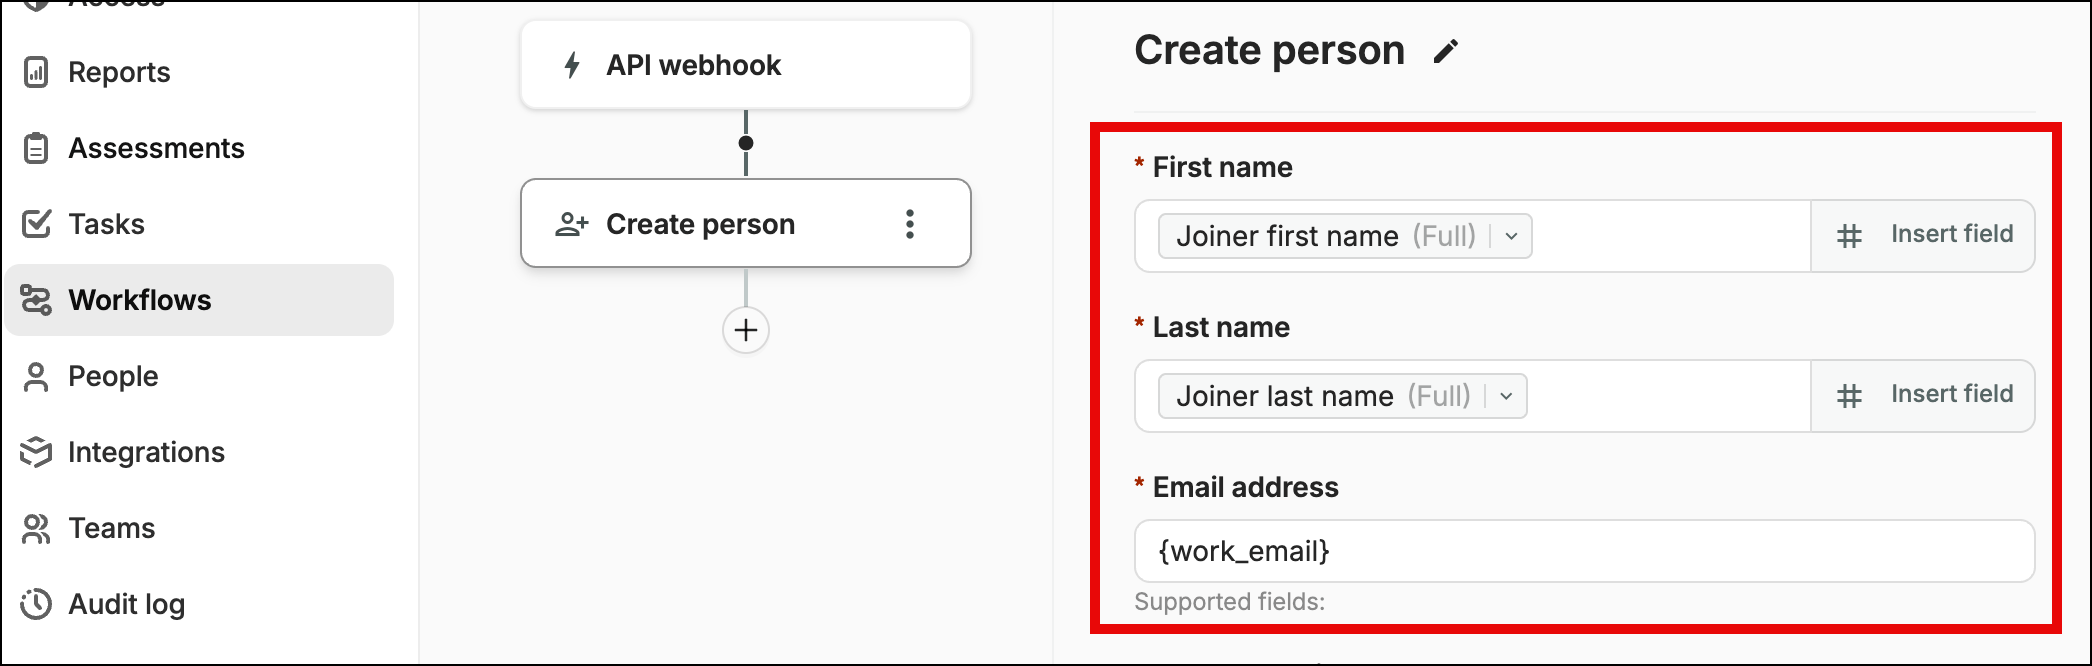
Firstly we will add a Create person action to our workflow. This is needed because the default context for the workflow is ‘None’ (since the person doesn’t exist yet, so SaaS Management can’t match).
By creating a person we are then positioned to create accounts for them in other systems, for example Google Workspace.
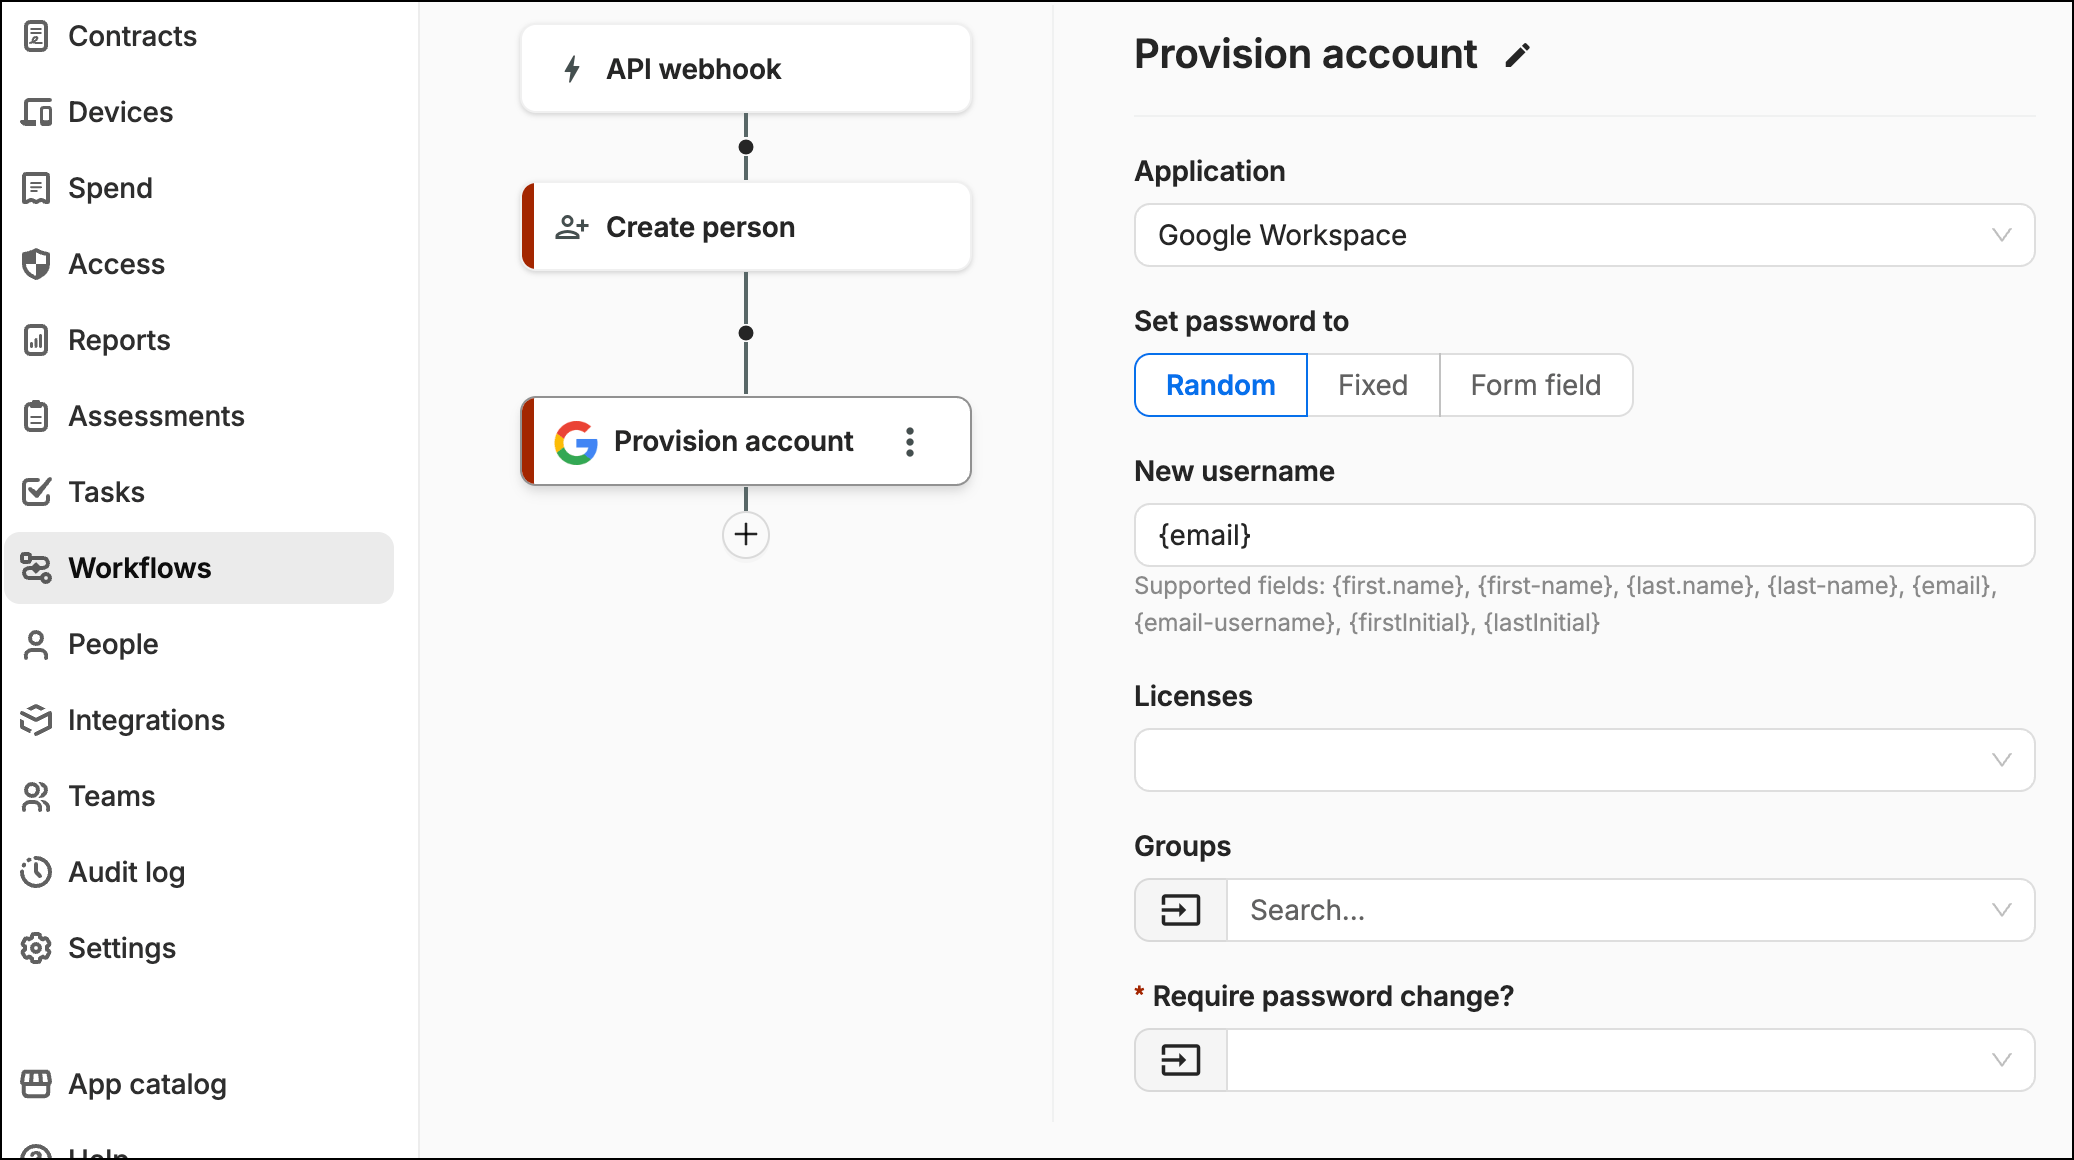
With that in place we can add a step for creating an account in our identity provider, in this case Google Workspace.
Add provisioning steps
To deal with the different application options, you need to:
- Add a field condition (to check whether the application was selected).
- Add the condition to a new group (so that once the condition and potential actions are performed, processing returns to the main path of the workflow).
- Add a provisioning step if the condition is met.
Add a Field condition to your workflow.
Check for the name of an application.
Add the condition to a new group:
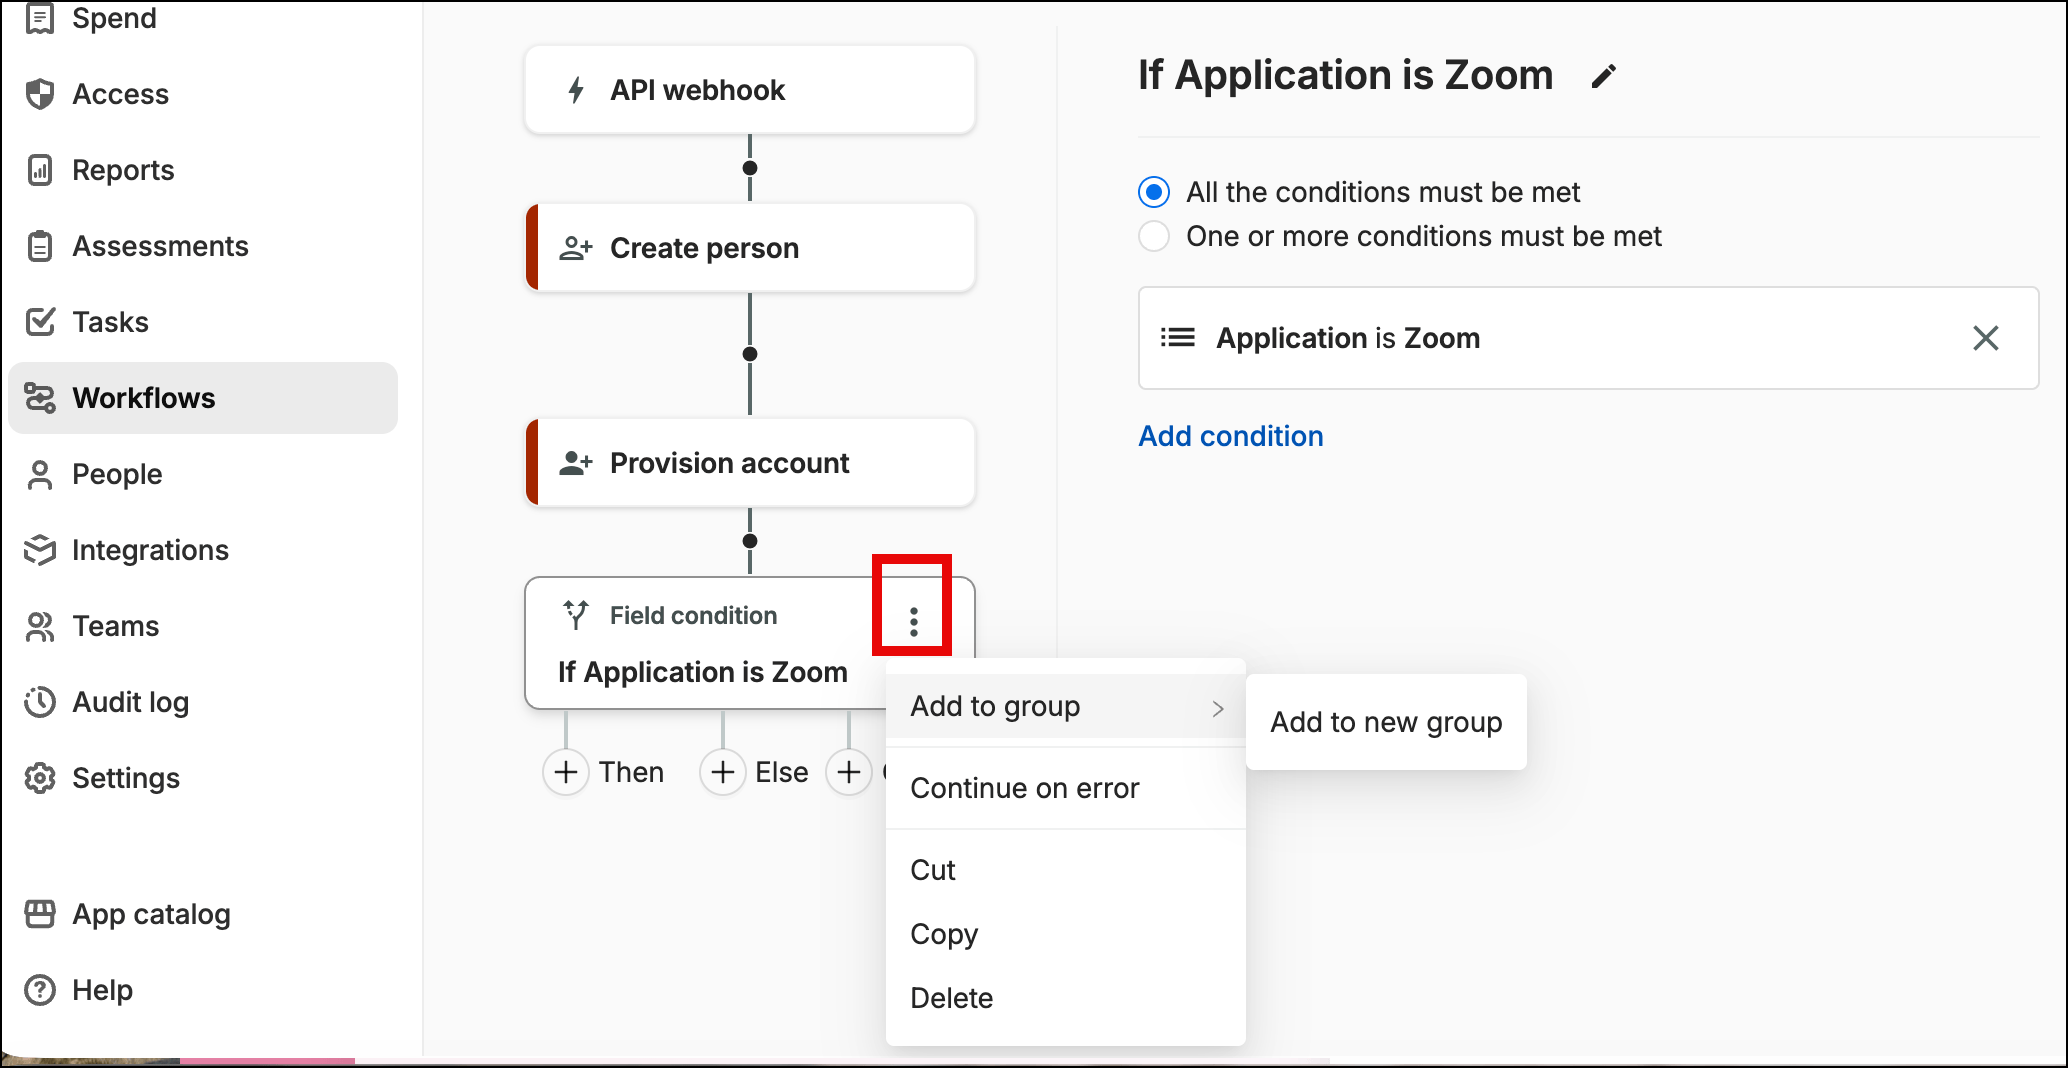
Give the group the same name as the application (for consistency).
Open the new group
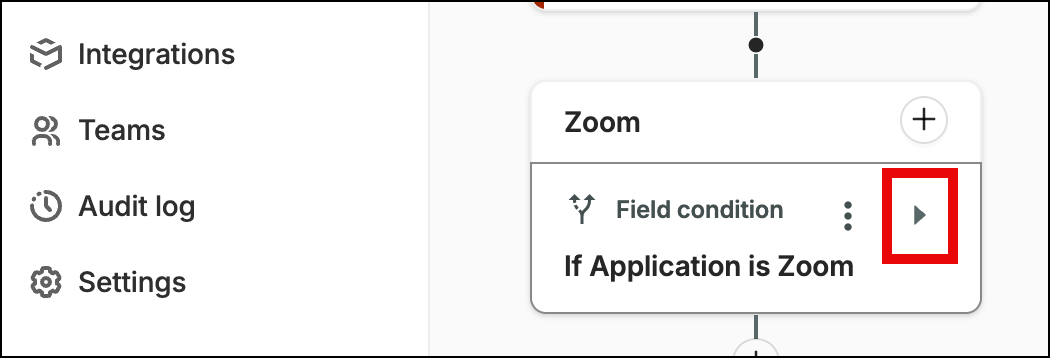
Add a provisioning action for the application:
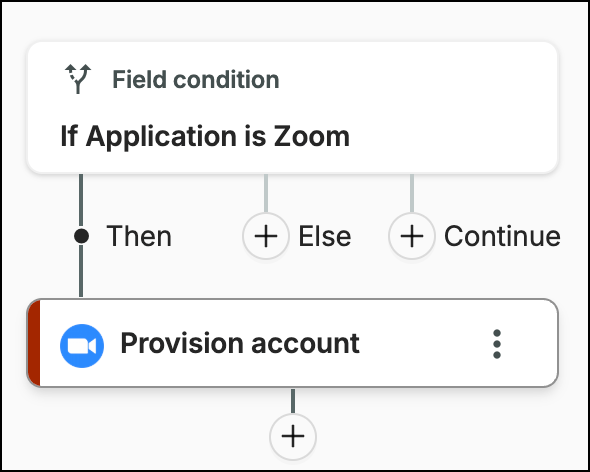
Repeat the above for each application you want, configuring each provisioning action as required.
Test the automation and workflow
Make sure your SaaS Management workflow is enabled. Webhooks only work when the workflow is enabled.
Then run the Onboard employee automation in Jira:
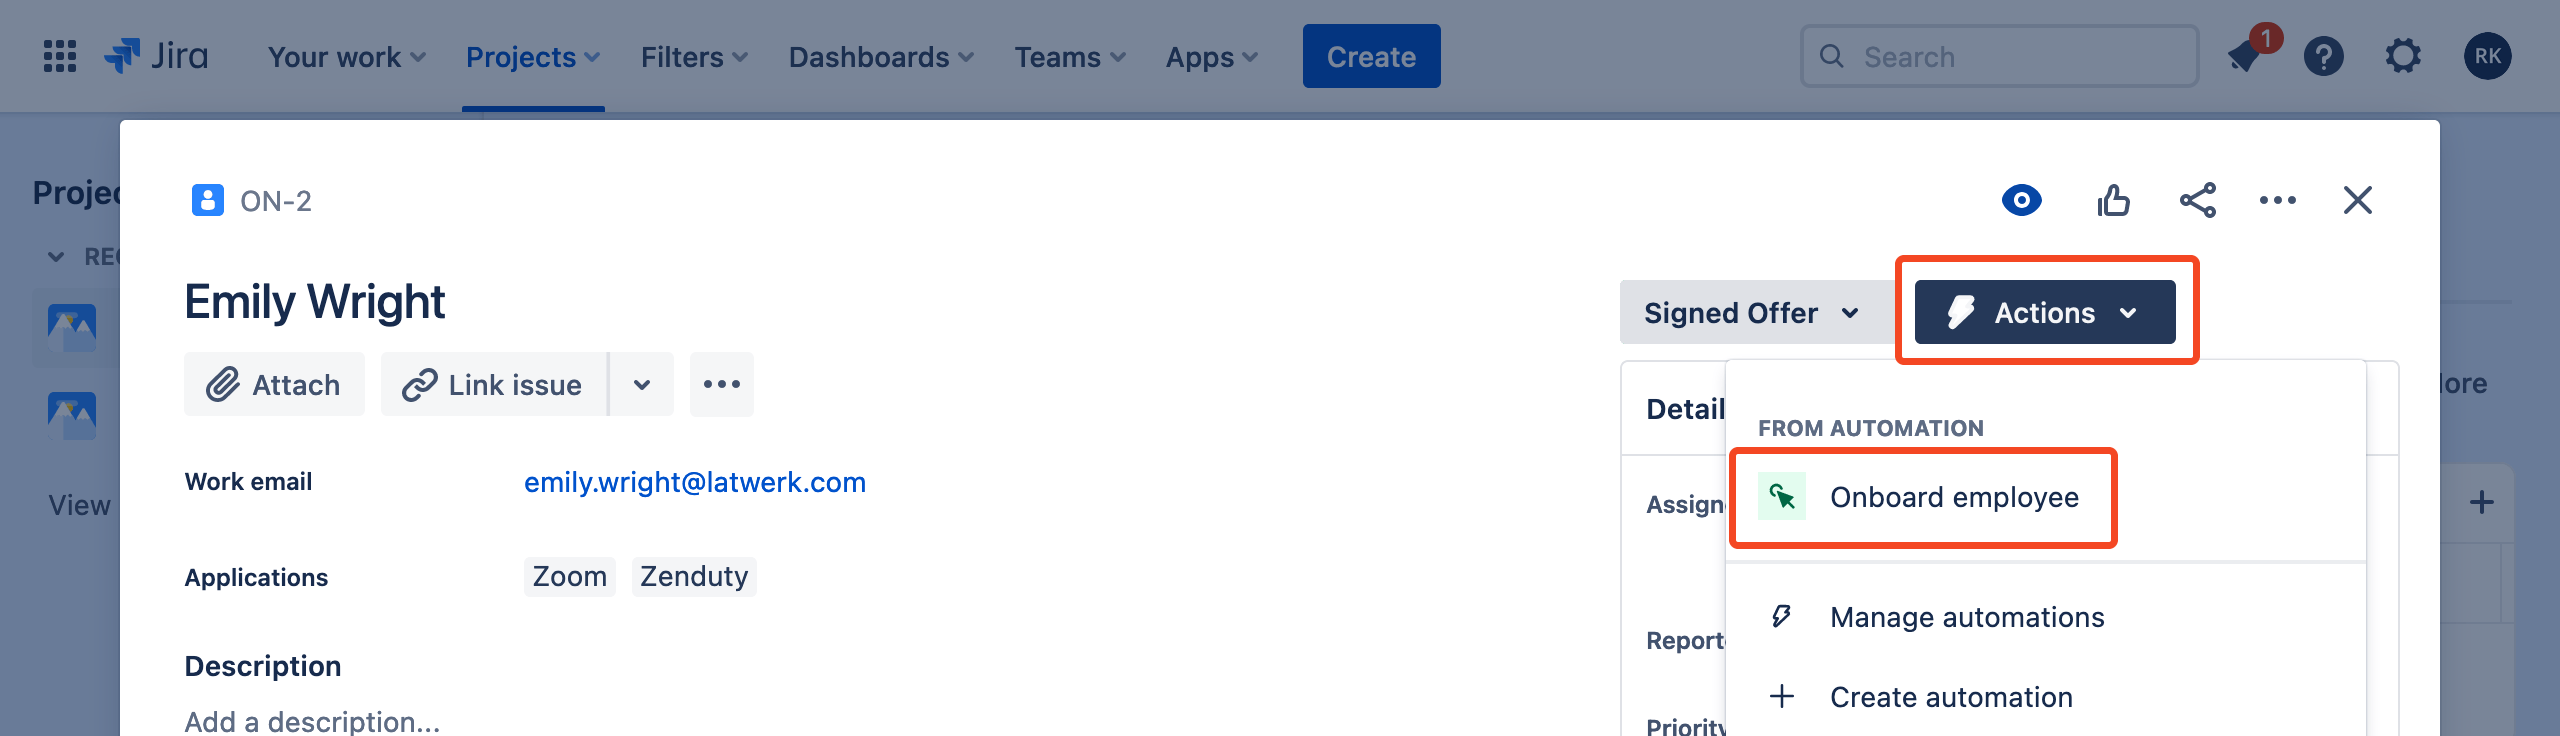
The workflow should then run in SaaS Management.
Was this article helpful?
Glad to hear it! If you have anything you'd like to add, feel free to contact us.
Sorry to hear that. Please contact us if you'd like to provide more details.