Note
Creating an API key
API keys (or Authtokens) are created for an individual technician user in the installed version of ServiceDesk Plus.
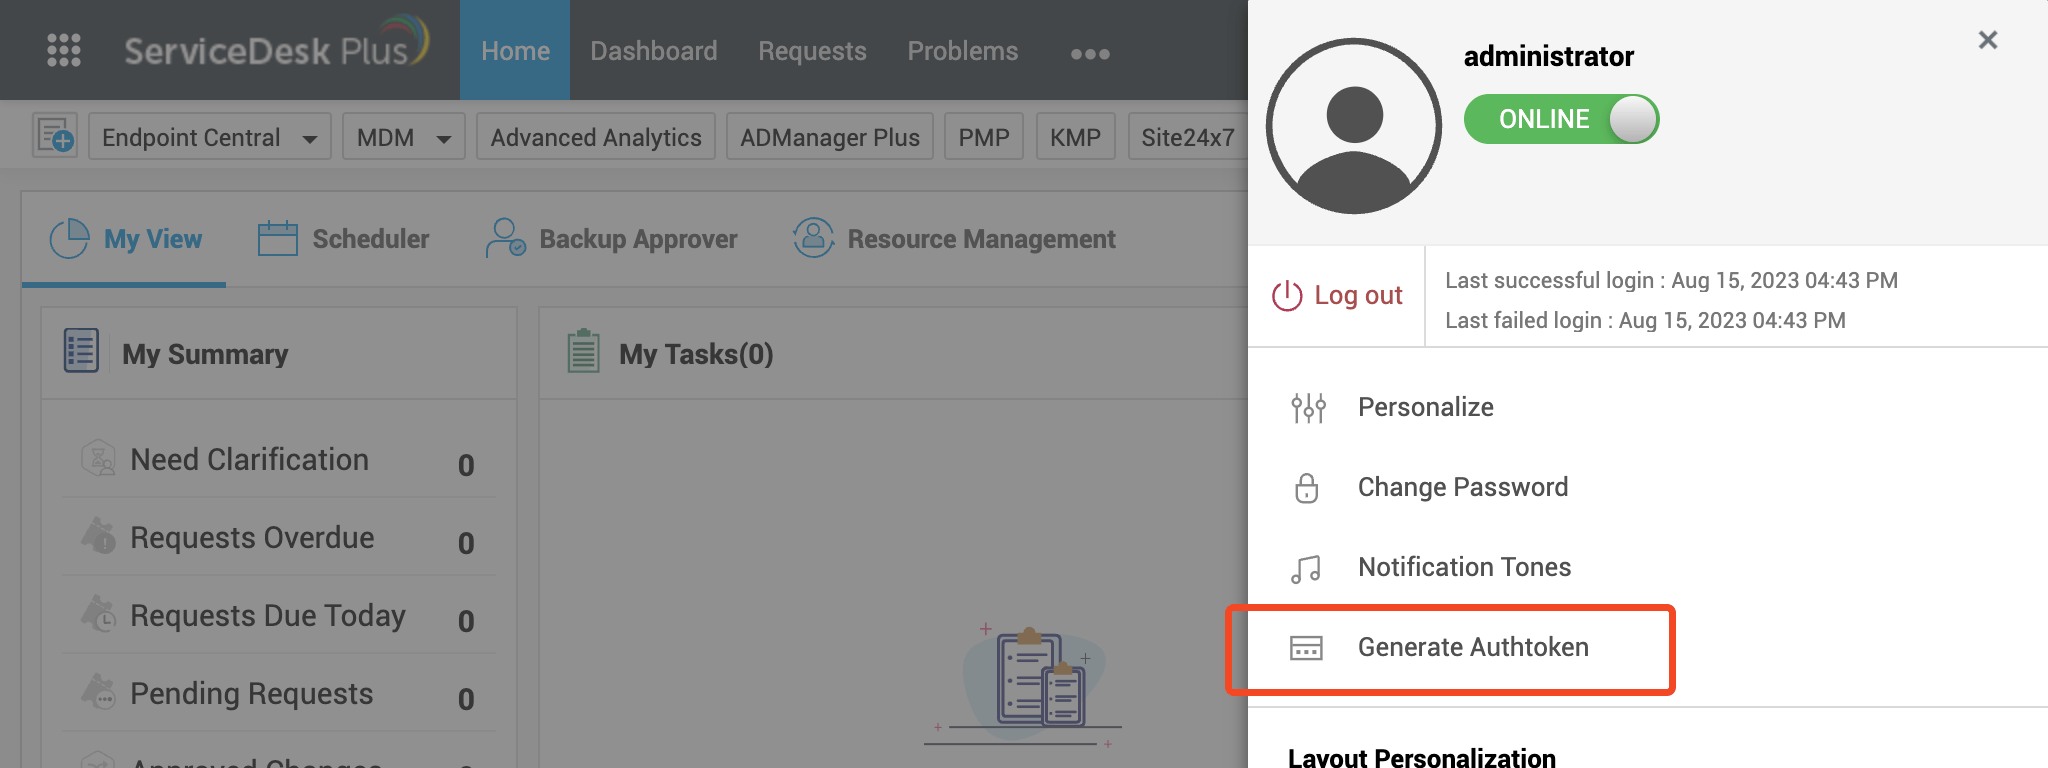
To generate a token, click your profile, and choose Generate Authtoken.
Permissions required
Provisioning and Deprovisioning requires a technician with the SDAdmin role.
If you do not need these features, then we recommend creating a more limited technician role for 1Password SaaS Manager access (rather than using a technician with the SDAdmin role).
Go to Admin > Users & Permissions > Roles.
Create a new role with these permissions:
| SaaS Manager feature | SD Plus Permission | Access level | Additional standard role |
|---|---|---|---|
| Create and update Requests | Requests | View, Add, Edit | HelpdeskConfig |
| Devices | Devices | View |
Assign this new role, (and the additional HelpdeskConfig roles if specified above) to a technician, and then login as the technician.
Important
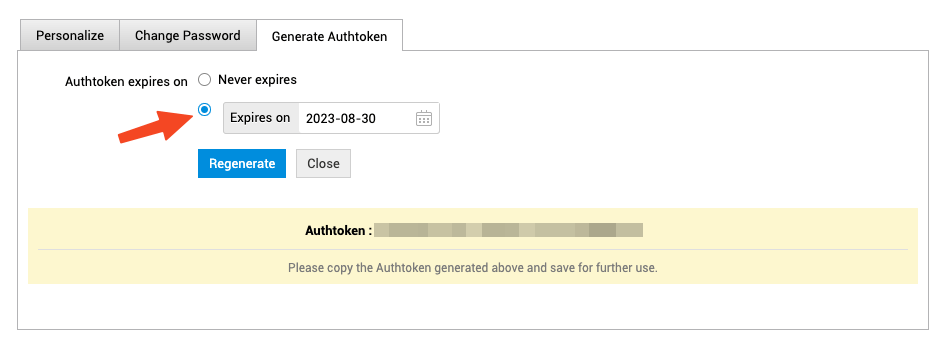
When you generate the Authtoken, you must set an expiry date (non admin roles cannot create tokens with no expiry date).
User management
ServiceDesk Plus splits users into Users and Technicians. Technicians have specific roles within ServiceDesk Plus, whereas Users are typically employees who can raise and view their own Requests.
SaaS Manager lets you create both types of user.
The Installed version of ServiceDesk Plus doesn’t let you deactivate users - they can only be deleted.
Setting up an automation to update SaaS Manager when Requests are closed
SaaS Manager can create Requests in ServiceDesk Plus using the ServiceDesk Plus API. ServiceDesk Plus however does not automatically support notifying SaaS Manager when Requests are updated.
You can however use the Automations feature of ServiceDesk Plus to create a webhook to notify SaaS Manager.
Callback URL
Before starting you will need to take a copy of the Callback URL that SaaS Manager providers when you connect ServiceDesk Plus.
Creating the webhook
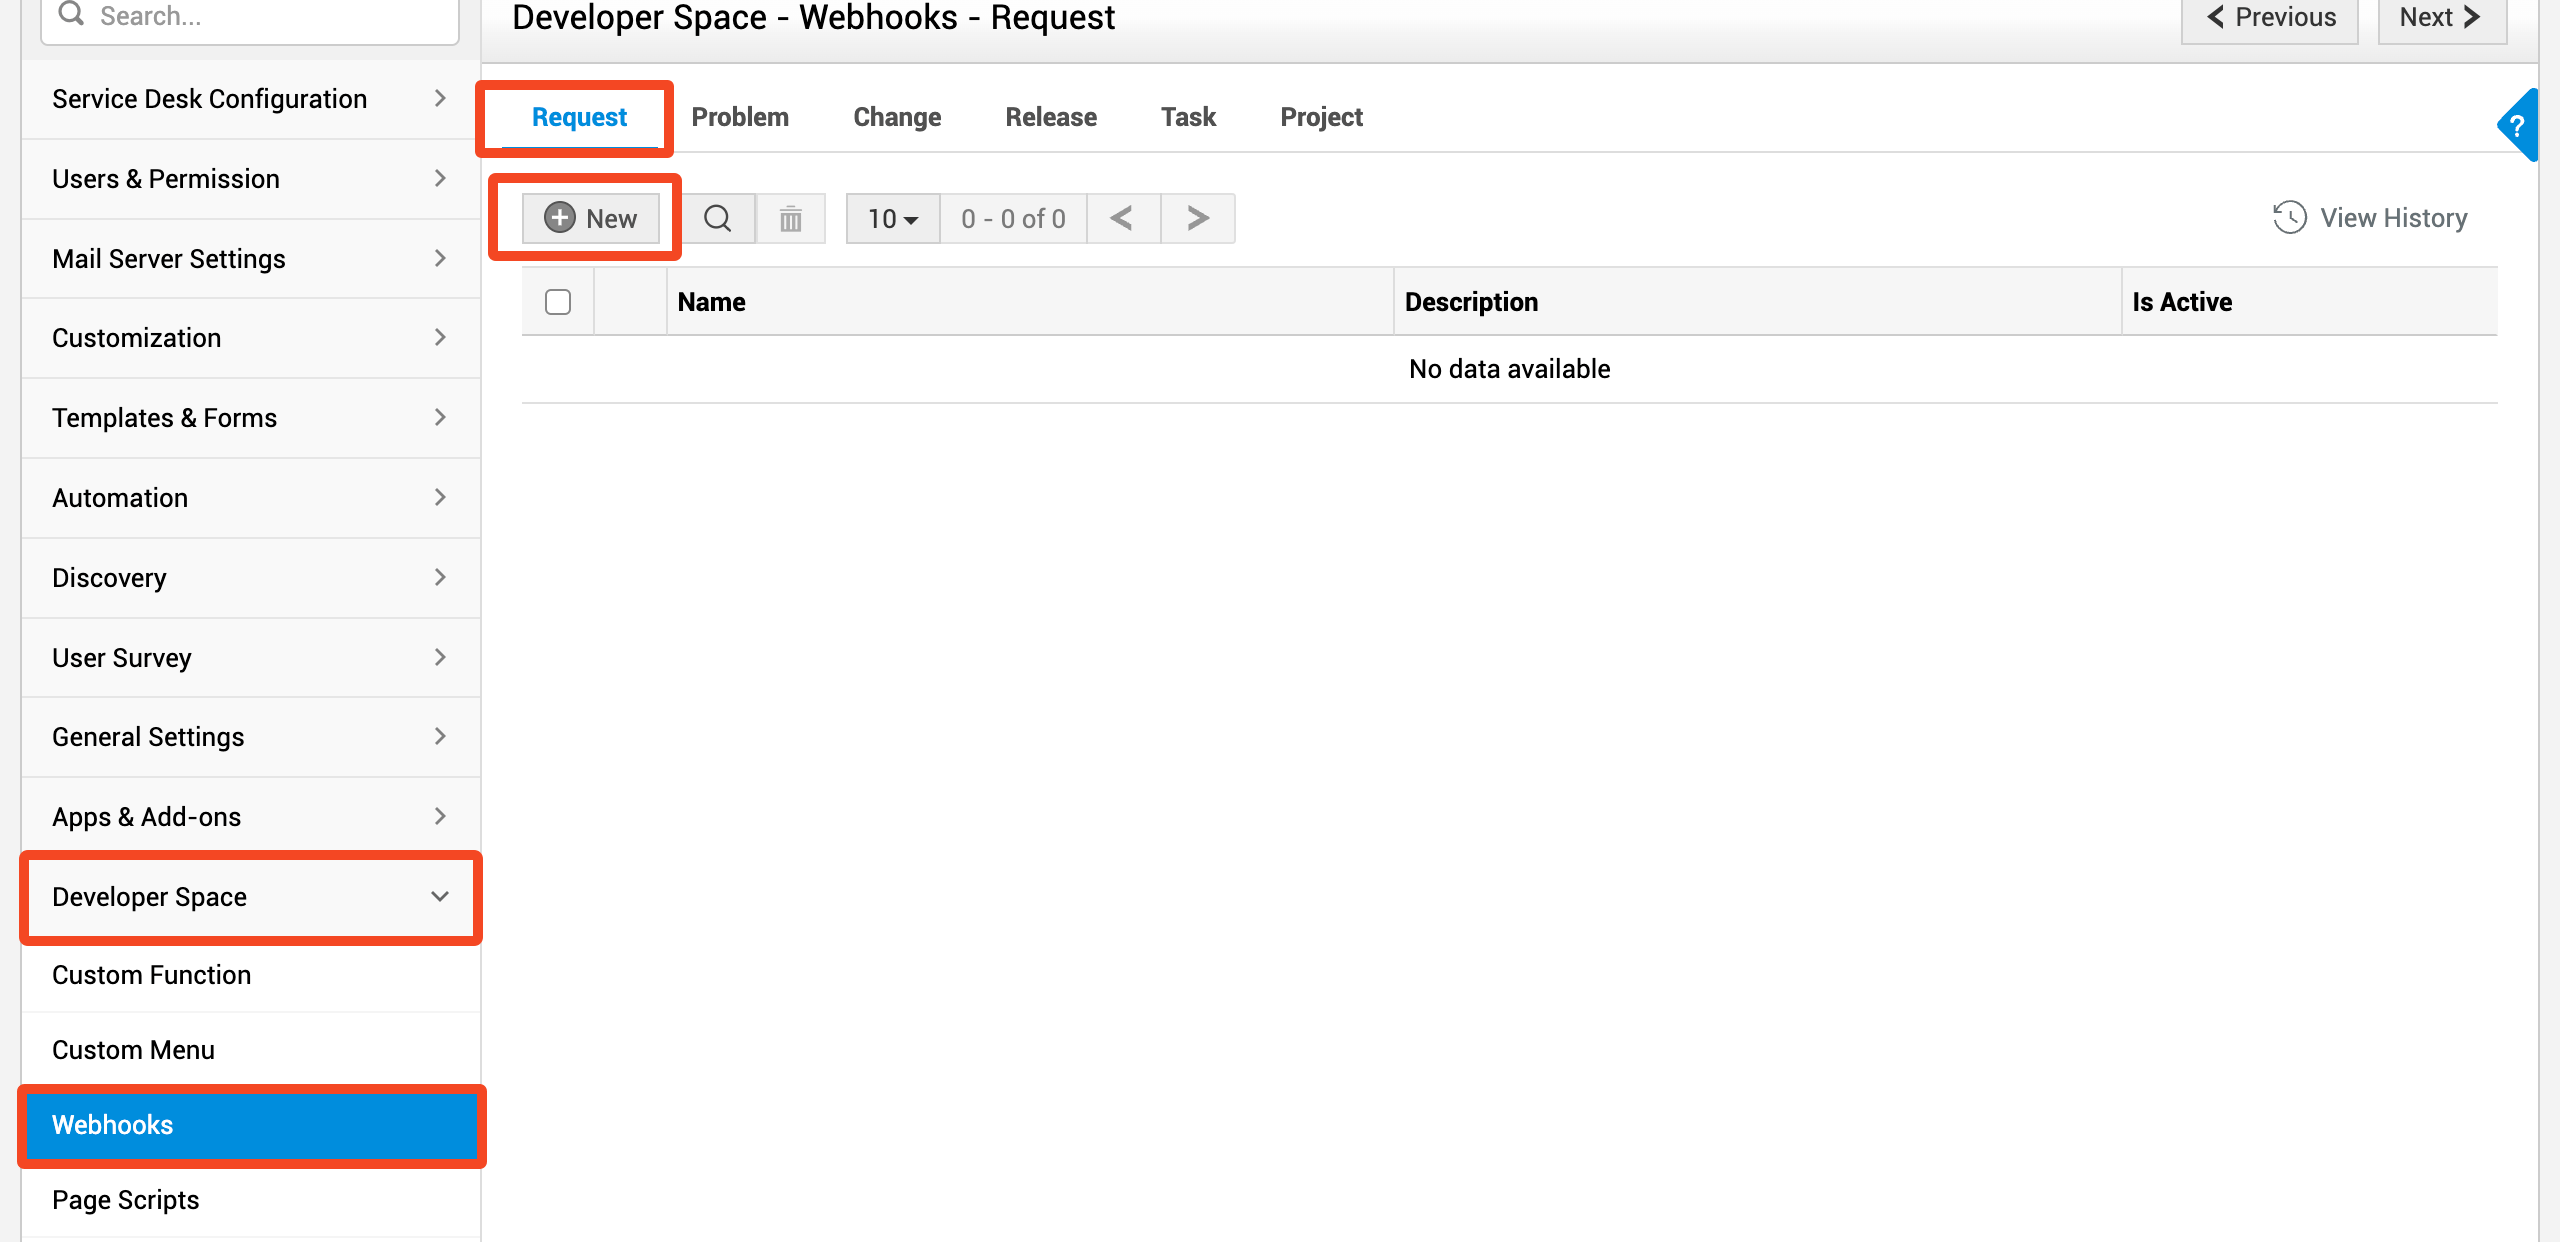
Go to Developer Space > Webhooks. Make sure that Request is selected and click New:
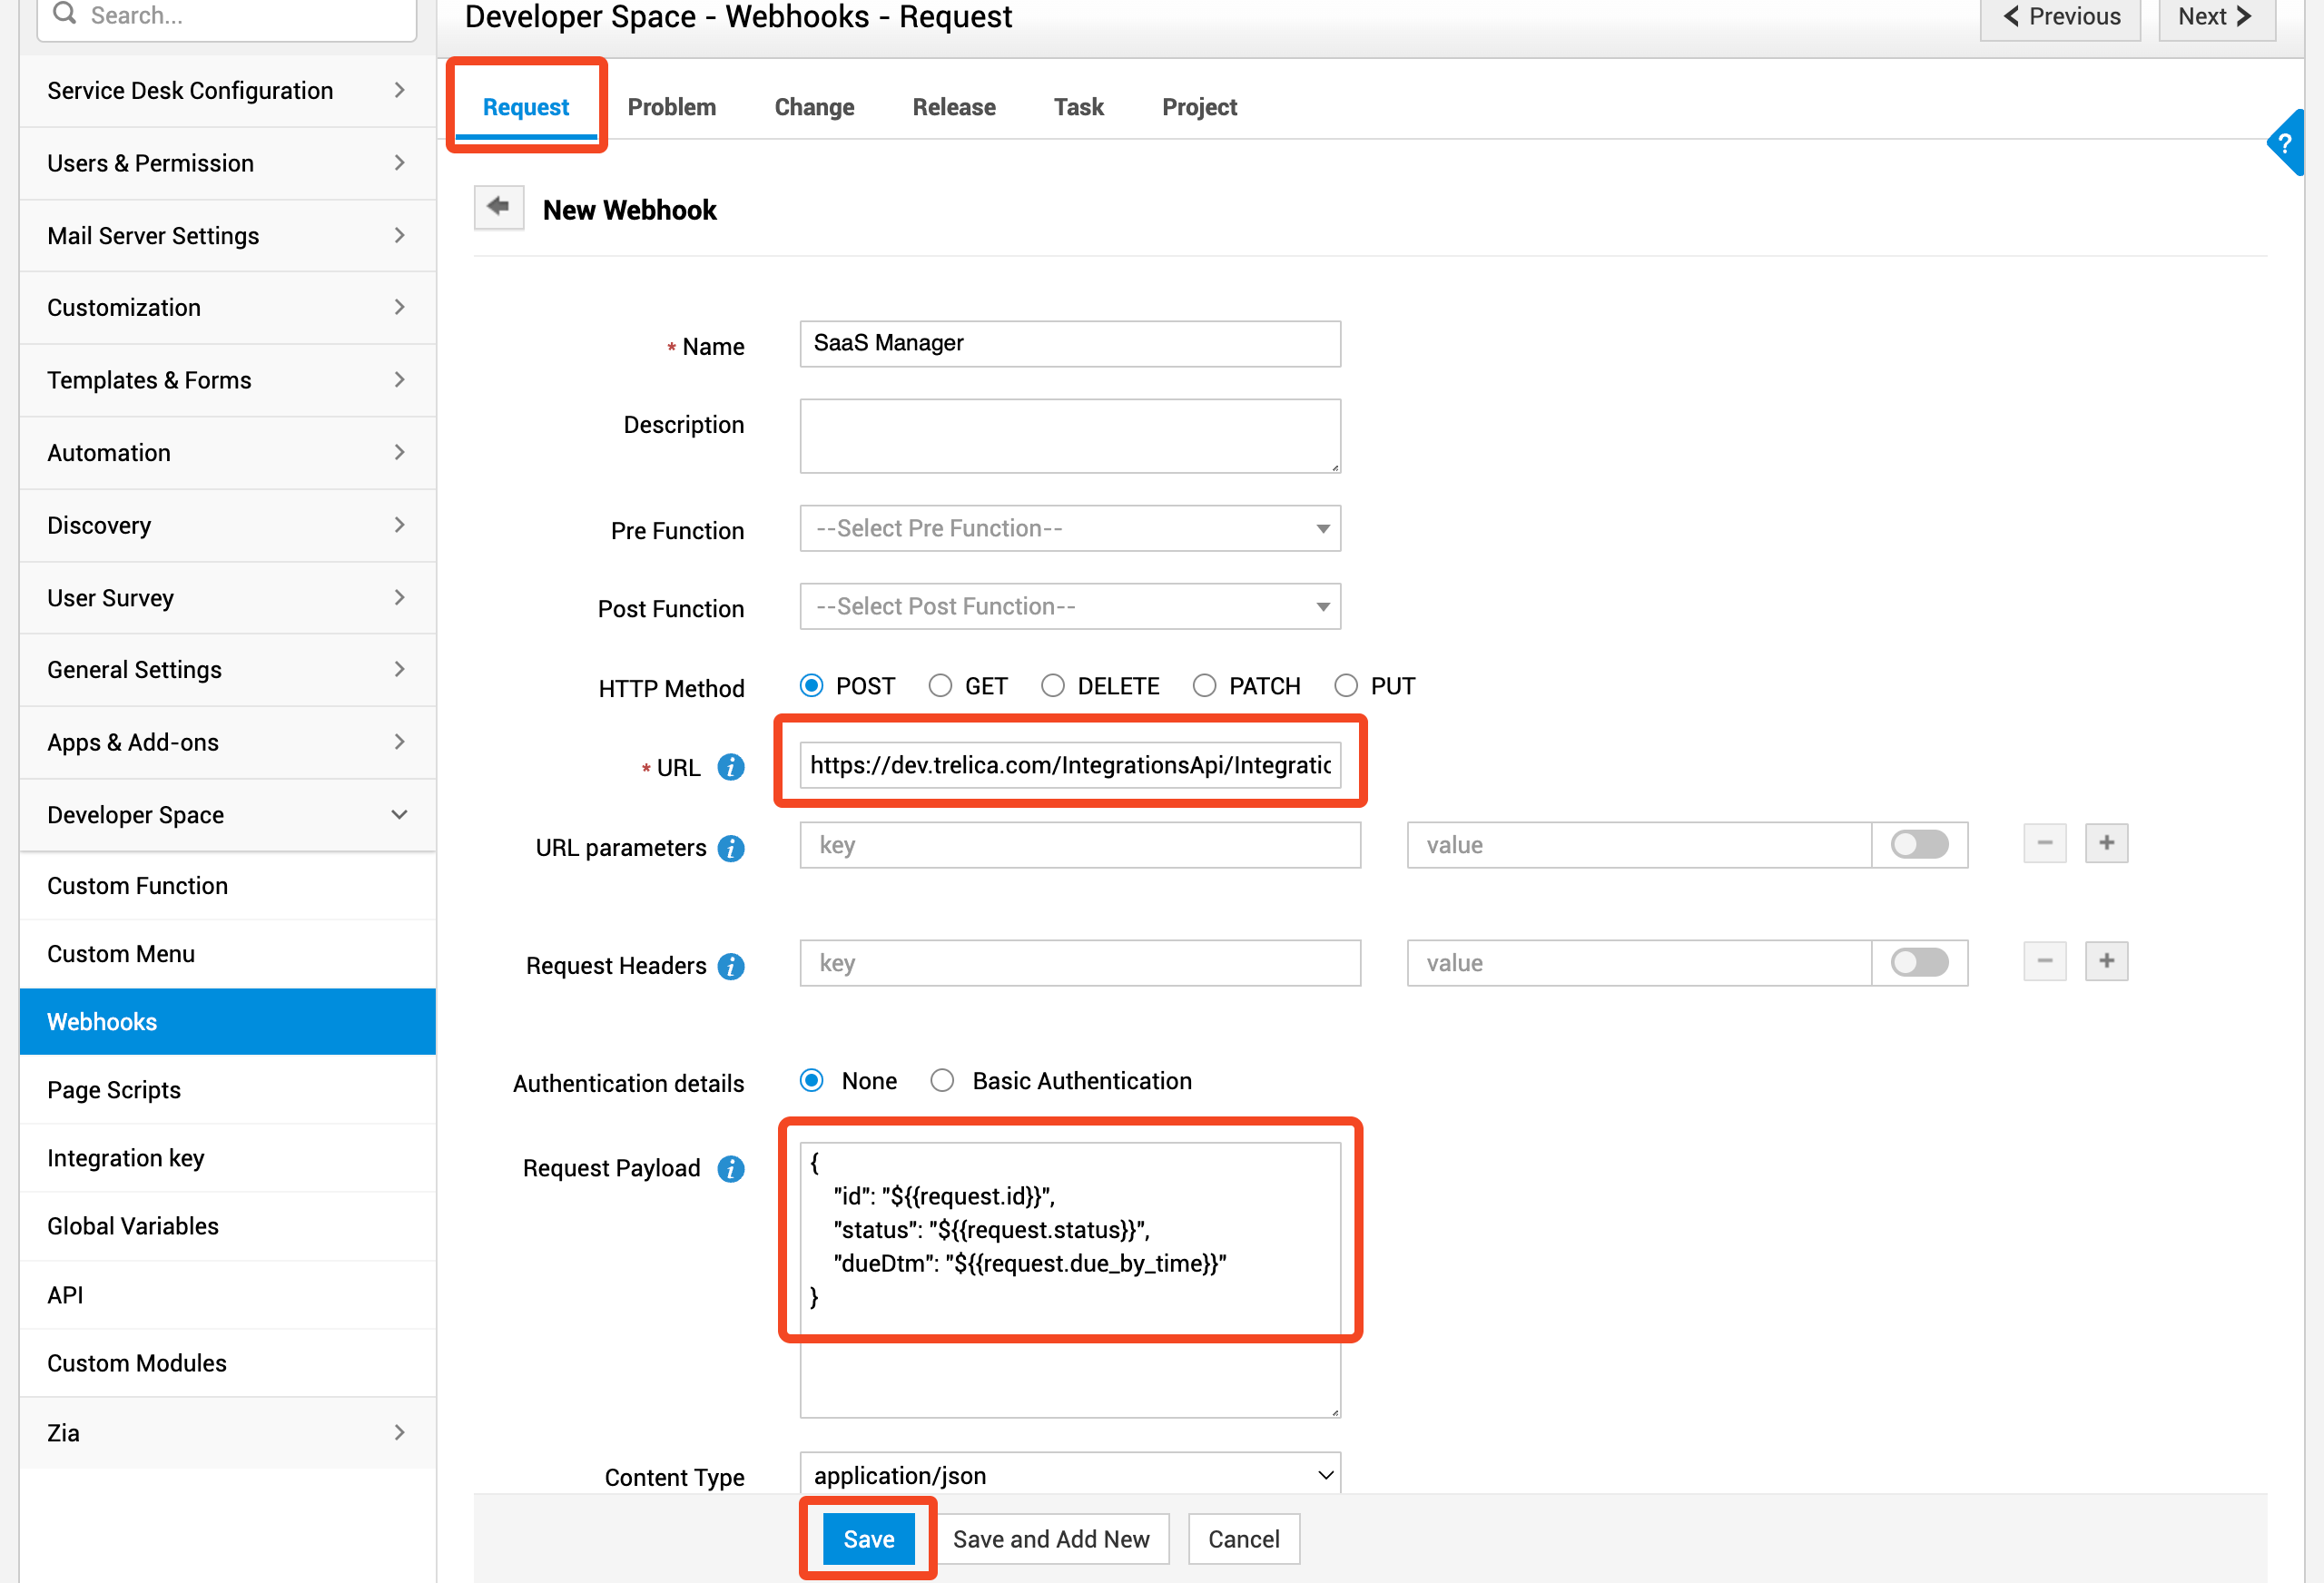
Give the webhook a name (for example ‘SaaS Manager’)
Make sure the HTTP Method is set to POST.
Paste in the Callback URL that you took from SaaS Manager earlier in these instructions.
Paste in the following block:
{
    "id": "${{request.id}}",
    "status": "${{request.status}}",
    "dueDtm": "${{request.due_by_time}}"
}
Make sure that the Content type is application/json.
Save the webhook.
Creating the custom trigger
Go to Automation > Custom Triggers. Make sure that the Request tab is selected and click to create a new Trigger Group.
Call the group ‘SaaS Manager’.
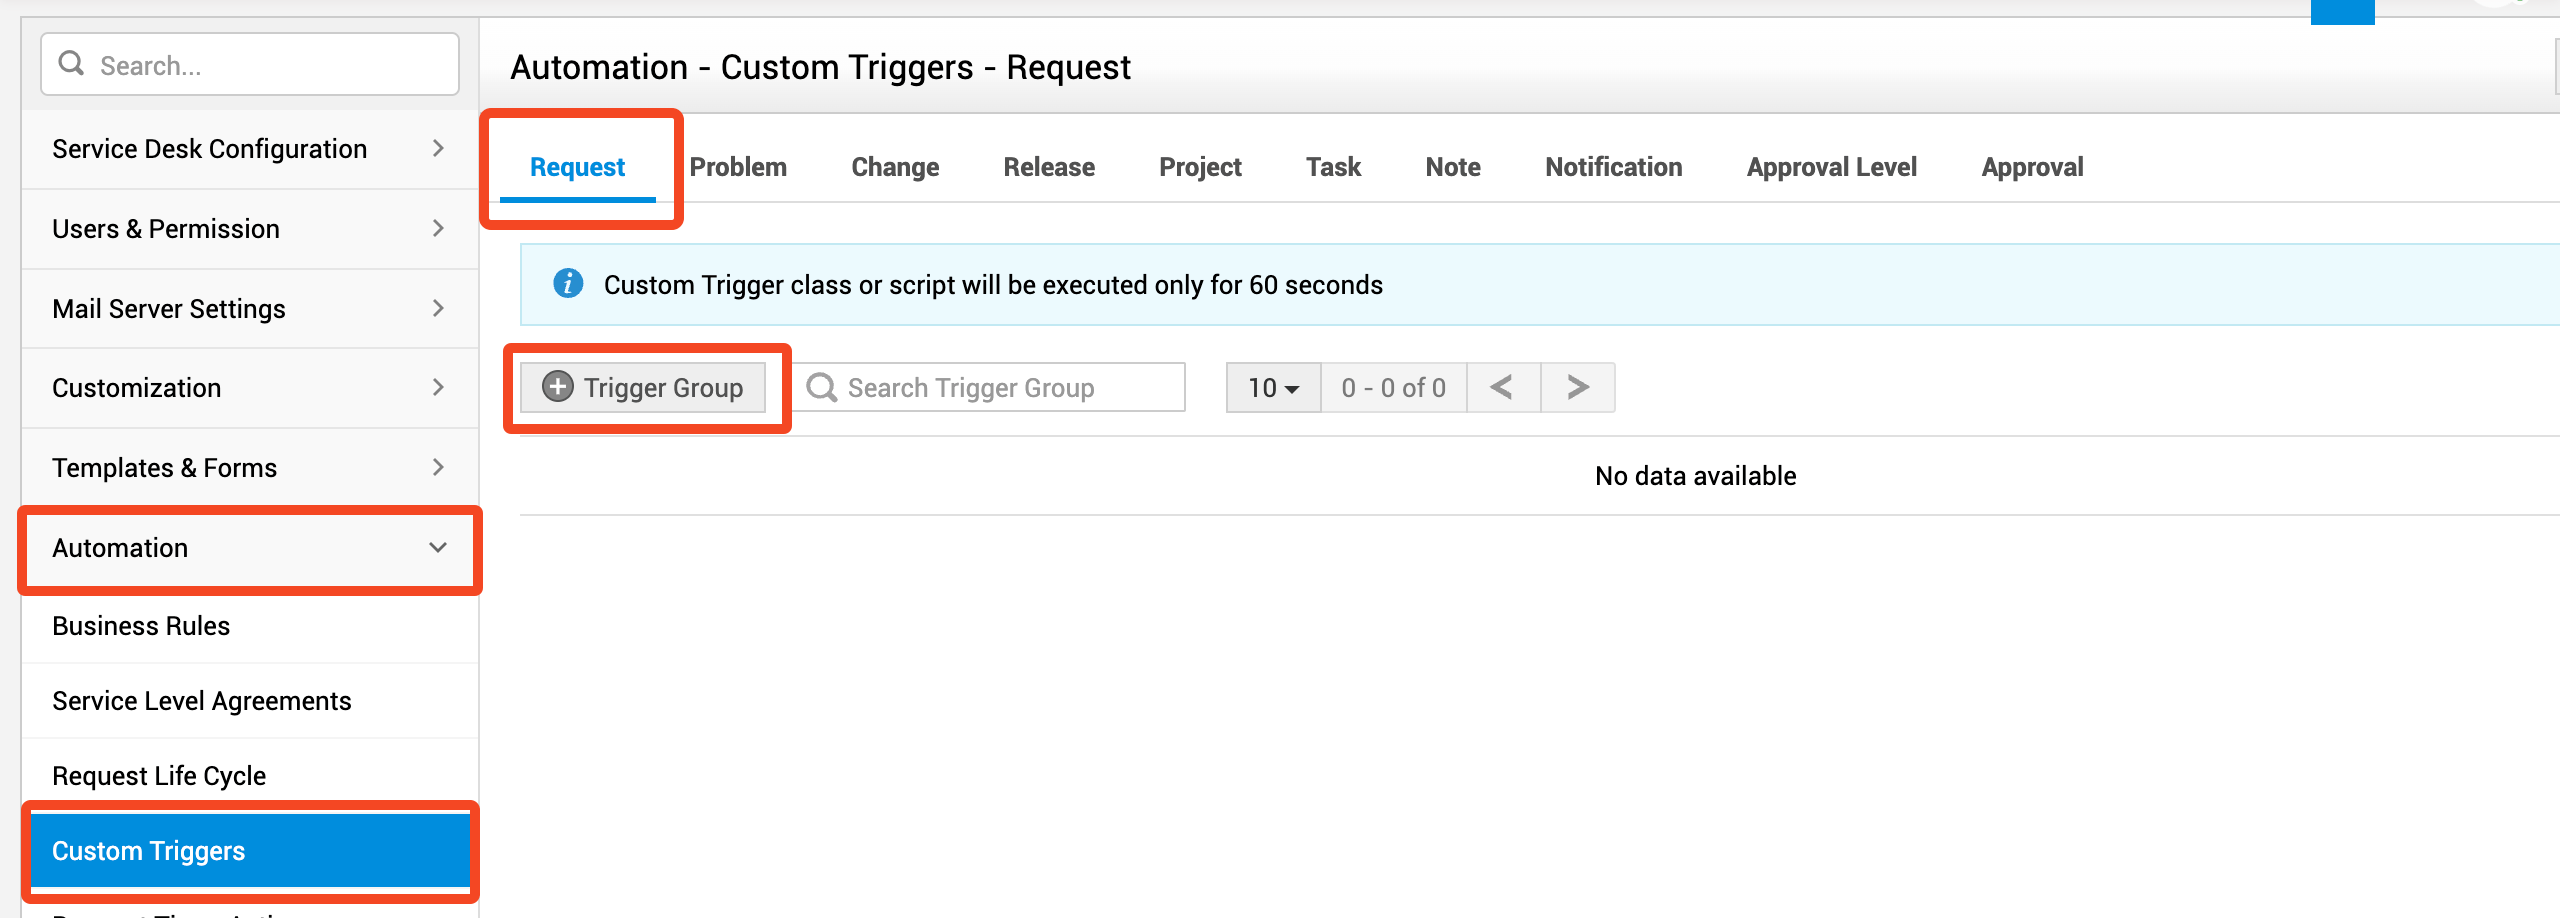
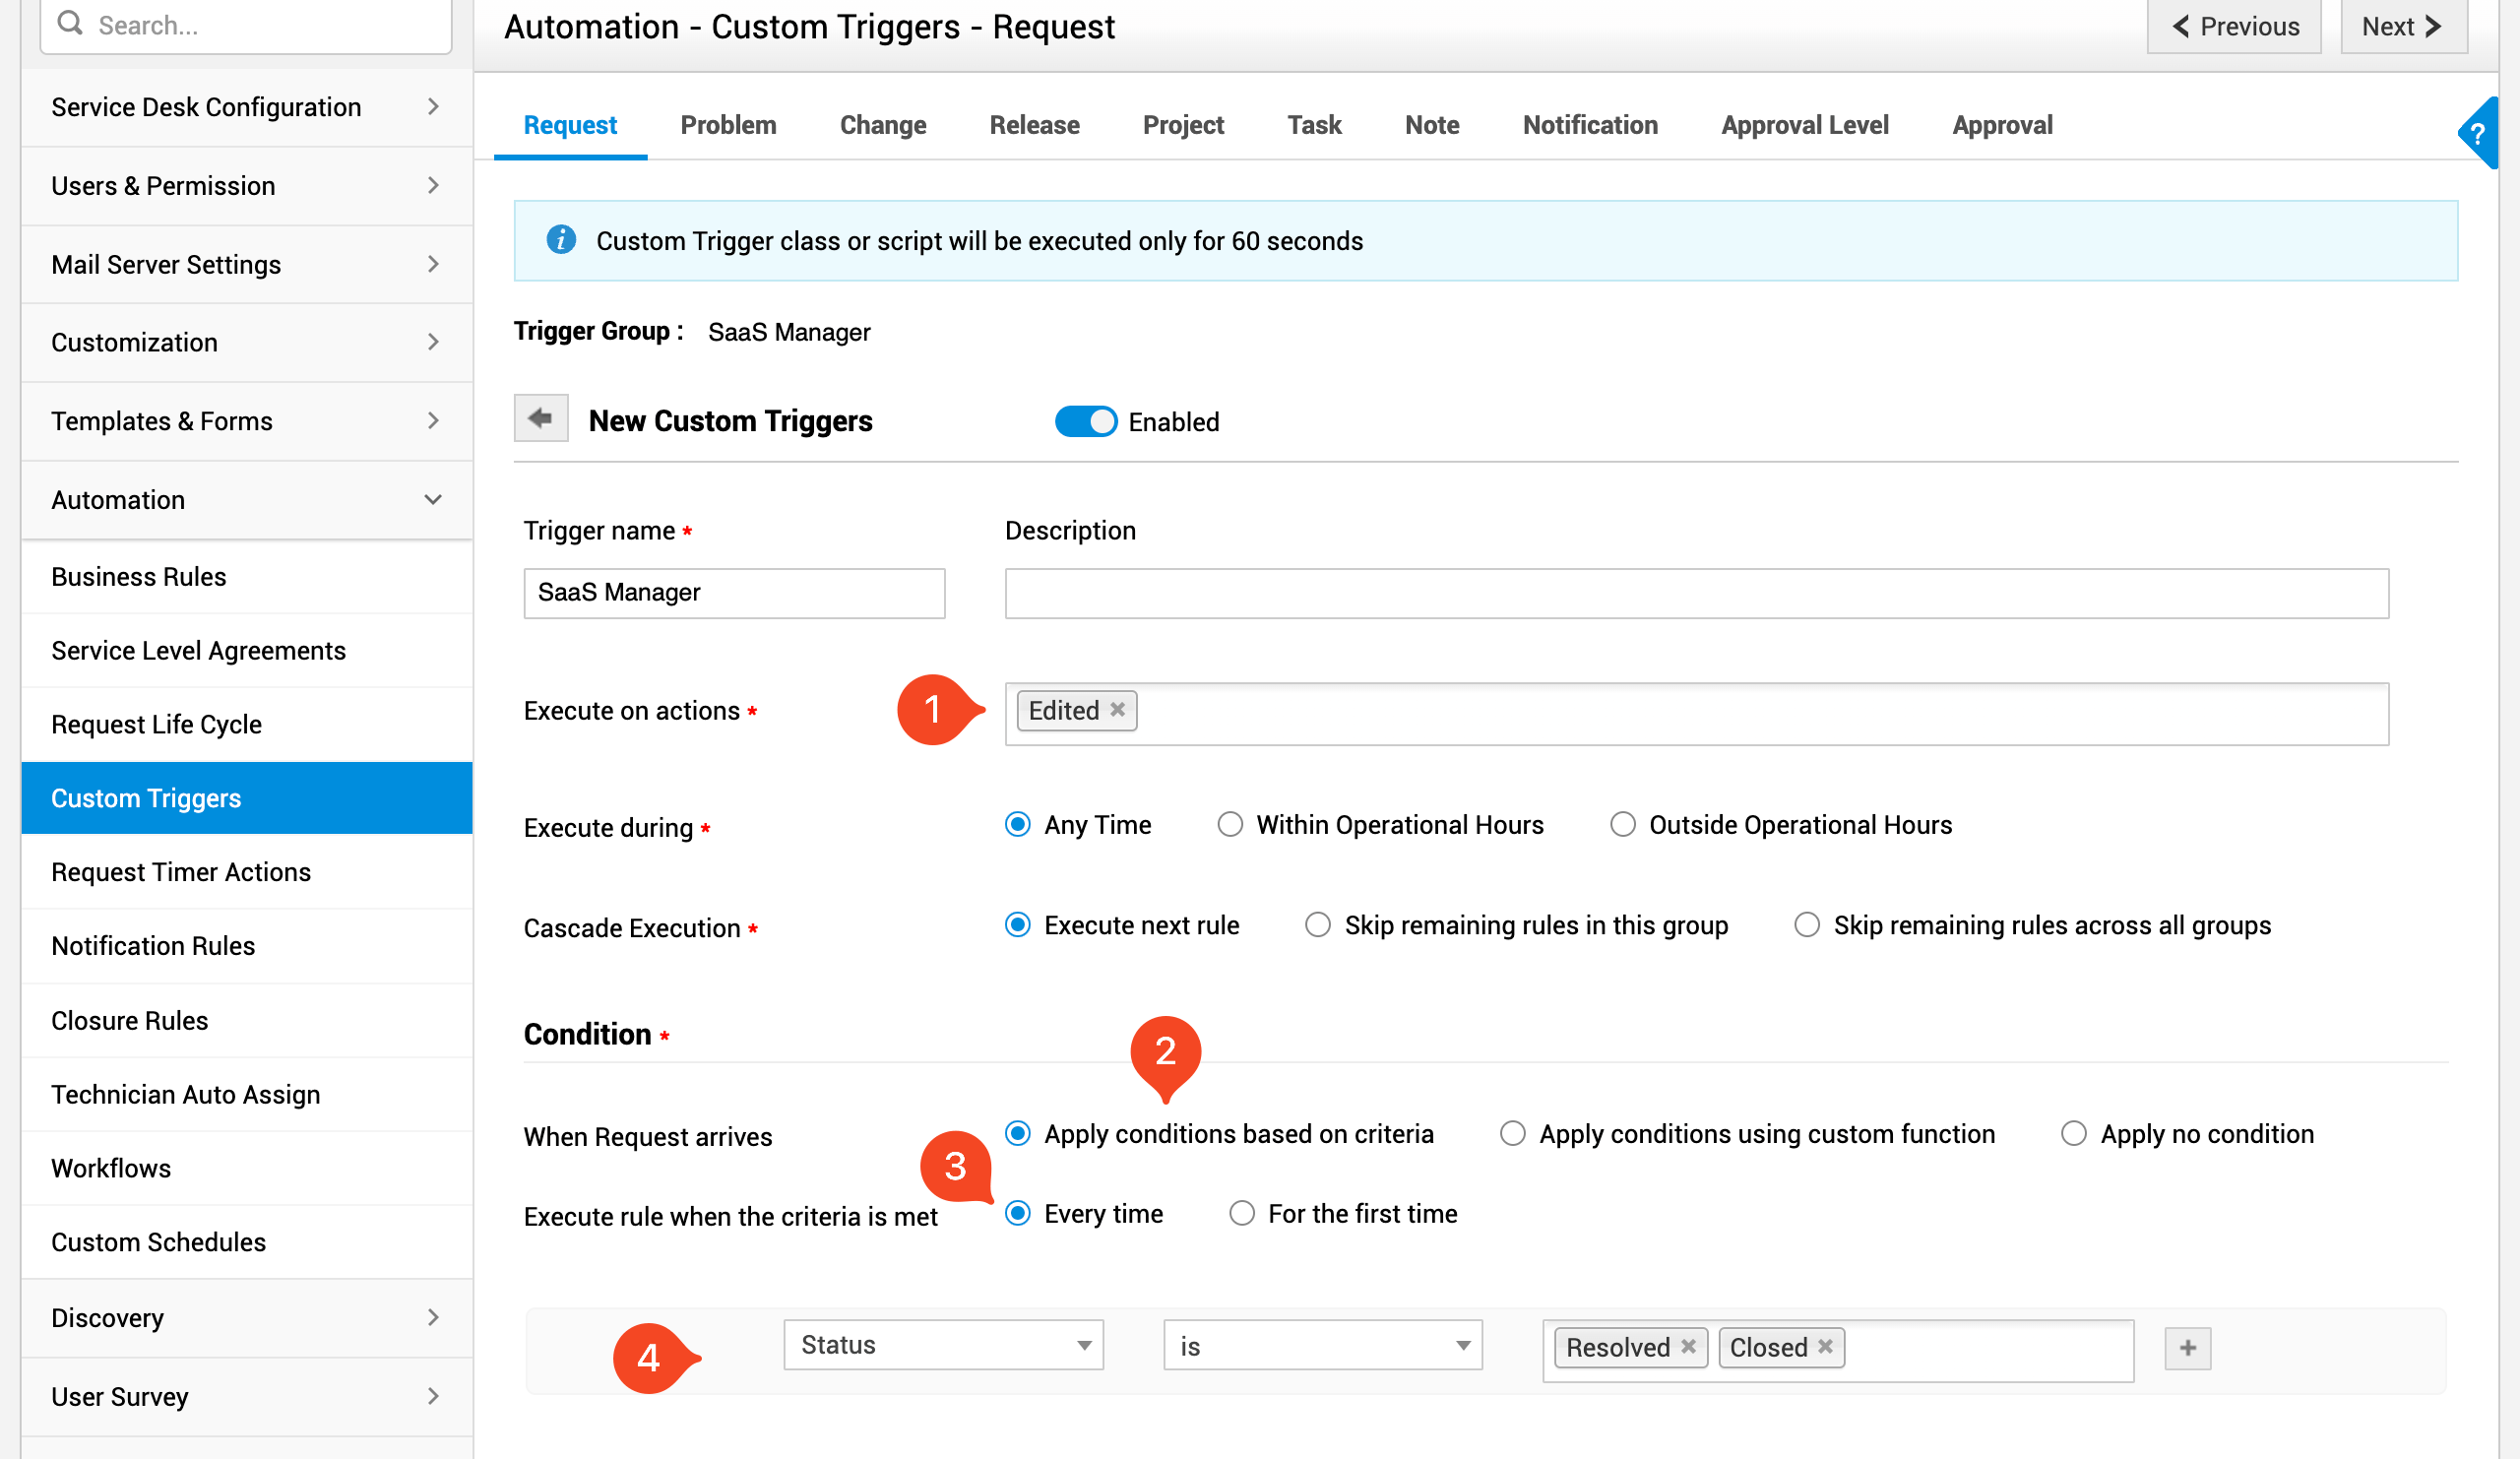
Select the group and click Add Trigger.
- Execute on Edited actions.
- Apply conditions based on criteria
- Make sure the rule executes Every time (otherwise it won’t pick up back-and-forth changes to and from Resolved and Closed states)
- The condition should include Status is Resolved or Closed and preferably some other differentiator. SaaS Manager sets a
SaaS Managertag on all requests it creates but unfortunately the Automation Triggers don’t offer this option.
Click Select Custom Action, select Webhook:
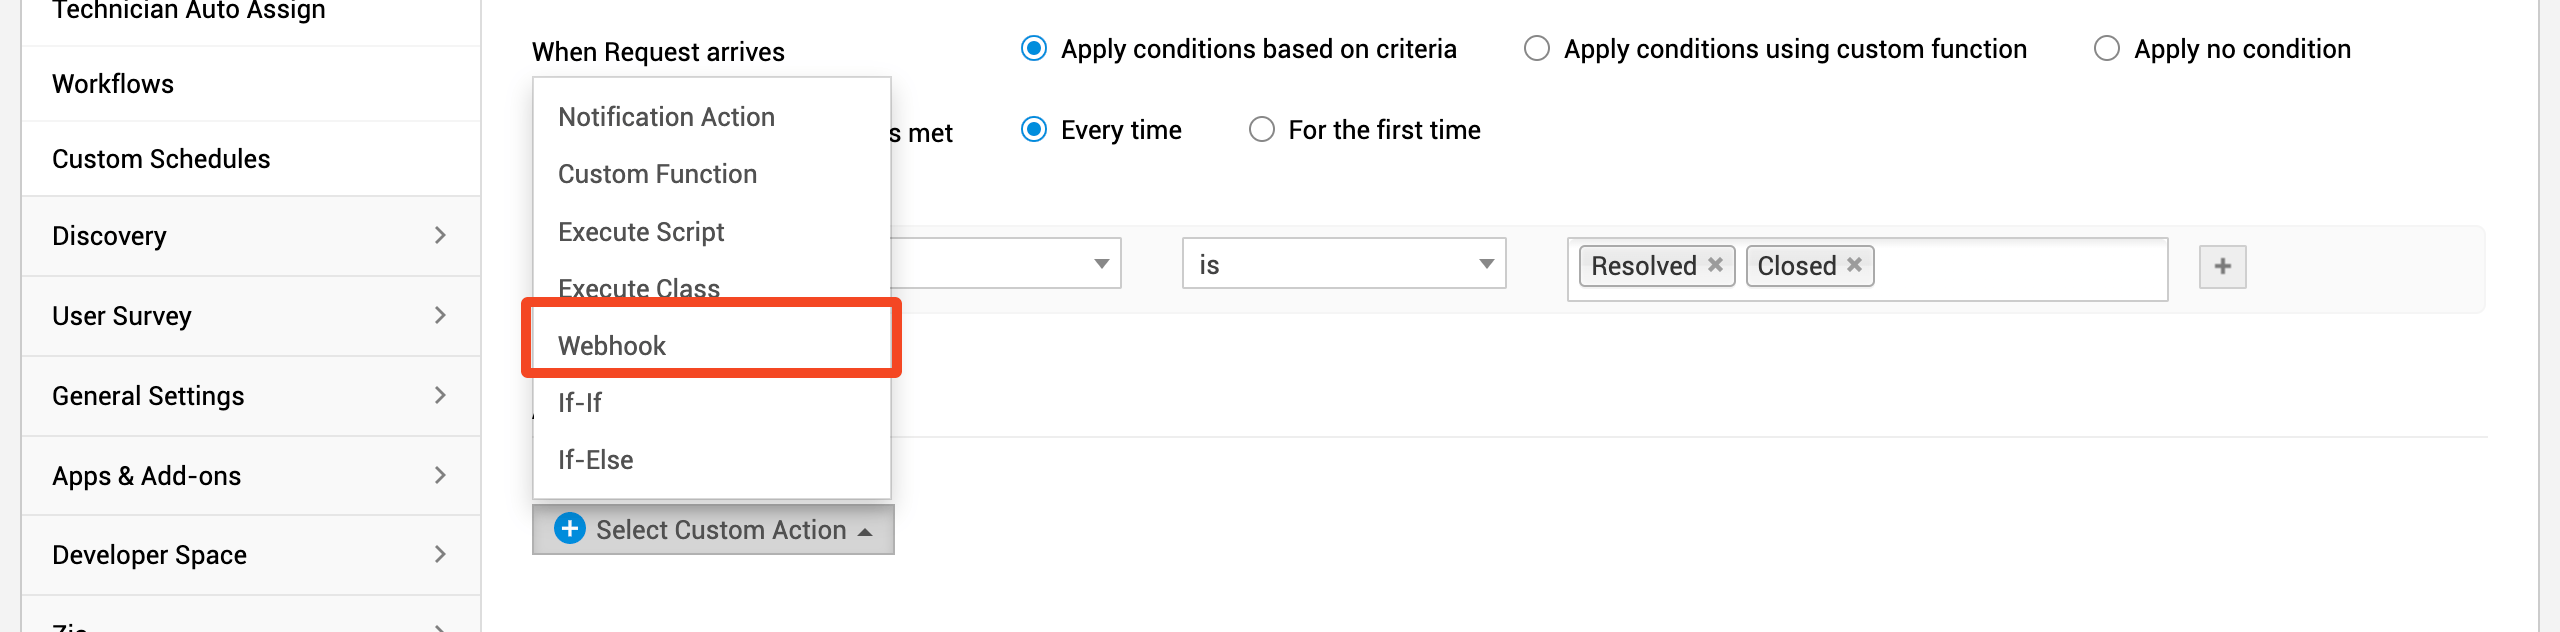
Select the webhook you just created, and click Save.
Was this article helpful?
Glad to hear it! If you have anything you'd like to add, feel free to contact us.
Sorry to hear that. Please contact us if you'd like to provide more details.