Tip
Universal Autofill requires 1Password 8 for Mac. If you’re using 1Password 7 or earlier, learn how to upgrade.
With 1Password and Universal Autofill, you can fill your usernames and passwords everywhere you need to sign in on your Mac:
- in all your apps and websites
- anywhere you’re asked to log in as an administrator on your Mac
- when you run
sudocommands in your terminal app
To get started, set up Universal Autofill on your Mac.
Set up Universal Autofill
Before you can use 1Password for Mac to autofill your information in apps and browsers, you’ll need to download and set up 1Password on your Mac. Then follow these steps:
- Select the Apple menu > System Settings from the menu bar.
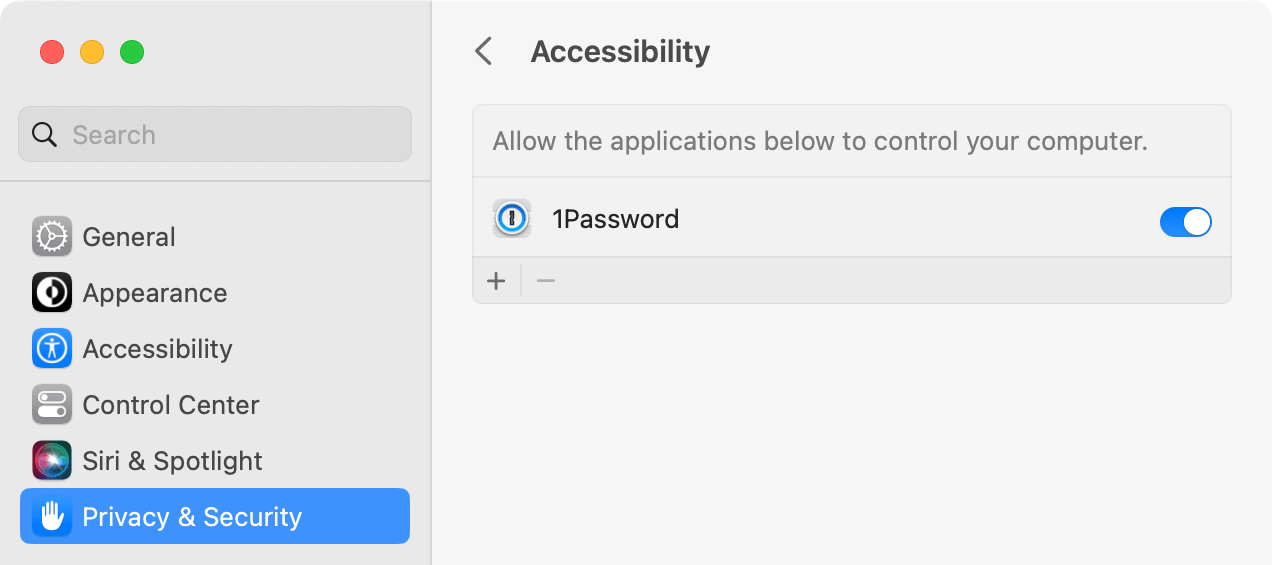
- Select Privacy & Security in the sidebar, then select Accessibility in the list.
- Select the toggle
beside 1Password, then enter the password you use to log in to your Mac.
If you don't see 1Password, select the + button, enter the password you use to log in to your Mac, then select the 1Password app in your Applications folder and select Open.
From now on, you’ll be able to use 1Password for Mac to fill your usernames and passwords without opening the 1Password app.
Fill in apps and browsers
Use the Command-Backslash (\) keyboard shortcut to autofill your usernames and passwords in your favorite apps and websites.
If you only have one login saved for an app or website, 1Password will fill it automatically.
If you have more than one login saved for an app or a website, Quick Access will open so you can choose the one you want to fill.
Get help if you’re having trouble filling in apps and browsers.
Autofill your Mac login
You can also use 1Password to fill your Mac login any time you’re asked to log in with an administrator account on your Mac, like when you want to change a system preference or use sudo commands in Terminal or iTerm2.
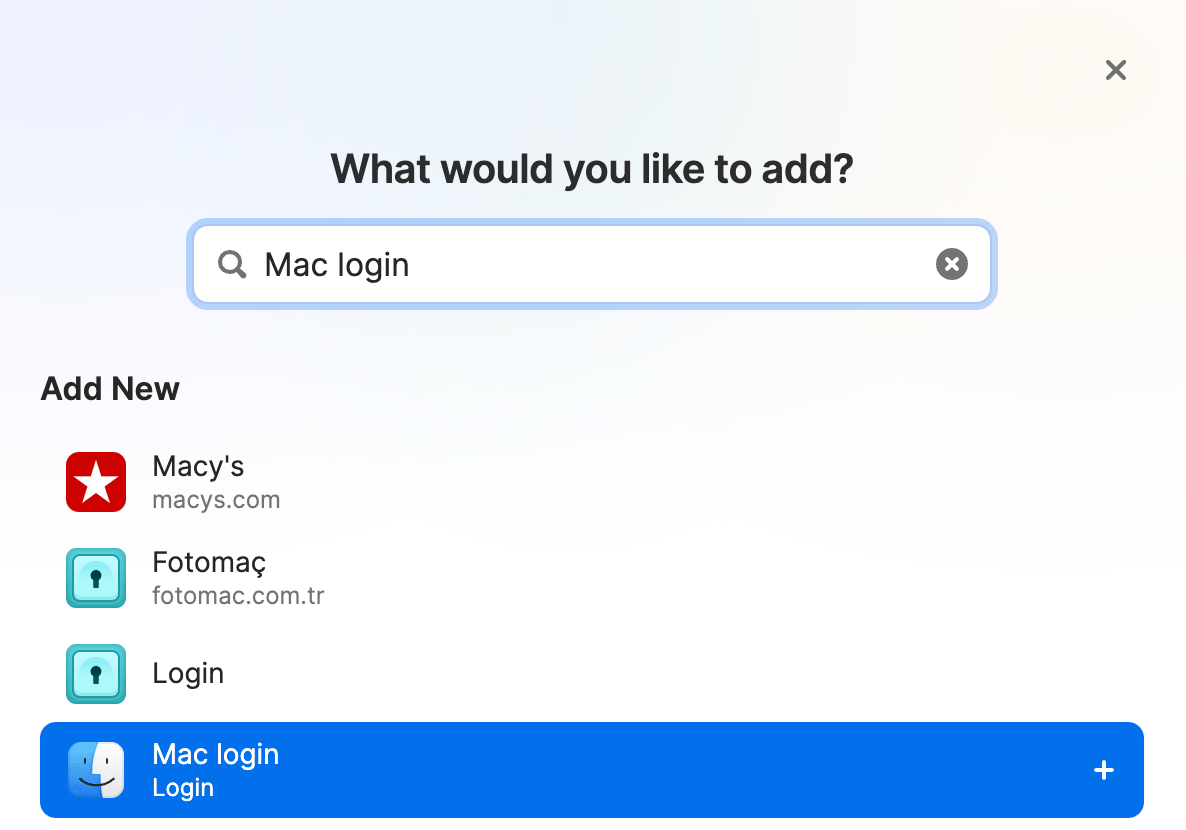
Create a Mac login item, if you don’t already have one saved in 1Password:
- Open and unlock 1Password.
- Select New Item, search for “Mac login”, and select it.
- Your Mac username will be filled automatically. Enter your password and select Save.
From now on, you’ll be able to use the Command-Backslash (\) keyboard shortcut to autofill your Mac login anywhere you need it.
If you’re using Terminal or iTerm 2, enter a sudo command and use the Command-Backslash (\) keyboard shortcut to autofill your Mac login.
The first time fill your password, you’ll see a message that 1Password wants to control your terminal app. Select OK to turn on the Automation preference for 1Password.
Get help if you don’t see a message to allow 1Password to fill logins in your terminal.

Get help
If you can’t use the Command-Backslash (\) keyboard shortcut to fill in an app or browser, use Quick Access (Shift-Command-Space) to find and fill your logins. If you’re still having trouble, you can copy your passwords from 1Password for Mac and paste them where you need to use them.
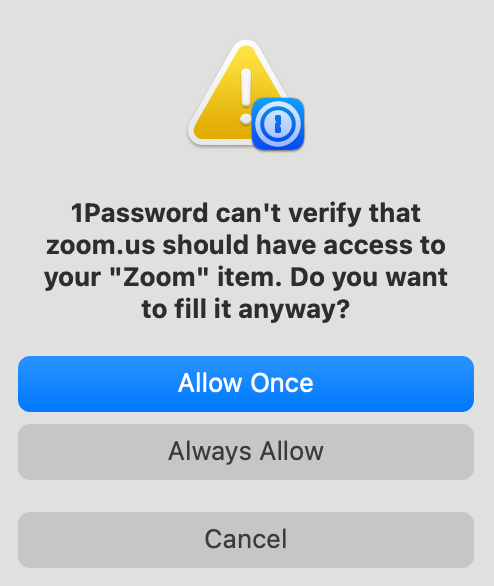
If you see a message that asks if you want to link your 1Password item to an app, or that 1Password can’t verify a site should have access to your item, you can choose what you want 1Password to do:
- Allow Once: 1Password will fill your details in the app or website one time.
- Always Allow: 1Password will fill your login in the app or website and update your 1Password item to link it to the app or site. You can then autofill your details every time you log in to the same app or website.
- Cancel: 1Password won’t fill your login in the app or website and won’t update your 1Password login.
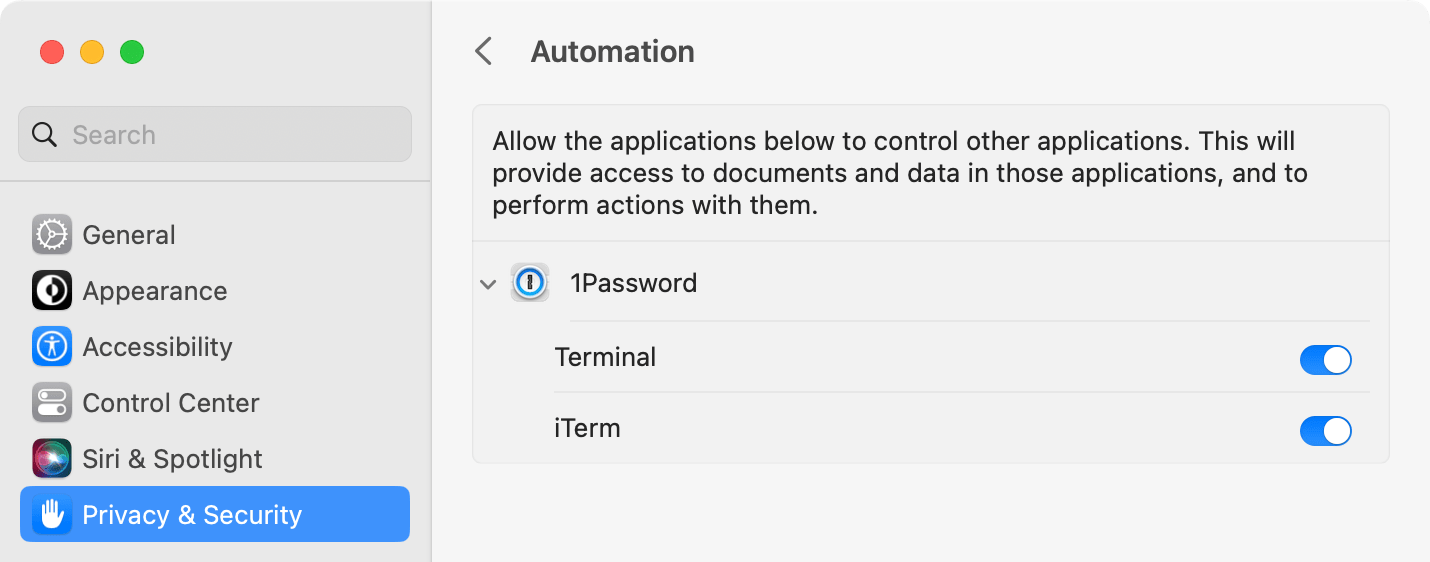
If you don’t see a message to allow 1Password to fill logins in your terminal app, follow these steps to turn on the Automation setting:
- Select the Apple menu > System Settings from the menu bar.
- Select Privacy & Security in the sidebar, then select Automation in the list.
- Select the right arrow beside 1Password, then select the checkbox for Terminal or iTerm.
To manage whether 1Password submits forms automatically after filling them:
- Open and unlock 1Password.
- Select your account or collection at the top of the sidebar > Settings.
- Select General, scroll down, and turn off Submit automatically with Universal Autofill.
Learn more
- Get to know Quick Access
- About macOS Privacy & Security settings for Universal Autofill
- 1Password keyboard shortcuts
- Get to know 1Password for Mac
- Get started with 1Password in your browser
Was this article helpful?
Glad to hear it! If you have anything you'd like to add, feel free to contact us.
Sorry to hear that. Please contact us if you'd like to provide more details.