1Password can import your passwords and other items from Bitwarden. When you import from Bitwarden:
- Your Bitwarden logins will be converted into 1Password Login items.
- Credit cards, identities, and secure notes will be imported.
- Passkeys and items in shared collections won’t be imported.

Step 1: Export your data from Bitwarden
To export your data from Bitwarden, follow these steps on your computer:
- Open your browser and sign in to your account on Bitwarden.com.
- Select Tools > Export vault in the sidebar.
- Select .json (Encrypted) in the “File format” dropdown menu, then select Password protected.
CSV files can only be imported in the 1Password apps. Unencrypted JSON and account restricted exports aren’t currently supported.
- Create a strong, memorable password and paste it into the password fields, then select Confirm format.
- Enter your Bitwarden password, then select Export vault.
- Save the
bitwarden_encrypted_export_*.jsonfile to your device.
Step 2: Import your data into 1Password
In the 1Password apps
- Open and unlock 1Password.
- Select File > Import from the menu bar.
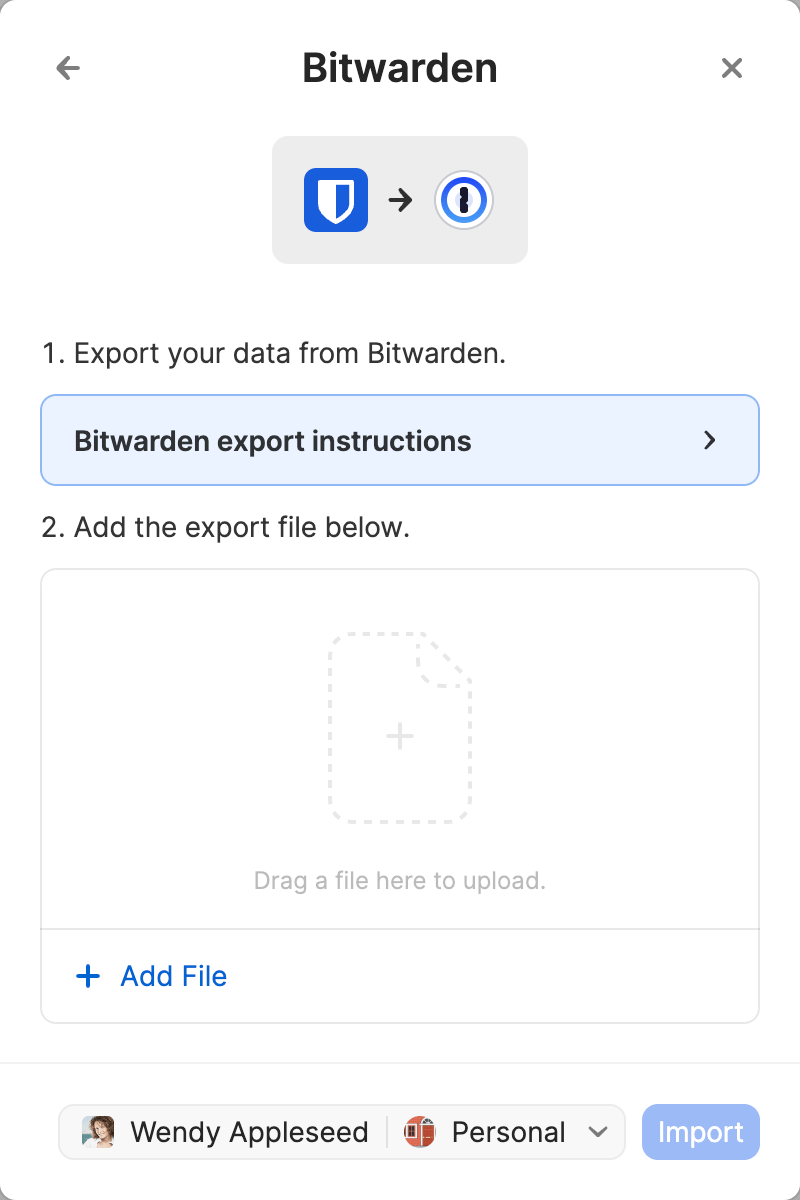
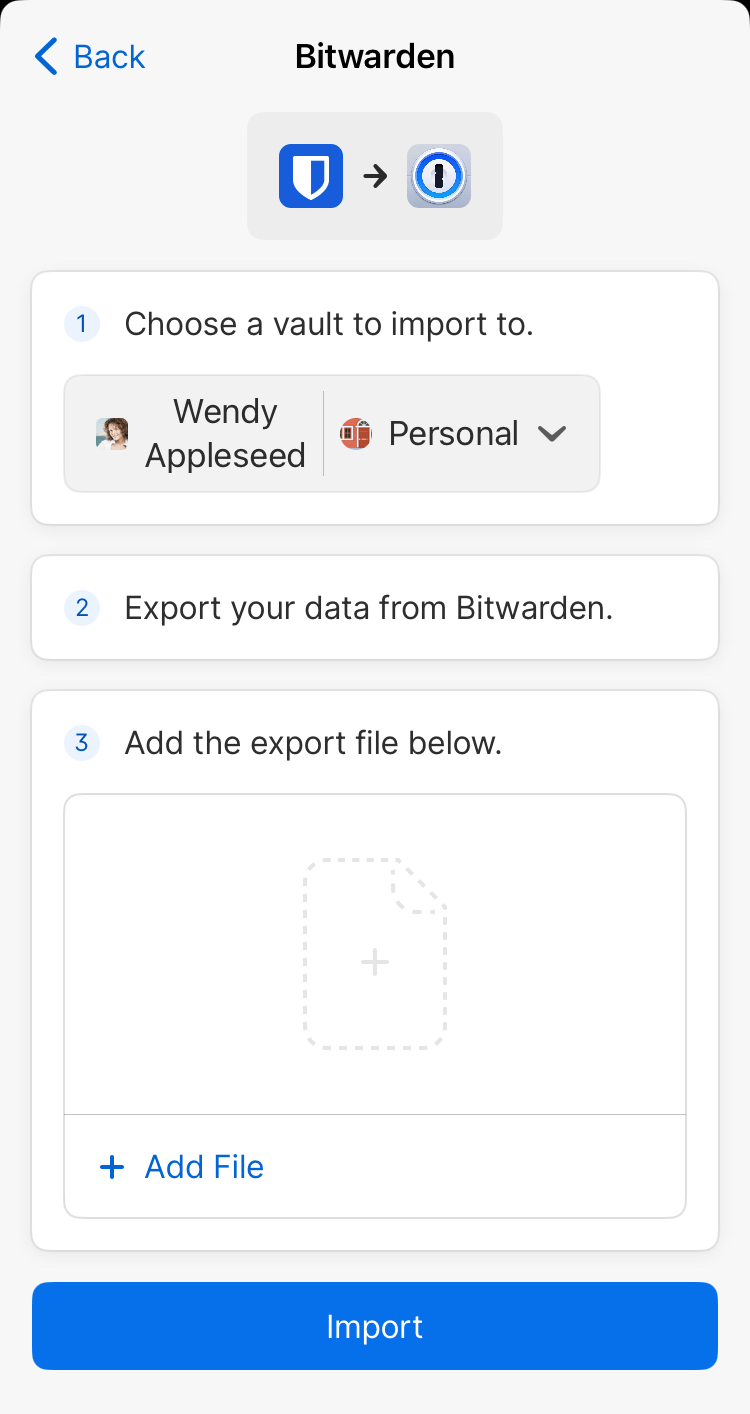
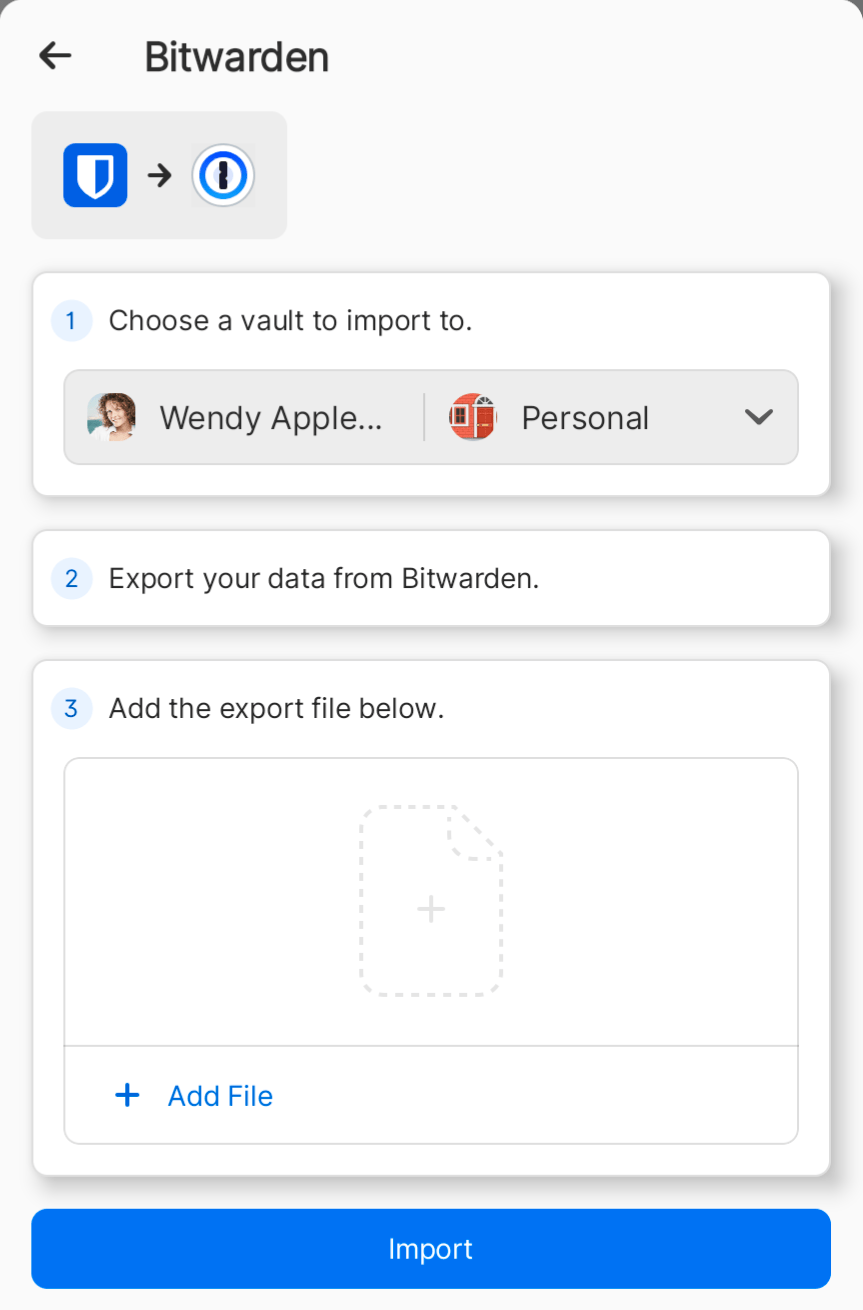
- Select Bitwarden.
- Choose the vault you want to import your data into. If you’re importing data you don’t want to share with other people, select the Personal, Private, or Employee vault. The name of this vault varies depending on your account type.
- Select Add File, then locate and select the export file you saved earlier.
- Copy the strong, memorable password you created earlier and paste it into the password field.
- Select Import, then select OK.
- Open and unlock 1Password.
- Select
 , then select Migrate data into 1Password.
 - Select Bitwarden.
- Choose the vault you want to import your data into. If you’re importing data you don’t want to share with other people, select the Personal, Private, or Employee vault. The name of this vault varies depending on your account type.
- Select Add File, then locate and select the export file you saved earlier.
- Copy the strong, memorable password you created earlier and paste it into the password field.
- Select Import, then select OK.
- Open and unlock 1Password.
- Select New Item, then select Migrate data into 1Password.
- Select Bitwarden.
- Choose the vault you want to import your data into. If you’re importing data you don’t want to share with other people, select the Personal, Private, or Employee vault. The name of this vault varies depending on your account type.
- Select Add File, then locate and select the export file you saved earlier.
- Copy the strong, memorable password you created earlier and paste it into the password field.
- Select Import, then select OK.
- Open and unlock 1Password.
- Select New Item, then select Migrate data into 1Password.
- Select Bitwarden.
- Choose the vault you want to import your data into. If you’re importing data you don’t want to share with other people, select the Personal, Private, or Employee vault. The name of this vault varies depending on your account type.
- Select Add File, then locate and select the export file you saved earlier.
- Copy the strong, memorable password you created earlier and paste it into the password field.
- Select Import, then select OK.
On 1Password.com
- Open your browser and sign in to your account on 1Password.com.
- Select your name in the top right and select Import data
- Choose Bitwarden and follow the onscreen instructions.
If you want to change anything about the import, like importing the data into a different vault, select Undo Import and start again.
Important
After you’ve imported your information into 1Password, delete the export file from your device.
Next steps
- Uninstall the Bitwarden app and extension to avoid conflicts with 1Password.
- Get 1Password in your browser to save logins and sign in to websites.
Get help
If your KDF algorithm in Bitwarden is set to Argon2id , you’ll see an error when you try to import your data. To resolve this issue, change your KDF algorithm to PBKDF2, then repeat the steps to export and import your data.
Was this article helpful?
Glad to hear it! If you have anything you'd like to add, feel free to contact us.
Sorry to hear that. Please contact us if you'd like to provide more details.