Tip
If you’re using Chrome, Firefox, Safari, Dashlane, LastPass, RoboForm, or Thycotic Secret Server, there’s an easier way to import your data.
Many applications provide the option to export data using the comma-separated values (CSV) file format. To learn how to export to a CSV file, check the documentation for your app.
Important
Before you export your data from your old password manager, temporarily turn off any backup software you may be using, so the unencrypted export file isn’t backed up.
Step 1: Prepare your CSV file
Before you import a CSV file into 1Password, make sure the data is formatted and organized correctly by opening the file in a text editor, like TextEdit on a Mac or Notepad on a Windows PC, and following these guidelines:
- Each line in the CSV file should contain a login, credit card, or secure note, including any required fields:
- For each login, a username, password, and website field is required.
- For each credit card, a credit card number and expiry date field is required.
- For each secure note, a title field is required.
- Each line that contains a specific type of item must have fields in a consistent order. For example, each line containing a login should have usernames, passwords, and websites in the same order.
- Each line must have the same number of fields, even if they’re left empty.
- If a value contains a line break or comma (including within passwords), enclose it in quotation marks.
For example, here’s what a CSV file may look like with two logins, a credit card, and a secure note:
Twitter,https://twitter.com/,wendy_appleseed,d2o4dmLxKBKGdzxHAA
Google,https://google.com/,wendyappleseed@gmail.com,hud1djw@CQM0hpn8bnj
Debit Card,1234567898765432,08/24,123,Wendy Appleseed
Super Secret Journal,"This is an entry in my super secret journal, and no one else should read it."
Step 2: Upload your CSV file
- Open your browser and sign in to your account on 1Password.com.
- Select your name in the top right > Import data.
- Select CSV File and follow the onscreen instructions.
When you’re asked to confirm your item types, continue to the next step.
Step 3: Choose an item type
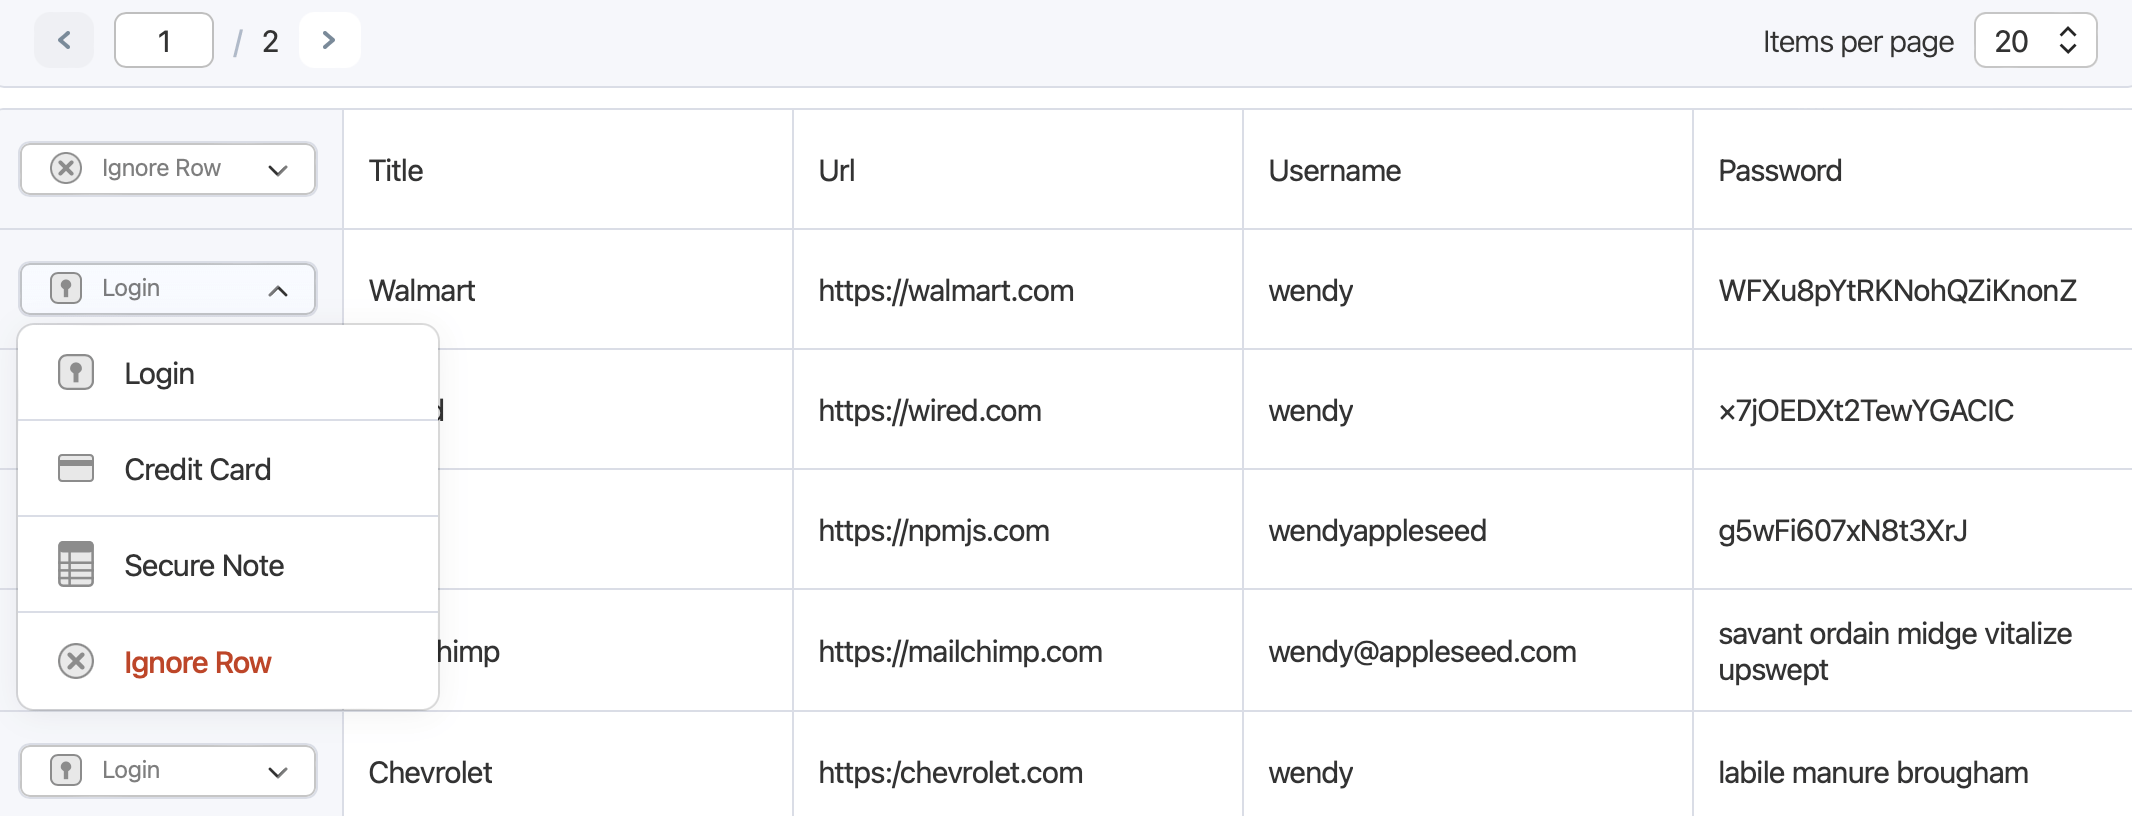
To make sure your items are formatted correctly, choose an item type for each row. To omit a row from the import, select Ignore Row, then select Continue.
Step 4: Organize your information
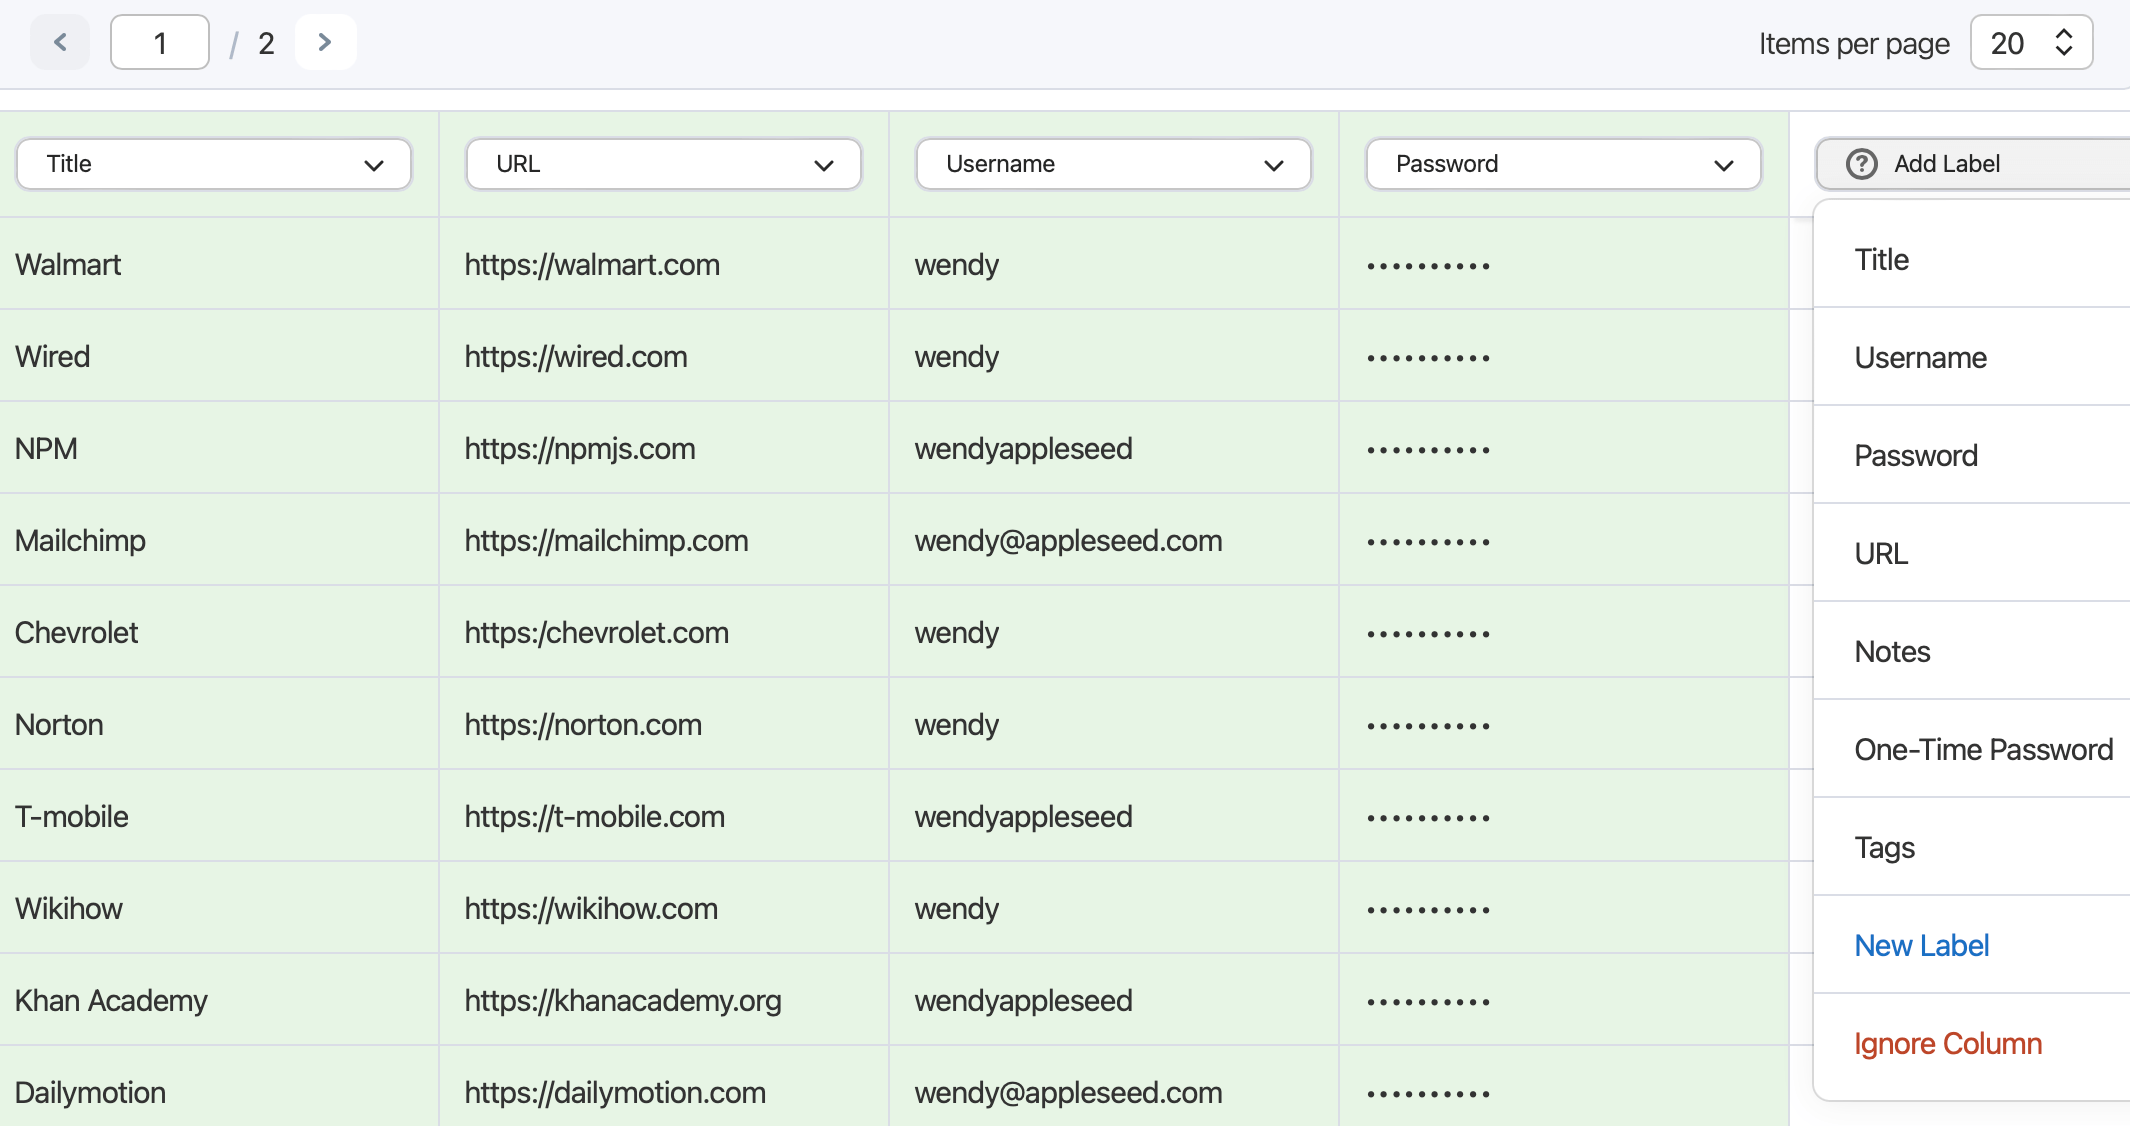
Label the information for each item type you chose:
- Select Add Label, then choose a label for at least one column.
- To create a label, select New Label.
- To leave the information unorganized, skip the label.
- To omit the information from the import, select Ignore Column.
- When you’re finished, select Continue, then select View imported items.
If you want to change anything about the import, like importing the data into a different vault, select Undo Import and start again.
Important
After you’ve imported your information into 1Password, delete the unencrypted CSV file, then turn on any backup software you turned off earlier.
Was this article helpful?
Glad to hear it! If you have anything you'd like to add, feel free to contact us.
Sorry to hear that. Please contact us if you'd like to provide more details.