Note
Restrictions allow Device Trust administrators to limit access to certain features or agent data sources within Device Trust.
Restricting features
There are two ways to restrict access to features in Device Trust.
Globally
When you restrict access to a feature, you disable it for every Device Trust administrator regardless of their access level. This means the feature will not be present in the UI and any background capabilities associated with that feature are disabled.
Note
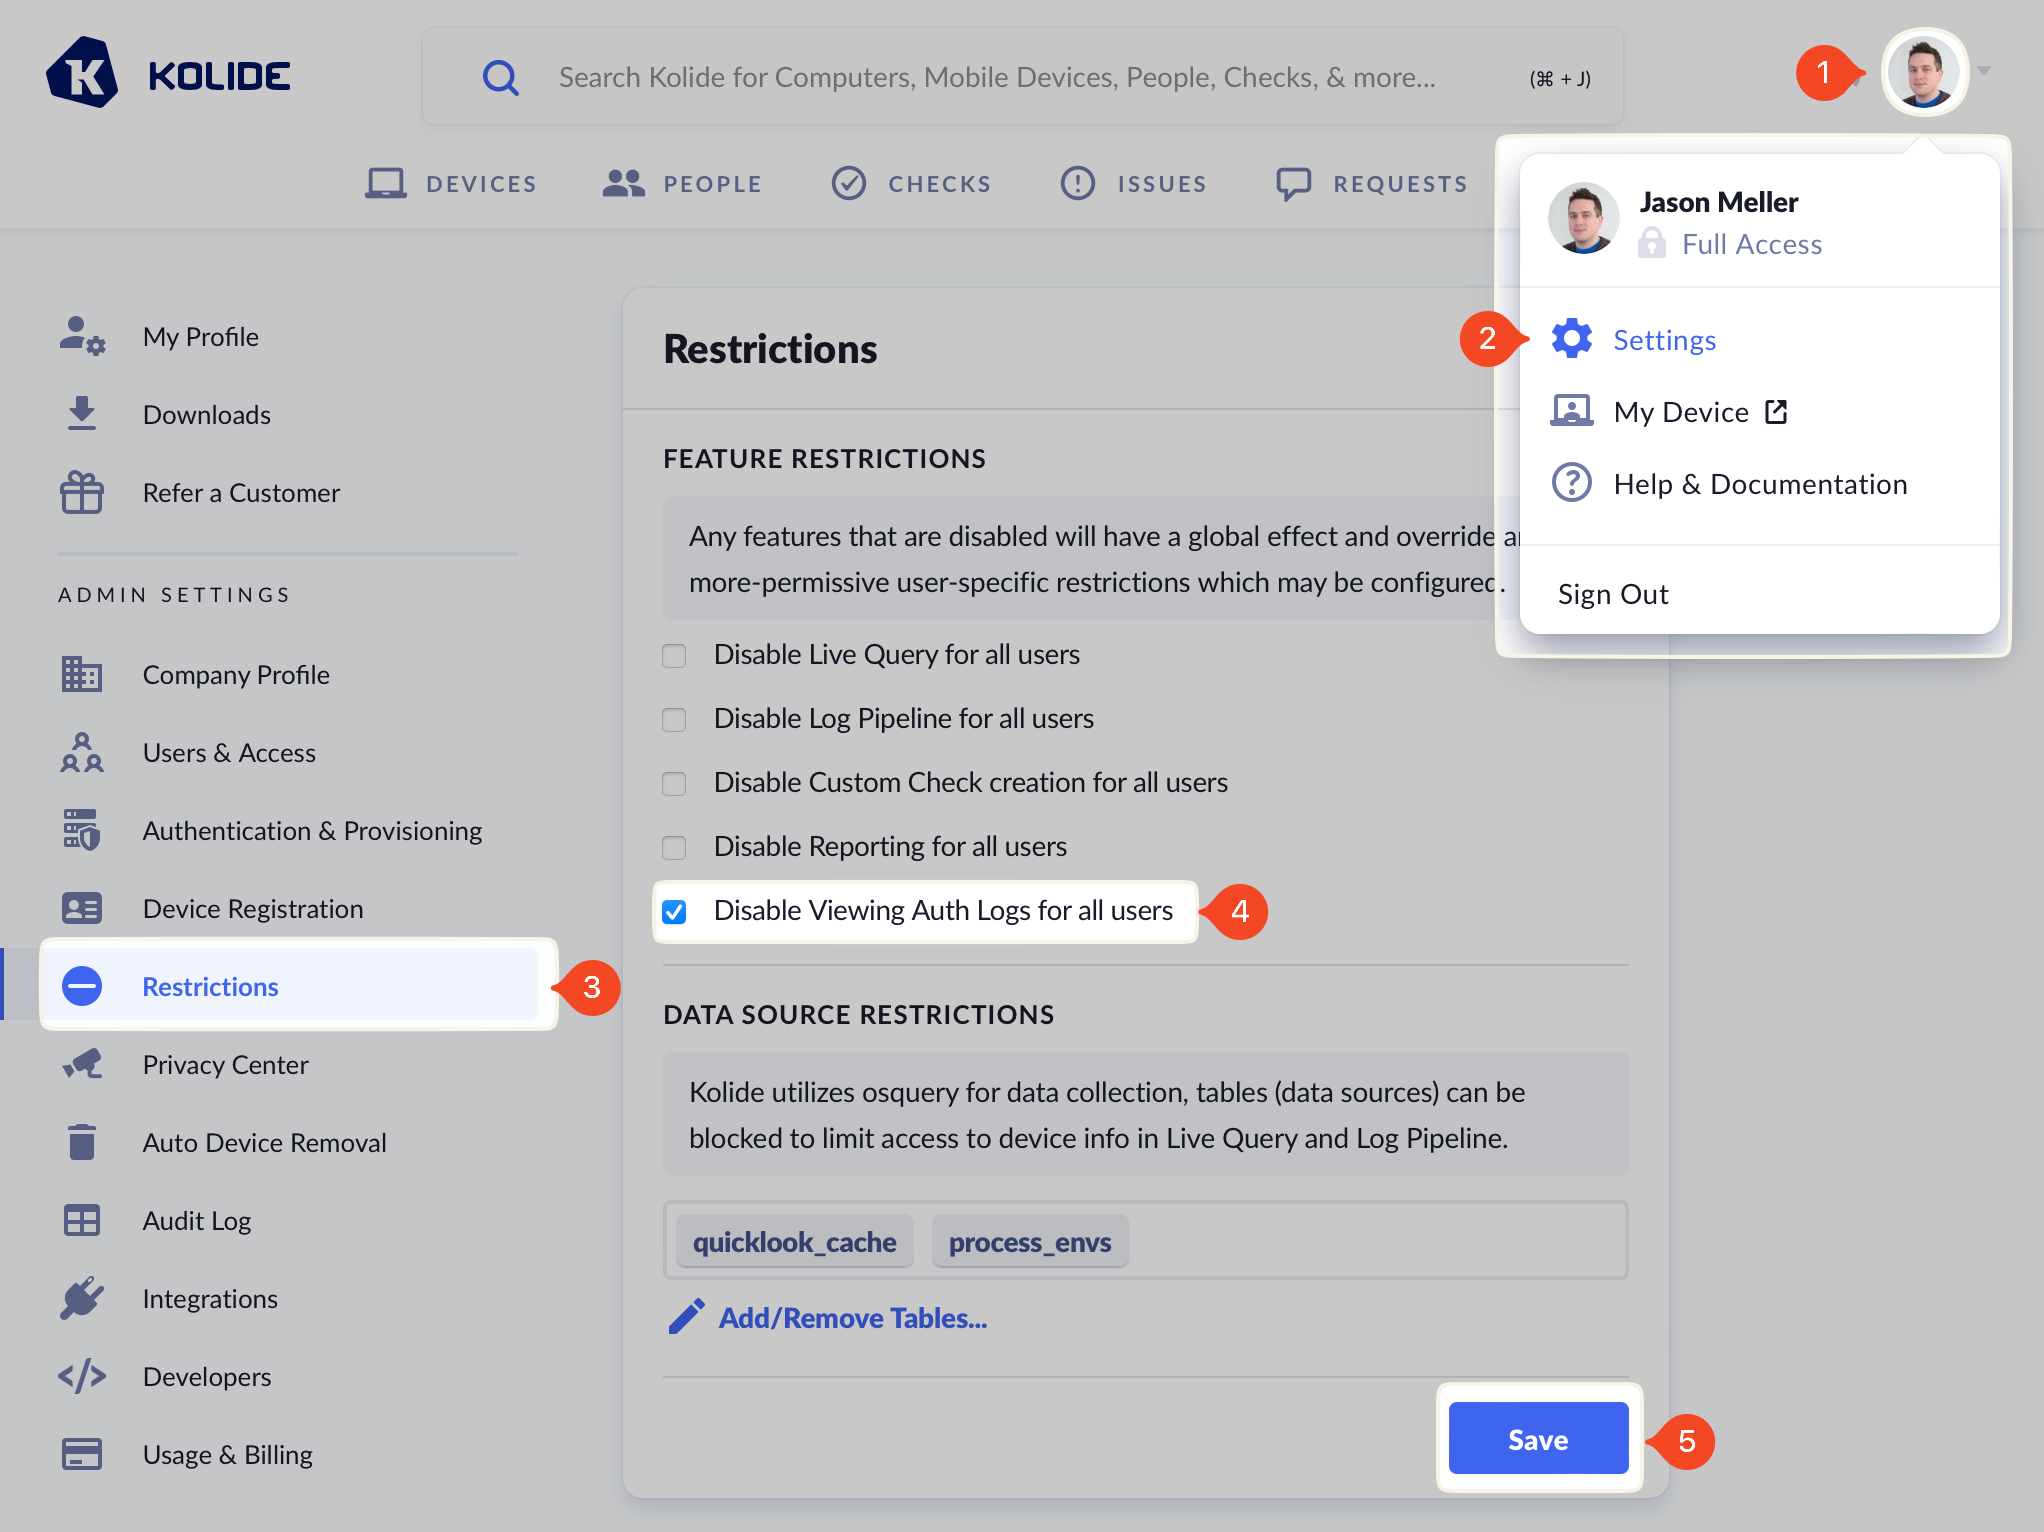
To restrict a feature, follow these steps:
- In the Device Trust admin console, click your user avatar in the upper-right corner.
- Click Settings.
- Click Restrictions in the left sidebar menu.
- Tick the checkbox next to the feature(s) you wish to disable.
- Click Save (this action will be logged in the audit log).
For A specific user
Device Trust users with Limited Access can either be invited with specific feature restrictions or have features added/removed later.
To restrict a Device Trust admin’s access:
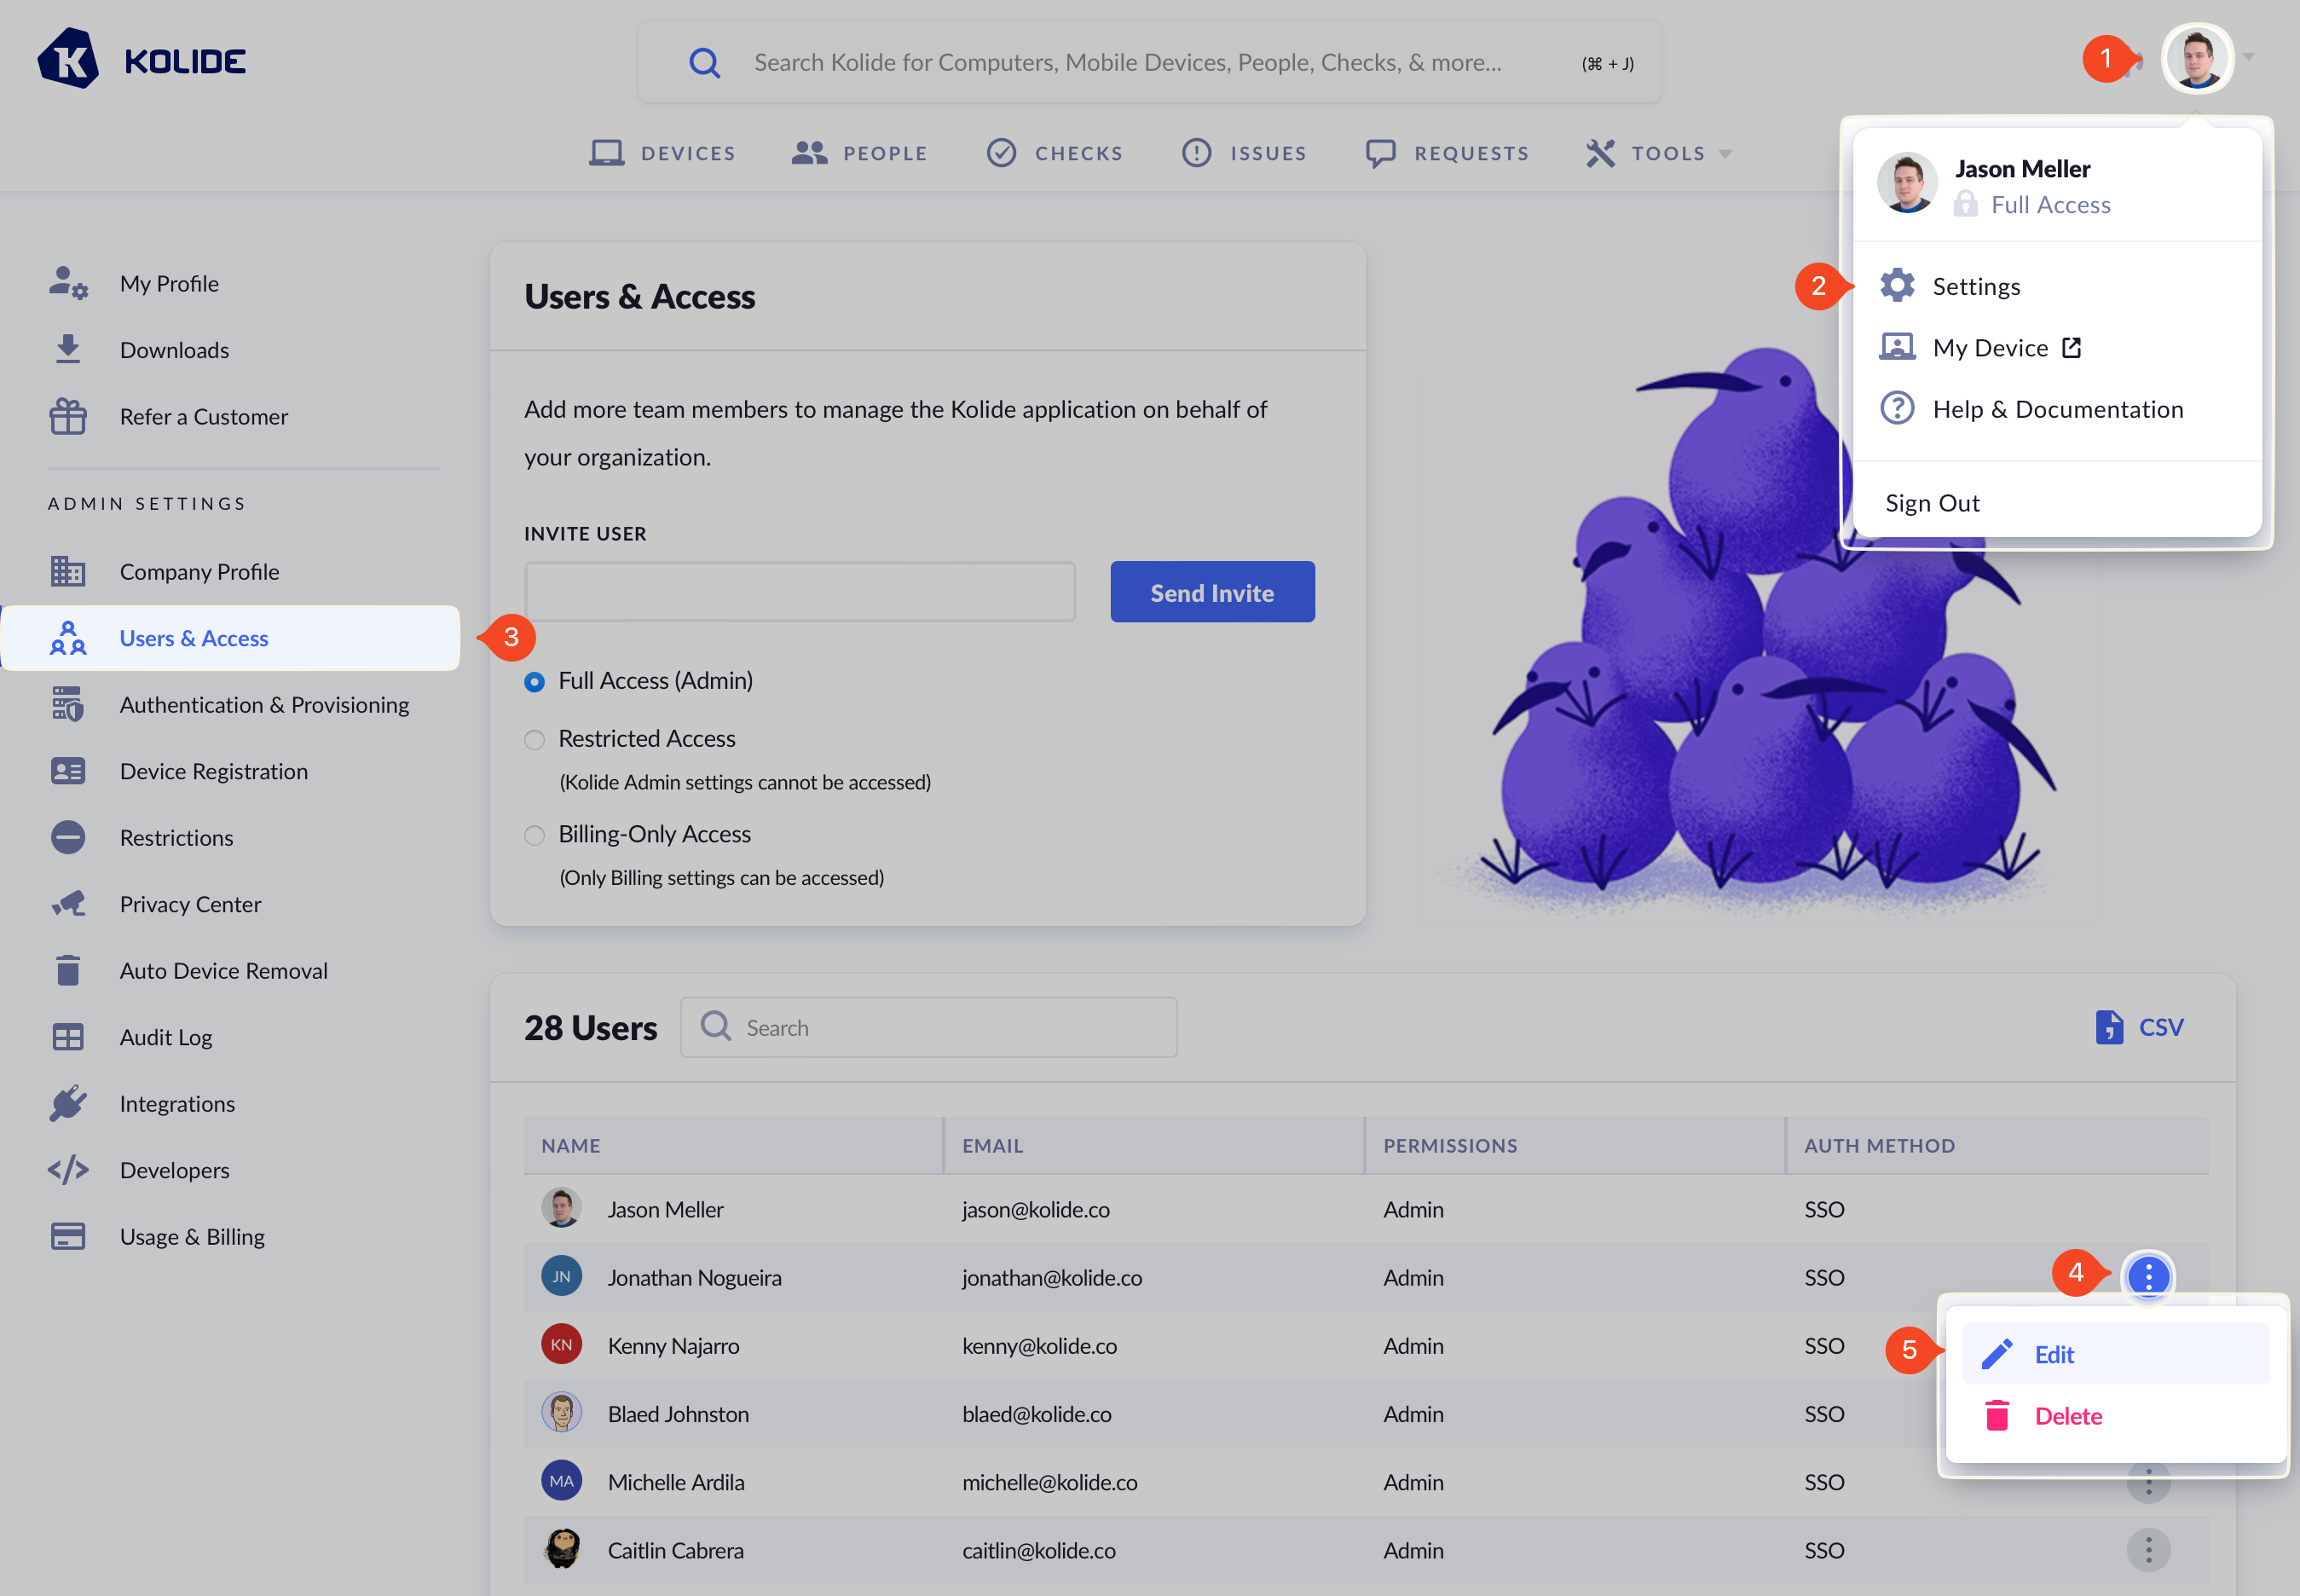
- In the Device Trust admin console, click your avatar in the upper-right corner.
- Click Settings.
- Click Users & Access in the left sidebar menu.
- Locate the user you want to restrict and click Edit.
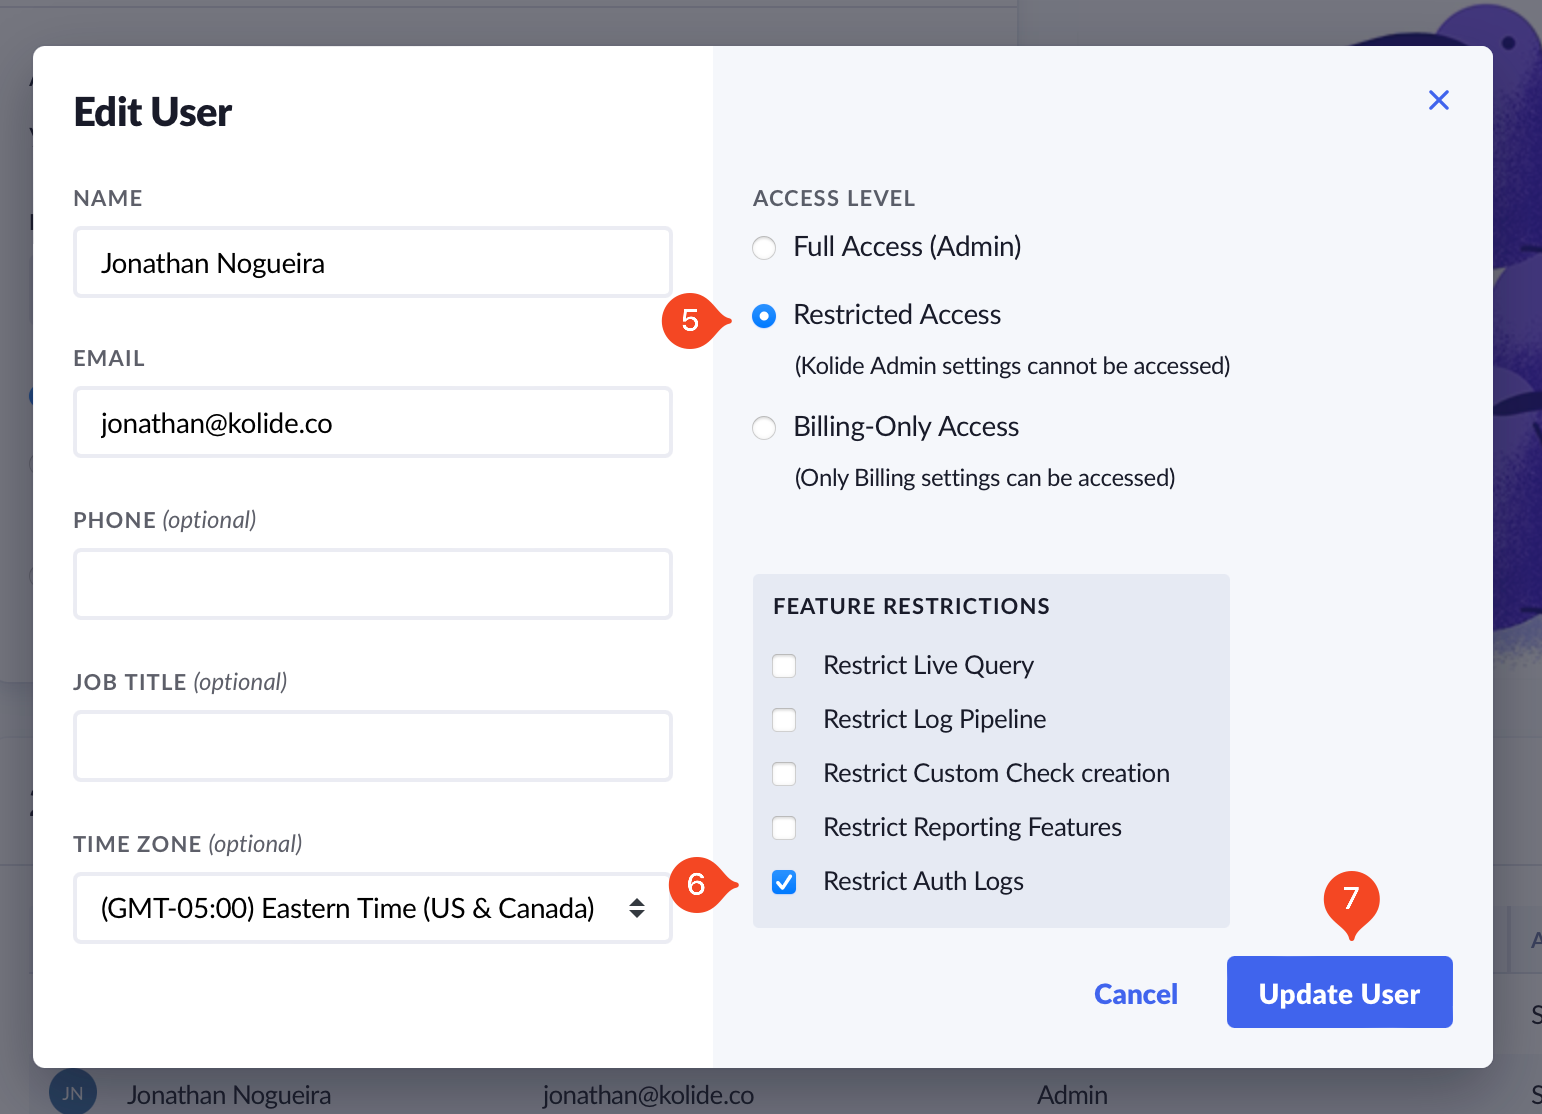
- In the modal that opens, make sure the Restricted Access radio button is selected. This will reveal Feature Restrictions options.
- Tick the checkbox next to the feature(s) you wish to disable.
- Click Save to apply the changes.
Data source restrictions
In addition to disabling access to features, you can also control which osquery tables Device Trust administrators can query within the Live Query, Log Pipeline, and Custom Checks features.
You may not want your teammates to query certain tables because they may
contain sensitive information or cause performance issues
when queried recklessly (for example, shell_history).
Note
Device Trust global blocklist
Due to serious privacy or stability issues, Device Trust bans the usage of the following osquery tables:
| Table Name | Reason |
|---|---|
| asl | Returns 100k+ rows per device and is depreciated |
| carves | Device Trust does not support file carving |
| dns_cache | Leaks sensitive user information |
| running_apps | Exposes in-focus app on macOS, which we consider a privacy overreach |
| example | Table exposes no functionality |
| kolide_app_icons | Intended for Device Trust internal use only |
| kolide_program_icons | Intended for Device Trust internal use only |
| kolide_airport_util | Exposes BSSID which can be used to pinpoint a person's exact location |
| kolide_wifi_networks | Exposes BSSID which can be used to pinpoint a person's exact location |
| kolide_nmcli_wifi | Exposes BSSID which can be used to pinpoint a person's exact location |
| windows_eventlog | Causes osquery to hang on Windows when queried |
Device Trust suggested blocklist
In addition to the globally blocklisted tables, Device Trust seeds your organization’s Device Trust account with the following suggestions. Unlike the global blocklist, any administrator can remove these restrictions if desired.
| Table Name | Reason |
|---|---|
| shell_history | Often contains clear-text credentials from engineers using CLI API tools |
| process_envs | When run on servers, they can often contain secrets. |
| quicklook_cache | Leaks user sensitive information |
| curl | Can be used to obtain information from a privileged/internal network |
Manage the blocklist
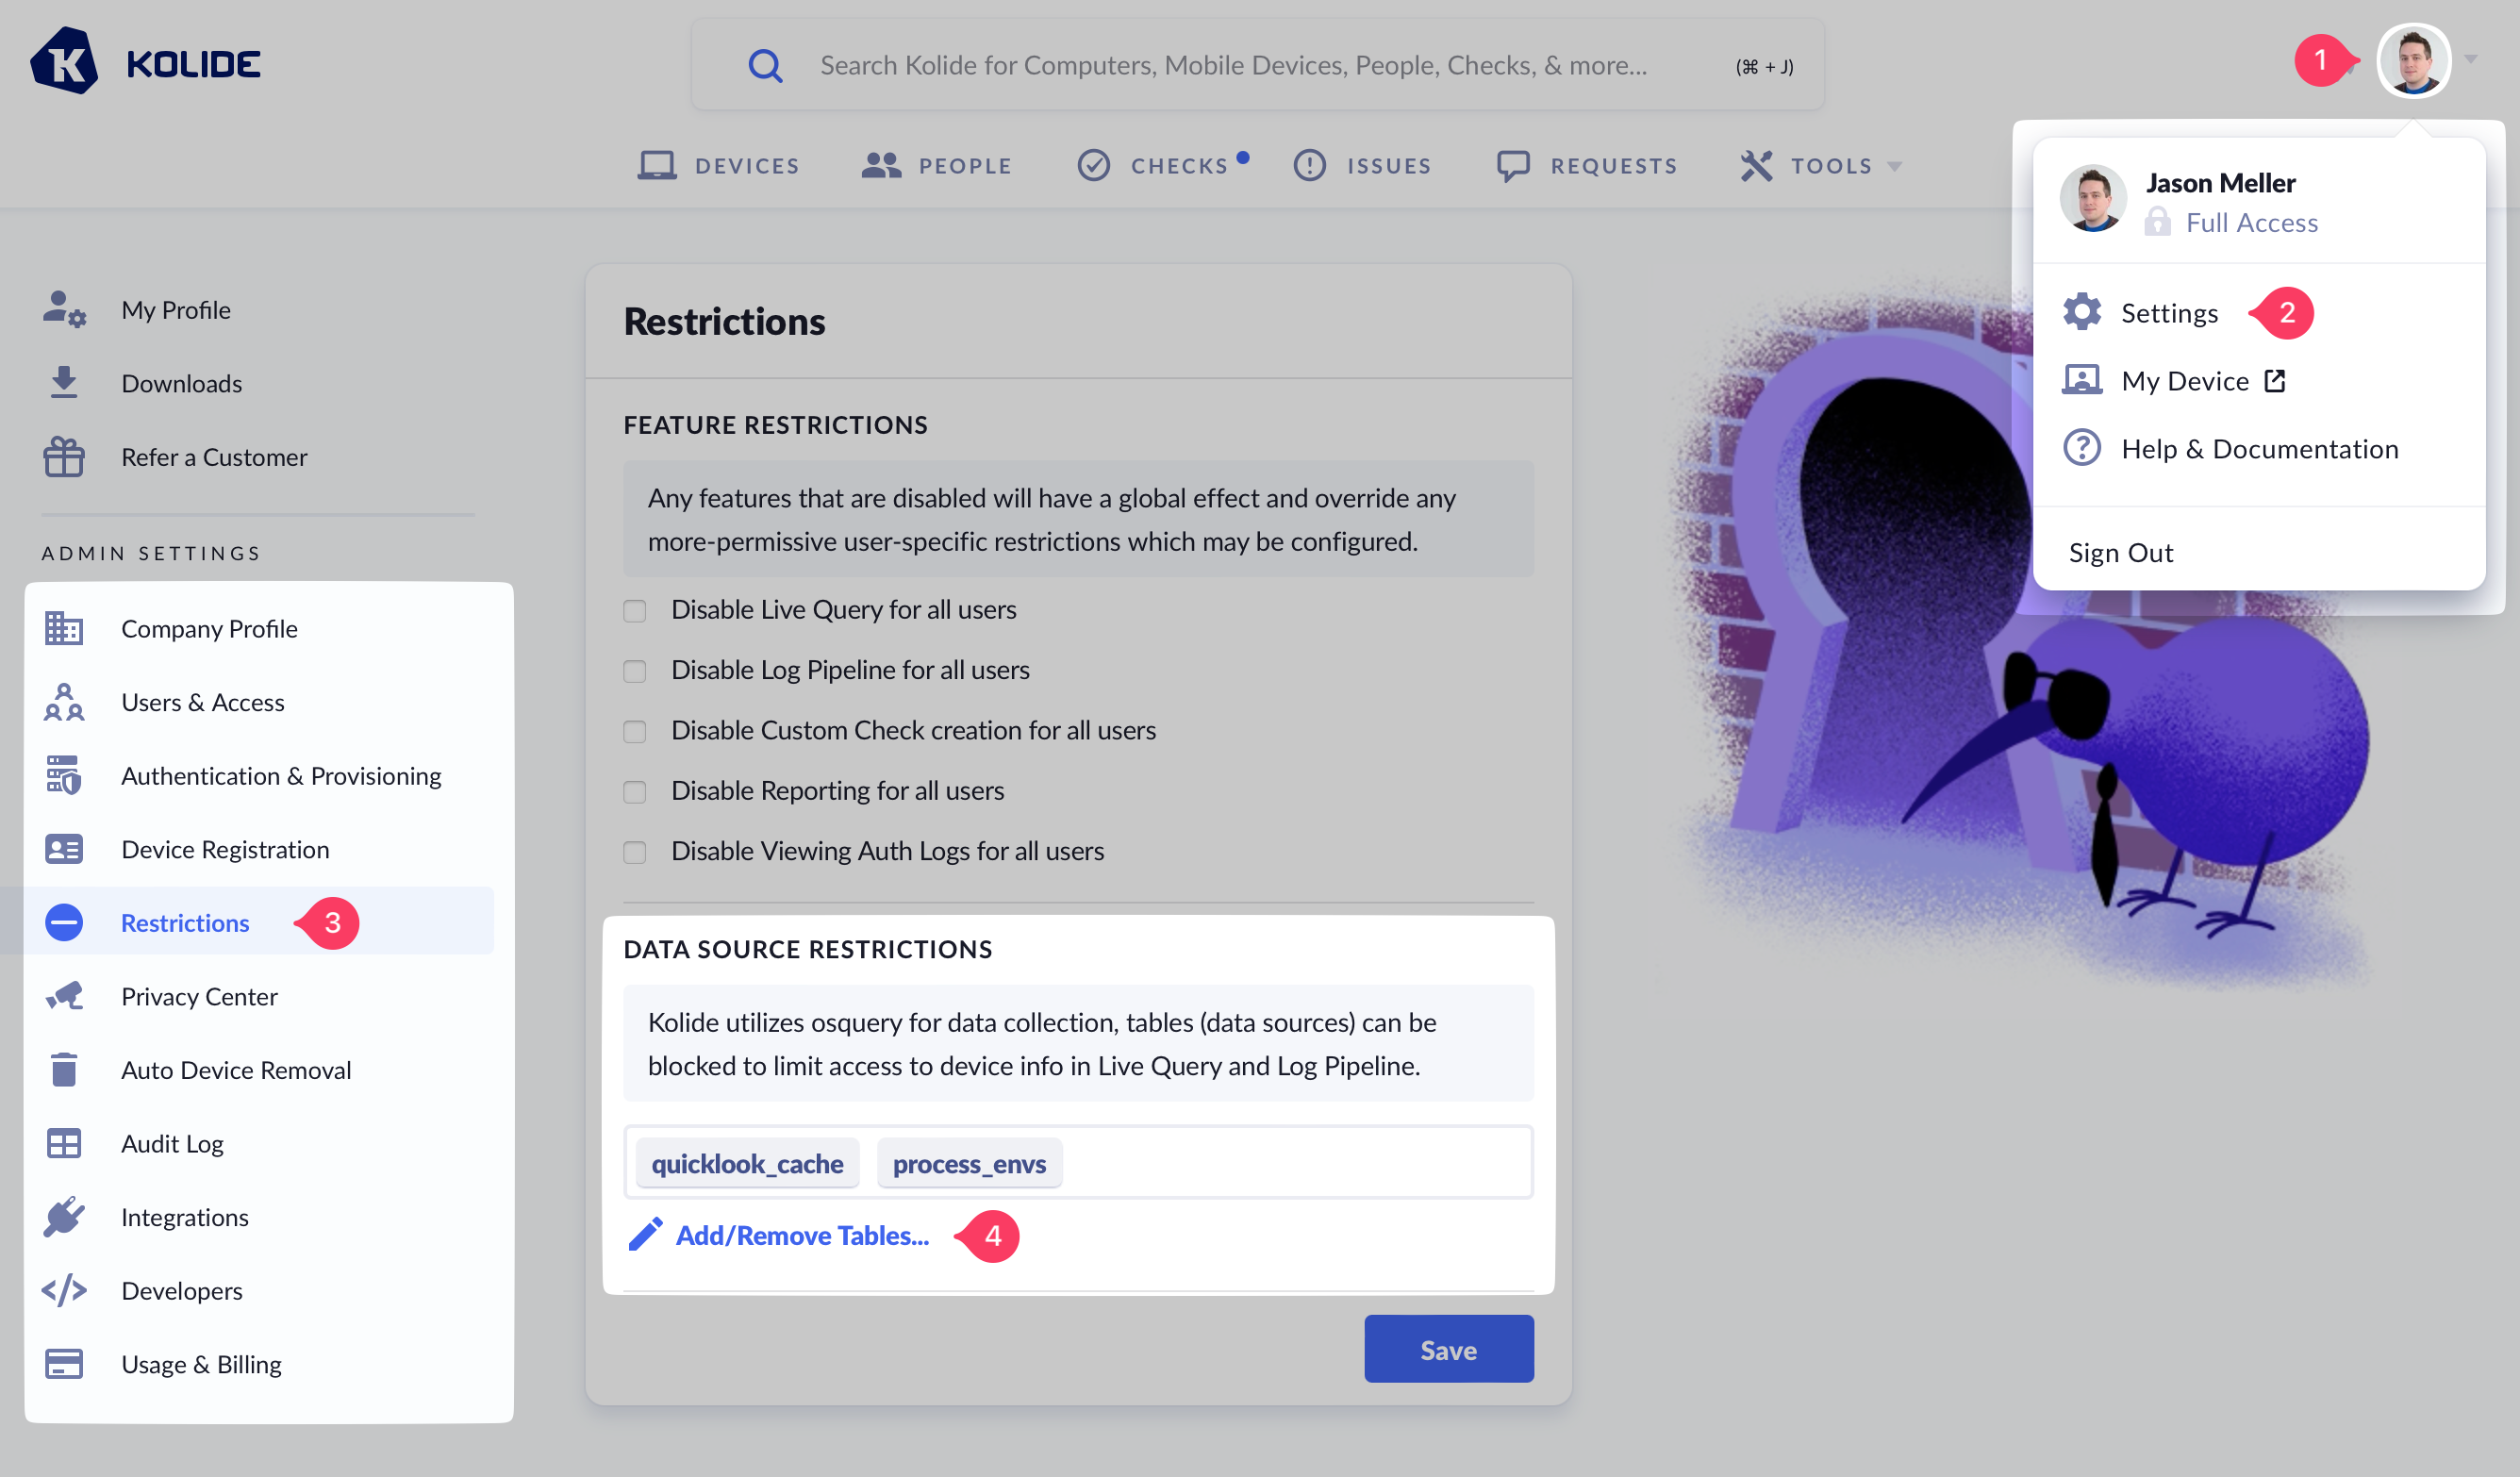
To manage the osquery table blocklist, follow these steps:
- In the Device Trust admin console, click your avatar in the upper-right corner.
- Click Settings.
- Click Restrictions in the left sidebar menu.
- Click Add/Remove Tables.
Adding tables
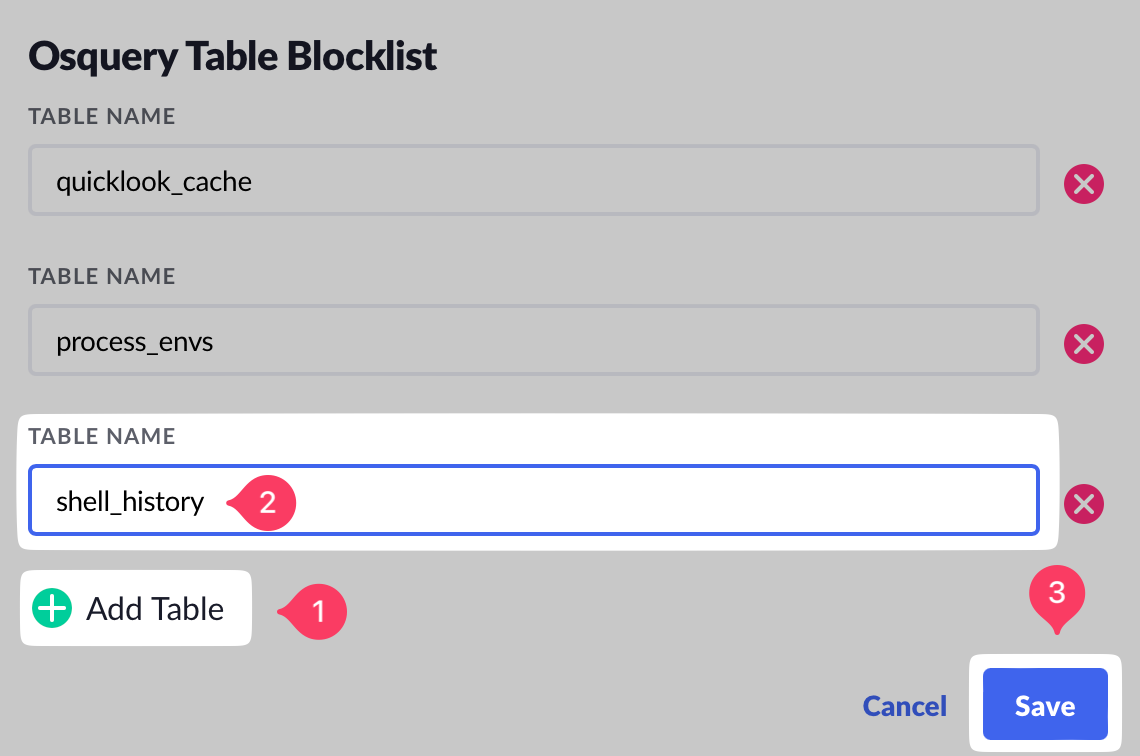
To add a table, click Add Table at the bottom of the modal. In the text field that appears, type the name of the table you wish to add to the blocklist, then click Save.
Removing tables
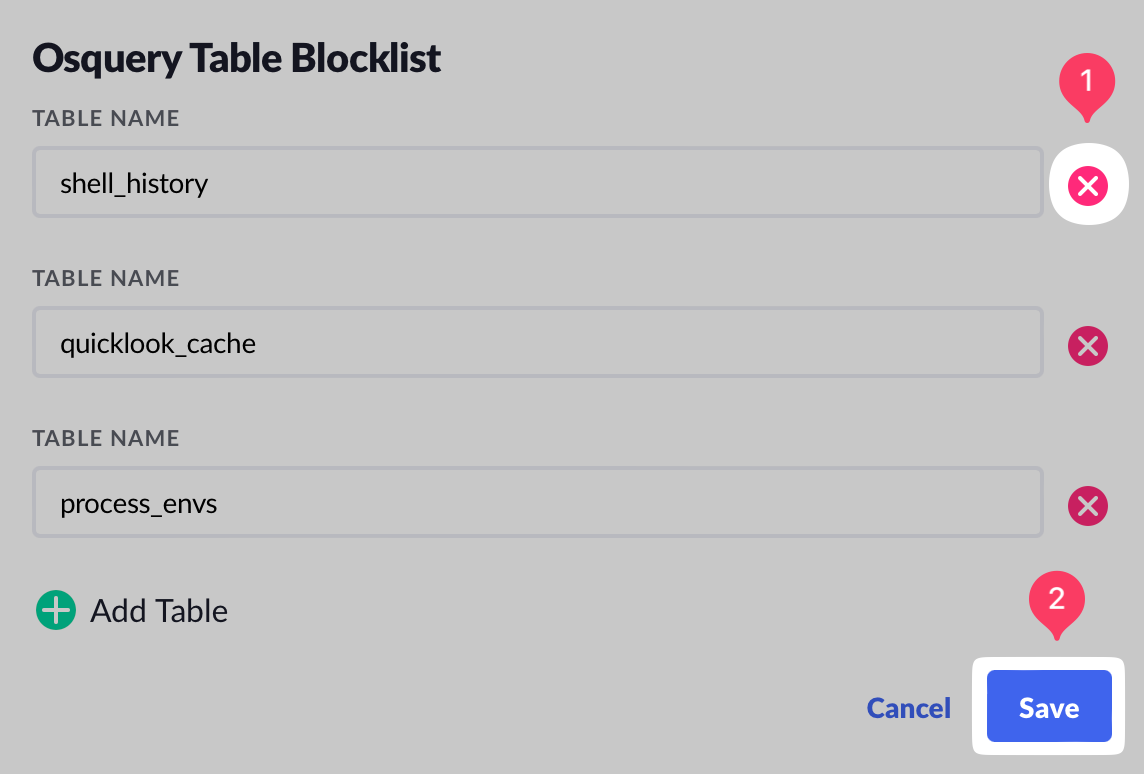
To remove a table, click the red X next to the table you wish to remove and then click Save.
Was this article helpful?
Glad to hear it! If you have anything you'd like to add, feel free to contact us.
Sorry to hear that. Please contact us if you'd like to provide more details.