With 1Password’s access gateway, you can configure team apps that sign in with 1Password using the OpenID Connect (OIDC) protocol. Before you add an app to the access gateway:
- Make sure the app supports SSO at your current pricing tier.
- Find the appropriate authentication protocol for the app in its SSO setup guide.
Tip
If your app uses SAML, learn how to add an app using the SAML 2.0 authentication protocol instead.
Step 1: Add a new team app
When you’re ready to add a new team app to the access gateway:
Step 2: Enter application details
- Enter the Application name. This is the name your team will see for the app in their Managed vault.
- Select OIDC to set up an app with the OIDC authentication protocol.
Step 3: Provide information from your service provider to 1Password
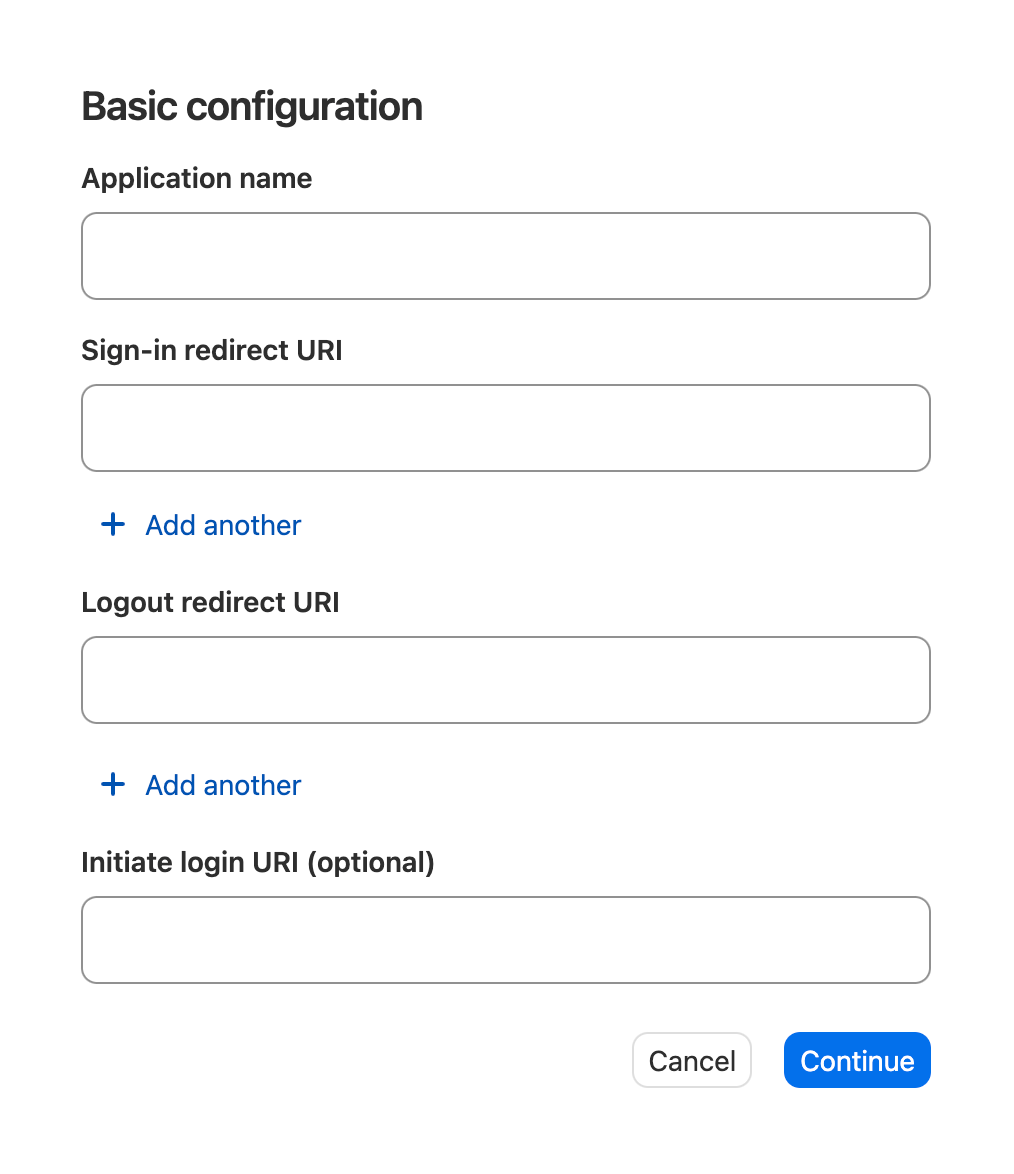
On the “Basic configuration” screen in the 1Password access gateway setup wizard, you’ll be asked to provide information about the app from your service provider to 1Password. Find the information in your service provider’s documentation.
- Application name: Enter a name, which your team will see for the app in their Managed vault.
- Sign-in redirect URI. This is the URL that 1Password sends the user to after they successfully authenticate.
Also called: Redirect URI, Callback URL, Return URL
- Logout redirect URI: This is the URL that 1Password sends the user to after they successfully sign out.
Also called: Sign-out Redirect URI, Logout Callback URL
- Initiate login URI (optional):This is a starting point where users are prompted to authenticate with 1Password.
Also called: Login Initiation Endpoint
After you’ve filled out these fields, select Continue.
Tip
If you need to provide 1Password’s metadata to your service provider before you can access information about your app, enter an application name, then select Continue.
Skip to step 3 and provide the information to your service provider, then select Edit configuration to return to step 2 and provide your app metadata to 1Password.
Step 4: Provide information from 1Password to your service provider
On the “Client credentials” screen, you’ll see the Client ID, Client Secret, and the 1P Open ID Configuration URL. Provide this information to your service provider as instructed in its SSO setup guide.
Important
1Password will only show the Client Secret once. Save it in 1Password immediately to avoid losing it.
- Client ID: This is the unique identifier assgined to the app by 1Password, used to identify the app during authentication.
Also called: App ID
- Client Secret: This is the secret assigned to the app by 1Password, used by the configured app to make authenticated requests to 1Password’s access gateway.
Also called: App Secret
- Open ID Configuration URL (optional): This URL will route you to the
.well-known/openid-configurationendpoint, which contains configuration details that some applications require to complete setup, like the authorization endpoint, token endpoint, user info endpoint, jwks, and supported grant types.Also called: Discovery URL
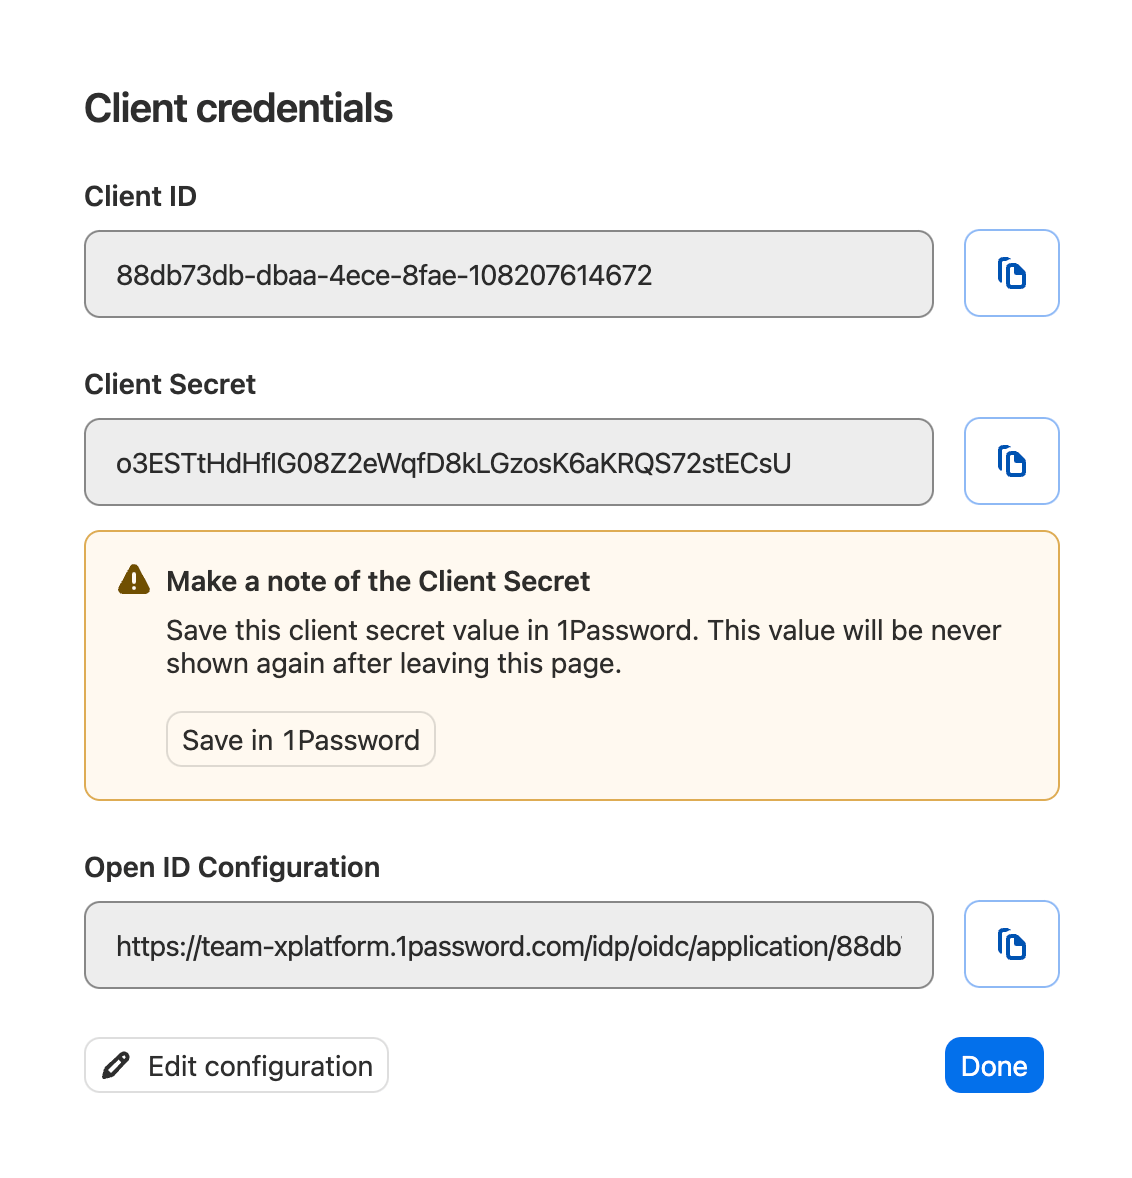
After you provide information about 1Password to your service provider, select Done to add the app to the access gateway.
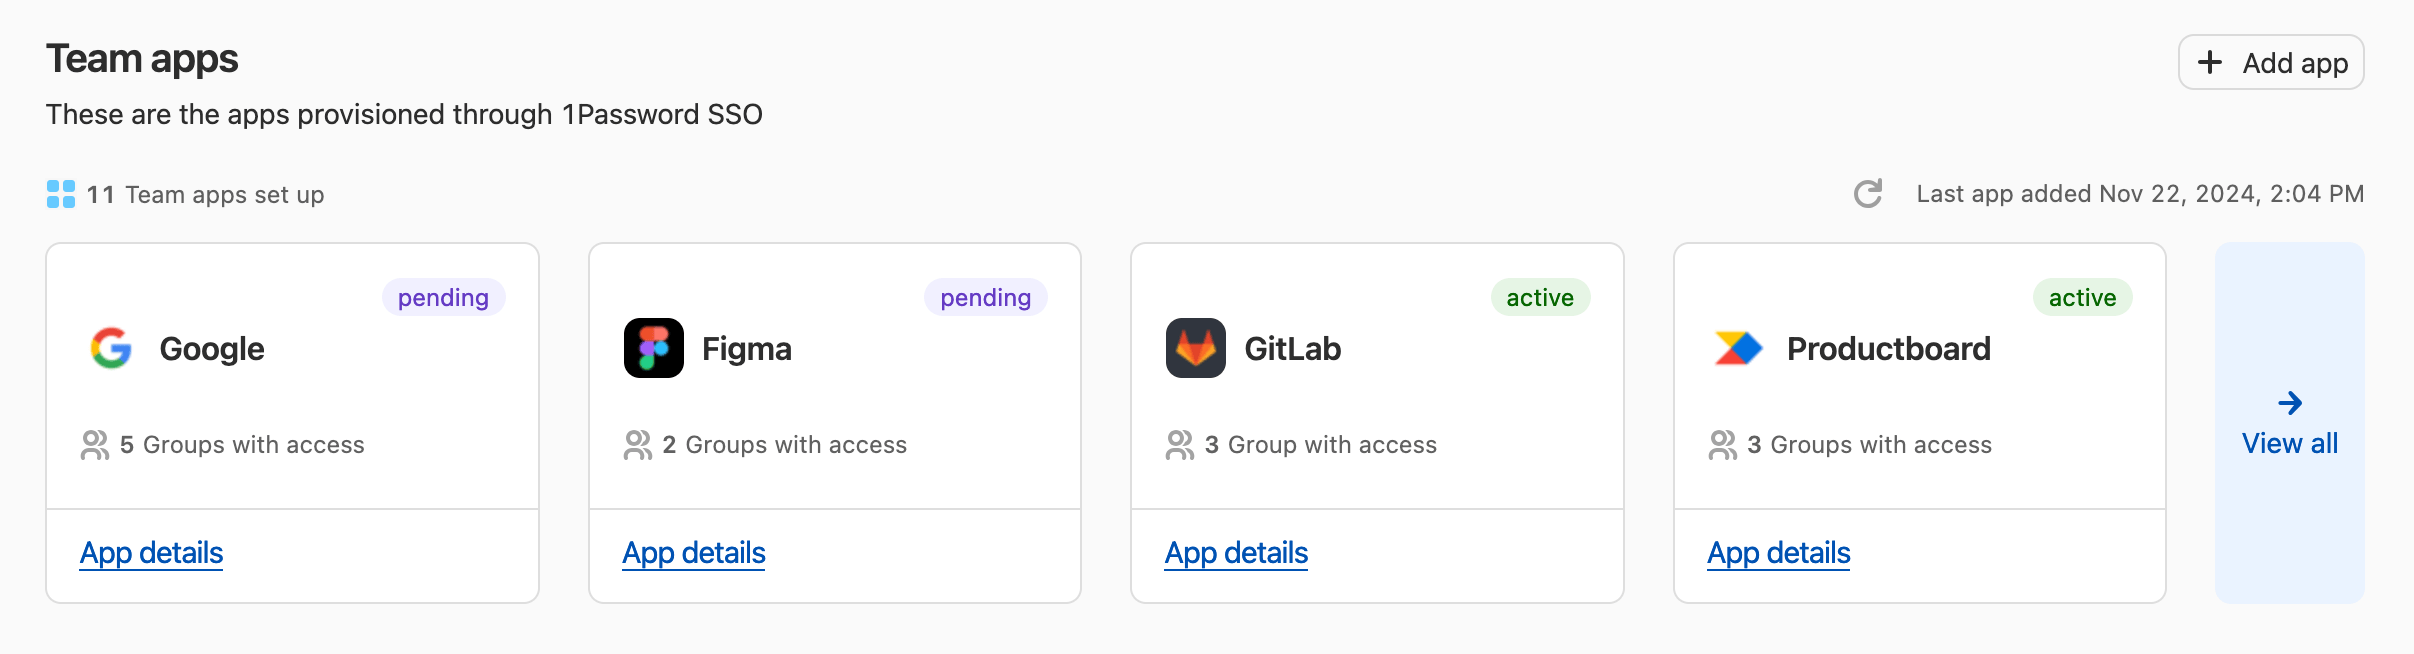
You can find the app under “Team apps” on the Apps page on 1Password.com. It will be listed as “pending” until a team member successfully launches the app using 1Password.
Step 5: Test the app
To test that the app works correctly before provisioning it to your team, first create a test group:
- Select Groups in the sidebar.
- Select New group and give your test group a name and description, then select Create group.
- On the next page, select Manage next to People.
- Select the people you want to add to the test group, then select Update Group Members.
Then assign the app to the test group:
- Select Apps in the sidebar.
- Select App details under the app you just added, then select Assign Groups.
- Select the test group, then select Review > Assign access.
Team members who belong to the test group should now be able to access the app in their Managed vault. After a team member successfully signs in to the app using 1Password, the app’s status will change from “pending” to “active”.
When you’re ready to assign the app to your team, learn how to assign apps to groups and manage which apps each group can access.
Get help
If you have questions about 1Password Extended Access Management, contact 1Password Support for help.